Querying MongoDB in the Browser with React and the Web SDK
Rate this tutorial
When we think of connecting to a database, we think of serverside. Our application server connects to our database server using the applicable driver for our chosen language. But with the Atlas App Service's Realm Web SDK, we can run queries against our Atlas cluster from our web browser, no server required.
One of the primary reasons database connections are traditionally server-to-server is so that we do not expose any admin credentials. Leaking credentials like this is not a concern with the Web SDK as it has APIs for user management, authentication, and access control. There are no admin credentials to expose as each user has a separate account. Then, using Rules, we control what data each user has permission to access.
The MongoDB service uses a strict rules system that prevents all operations unless they are specifically allowed. MongoDB Atlas App Services determines if each operation is allowed when it receives the request from the client, based on roles that you define. Roles are sets of document-level and field-level CRUD permissions and are chosen individually for each document associated with a query.
Rules have the added benefit of enforcing permissions at the data access level, so you don't need to include any permission checks in your application logic.
You can find instructions for creating a free MongoDB Atlas cluster and App Services App in our documentation: Create a App (App Services UI).
We're going to be using one of the sample datasets in this tutorial, so after creating your free cluster, click on Collections and select the option to load a sample dataset. Once the data is loaded, you should see several new databases in your cluster. We're going to be using the
sample_mflix database in our code later.Atlas Application Services supports a multitude of different authentication providers, including Google, Apple, and Facebook. For this tutorial, we're going to stick with regular email and password authentication.
In your App, go to the Users section and enable the Email/Password provider, the user confirmation method should be "automatic", and the password reset method should be a reset function. You can use theprovided stubbed reset function for now.
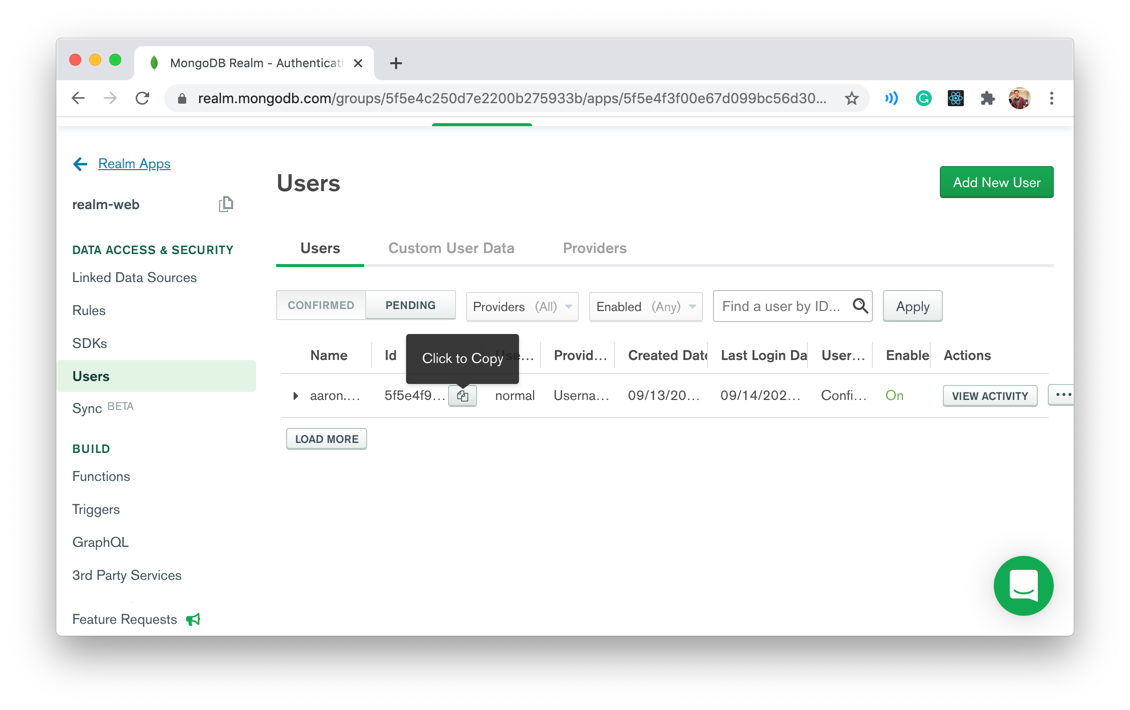
In a real-world application, we would have a registration flow so that users could create accounts. But for the sake of this tutorial, we're going to create a new user manually. While still in the "Users" section of your App, click on "Add New User" and enter the email and password you would like to use.
Rules and Roles govern what operations a user can perform. If an operation has not been explicitly allowed, Atlas App Services will reject it. At the moment, we have no Rules or Roles, so our users can't access anything. We need to configure our first set of permissions.
Navigate to the "Rules" section and select the
sample_mflix database and the movies collection. App Services has several "Permissions Template"s ready for you to use.- Users can only read and write their own data.
- Users can read all data, but only write their own data.
- Users can only read all data.
These are just the most common types of permissions; you can create your own much more advanced rules to match your requirements.
- Configure a role that can only insert documents.
- Define field-level read or write permissions for a field in an embedded document.
- Determine field-level write permissions dynamically using a JSON expression.
- Invoke an Atlas Function to perform more involved checks, such as checking data from a different collection.
We only want our users to be able to access their data and nothing else, so select the "Users can only read and write their own data" template.
App Services does not stipulate what field name you must use to store your user id; we must enter it when creating our configuration. Enter
authorId as the field name in this example.By now, you should have the Email/Password provider enabled, a new user created, and rules configured to allow users to access any data they own. Ensure you deploy all your changes, and we can move onto the code.
Once you have the code downloaded, you will need to install a couple of dependencies.
As we're going to require access to our App client throughout our React component tree, we use a Context Provider. You can find the context providers for this project in the
providers folder in the repo.This provider handles the creation of our Web App client, as well as providing methods for logging in and out. Let's look at these parts in more detail.
The value for
REALM_APP_ID is on your Atlas App Services dashboard. We instantiate a new Web App with the relevant ID. It is this App which allows us to access the different Atlas App Services services. You can find all required environment variables in the .envrc.example file.You should ensure these variables are available in your environment in whatever manner you normally use. My personal preference is direnv.
The
logIn method accepts the email and password provided by the user and creates an App Services credentials object. We then use this to attempt to authenticate with our App. If successful, we store the authenticated user in our state.Just like the App context provider, we're going to be accessing the Atlas service throughout our component tree, so we create a second context provider for our database.
The Web SDK provides us with access to some of the different Atlas App Services, as well as our custom functions. For this example, we are only interested in the
mongodb-atlas service as it provides us with access to the linked MongoDB Atlas cluster.In this React hook, whenever our user variable updates—and is not null, so we have an authenticated user—we set our db variable equal to the database service for the
sample_mflix database.Once the service is ready, we can begin to run queries against our MongoDB database in much the same way as we would with the Node.js driver.
However, it is a subset of actions, so not all are available—the most notable absence is
collection.watch(), but that is being actively worked on and should be released soon—but the common CRUD actions will work.The default boilerplate generated by
create-react-app places the DOM renderer in index.js, so this is a good place for us to ensure that we wrap the entire component tree within our RealmApp and MongoDB contexts.The order of these components is essential. We must create our Web App first before we attempt to access the
mongodb-atlas service. So, you must ensure that <RealmApp> is before <MongoDB>. Now that we have our <App /> component nestled within our App and MongoDB contexts, we can query our Atlas cluster from within our React component!Our demo has two main components: a login form and a table of movies, both of which are contained within the
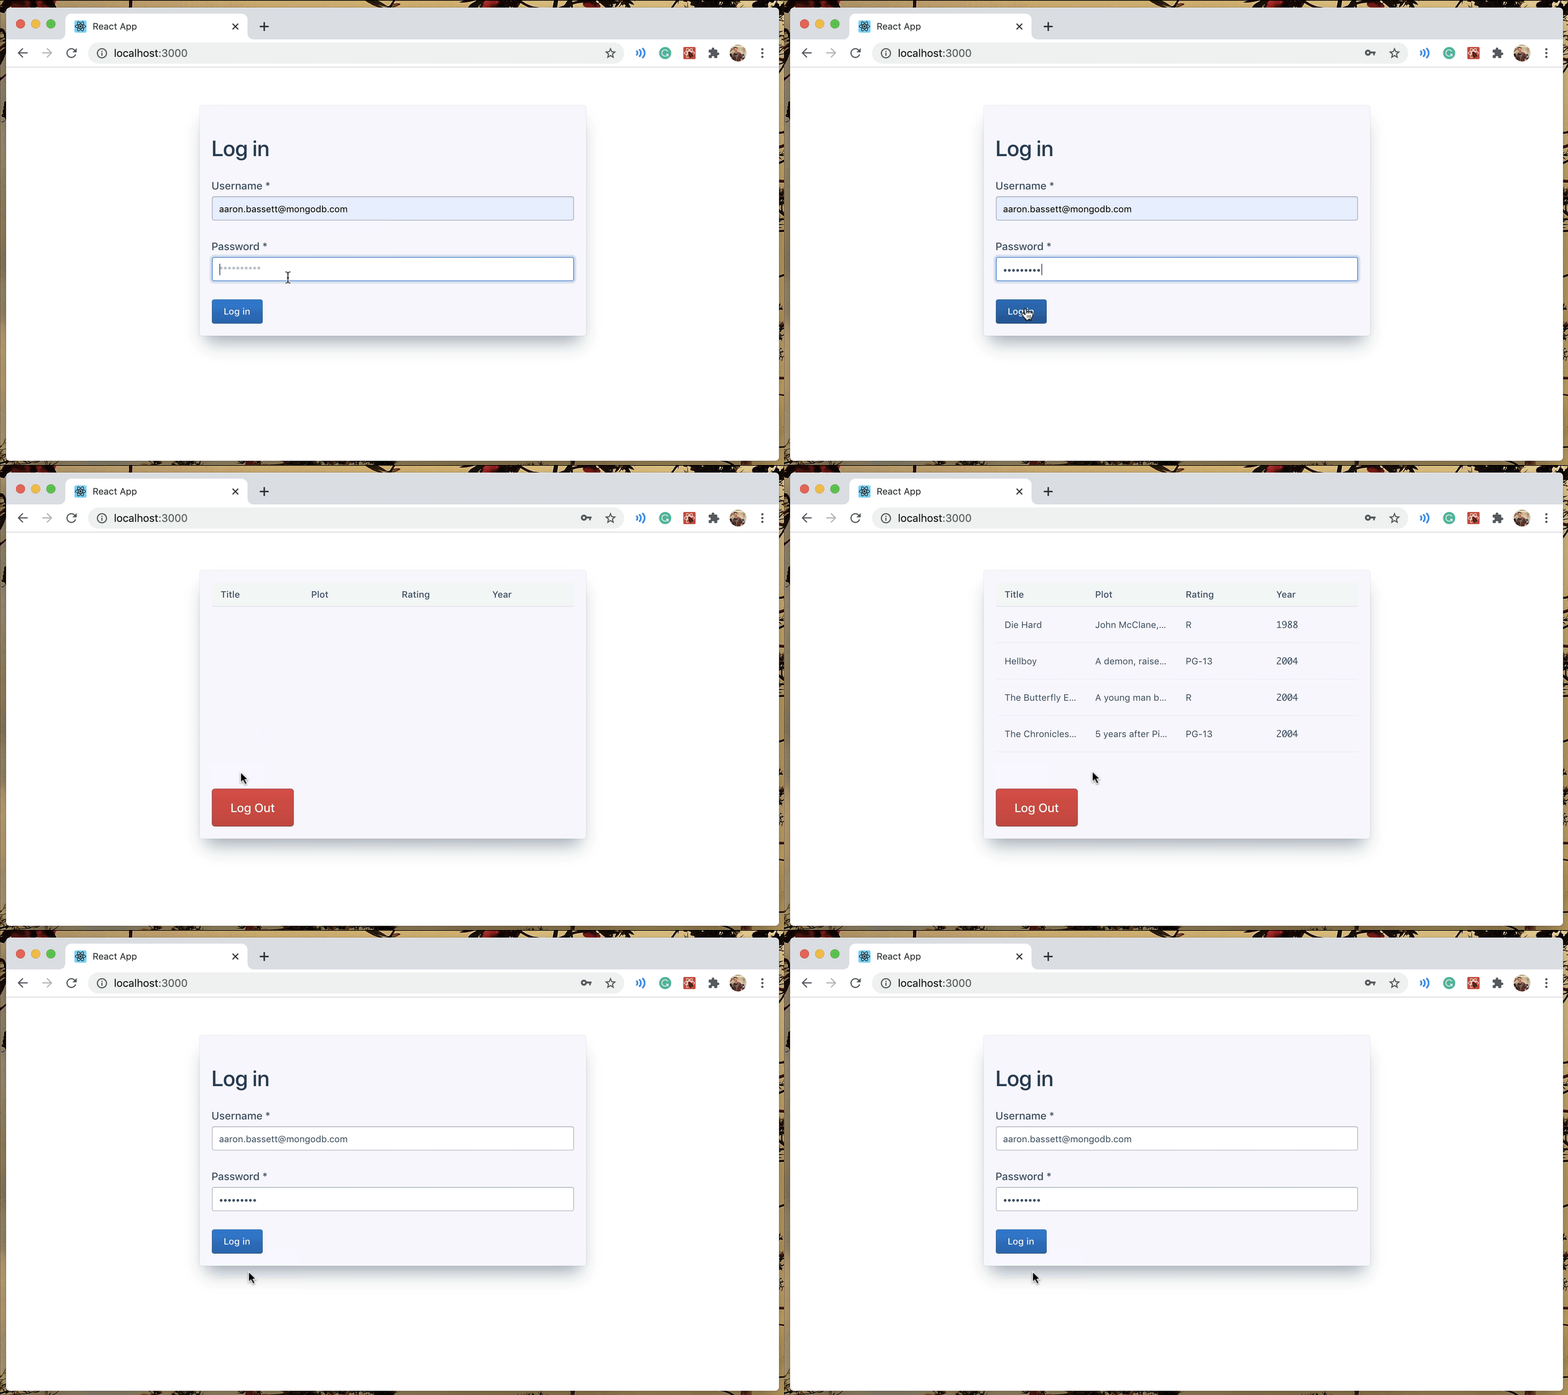
App.js. Which component we show depends upon whether the current user has authenticated or not.
The login form consists of two controlled text inputs and a button to trigger the handleLogIn function.

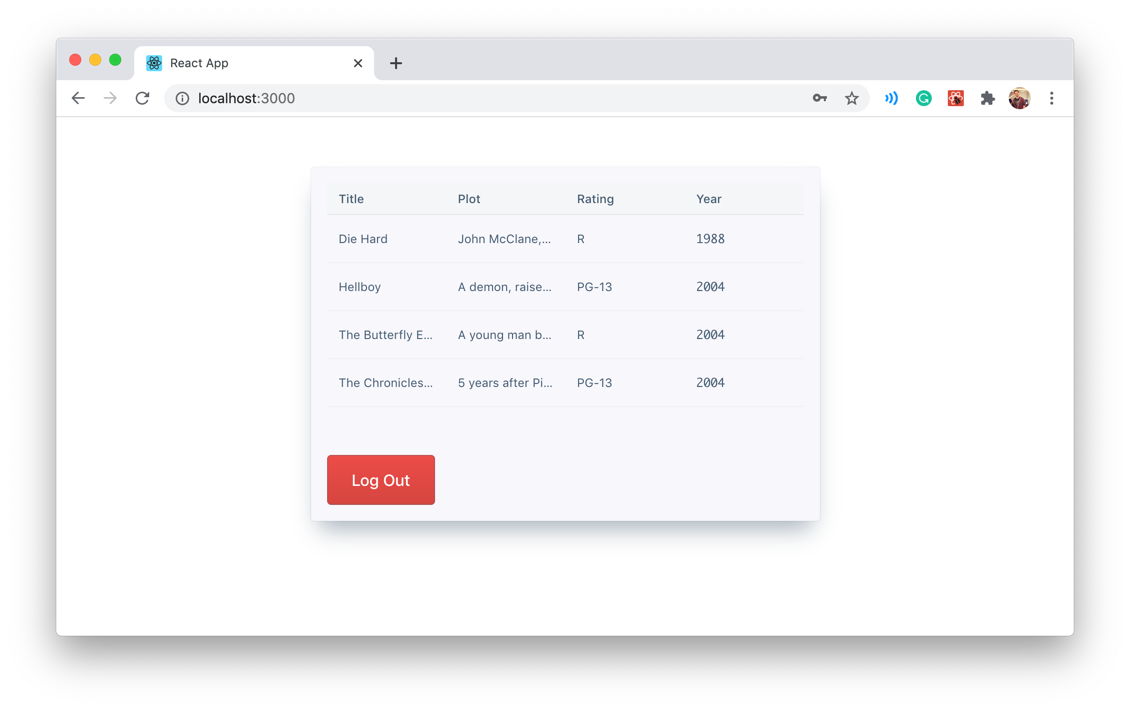
The MovieList component renders an HTML table with a few details about each movie, and a button to allow the user to log out.
Here, we have our main
<App /> component. Let's look at the different sections in order.We're going to use the App and the MongoDB provider in this component: App for authentication, MongoDB to run our query. We also set up some state to store our email and password for logging in, and hopefully later, any movie data associated with our account.
This React hook runs whenever our user or db updates, which occurs whenever we successfully log in or out. When the user logs in—i.e., we have a valid user and a reference to the
mongodb-atlas service—then we run a find on the movies collection.Notice we do not need to specify the User Id to filter by in this query. Because of the rules, we configured earlier only those documents owned by the current user will be returned without any additional filtering on our part.
If you run the demo and log in now, the movie table will be empty. We're using the sample dataset, and none of the documents within it belongs to our current user. Before trying the demo, modify a few documents in the movies collection and add a new field,
authorId, with a value equal to your user's ID. You can find their ID in the App Users section.
Once you have given ownership of some documents to your current user, try running the demo application and logging in.

Congratulations! You have successfully queried your database from within your browser, no server required!
Try modifying the rules and roles you created to see how it impacts the demo application.

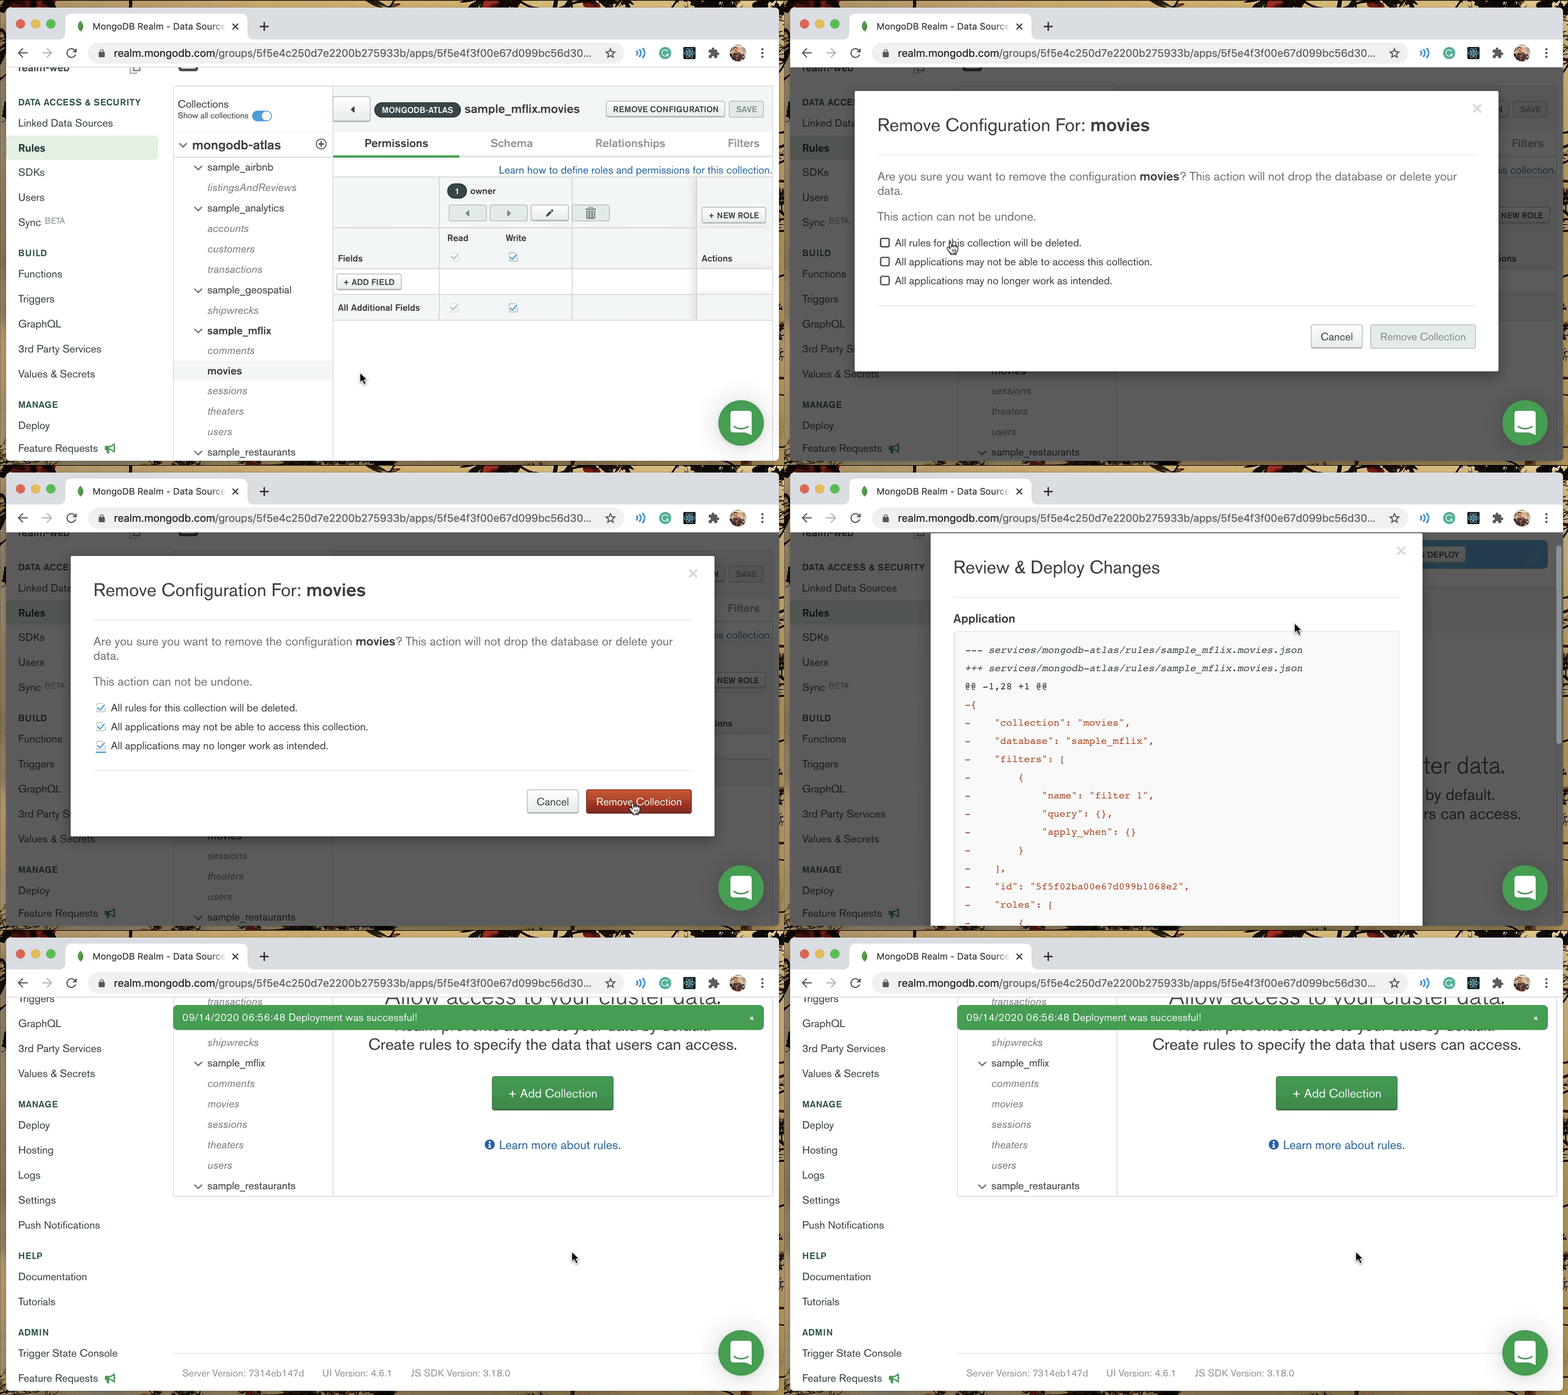
Ignore the warning and delete the configuration for the movies collection. Now, your App should die with a 403 error: "no rule exists for namespace' sample_mflix.movies.'"
Use the "Users can read all data, but only write their own data" template. I would suggest also modifying the
find() or adding a limit() as otherwise, the demo will try to show every movie in your table!Add field-level permissions. In this example, non-owners cannot write to any documents, but they can read the title and year fields for all documents.
For more information on MongoDB Atlas App Services and the Web SDK, I recommend reading our documentation:
If you haven't yet set up your free cluster on MongoDB Atlas, now is a great time to do so. You have all the instructions in this blog post.
If you have questions, please head to our developer community website where the MongoDB engineers and the MongoDB community will help you build your next big idea with MongoDB.