개요
이 가이드 에서는 Meteor 를 프런트엔드 프레임워크 로 사용하는 풀스택 Vue 애플리케이션 만드는 방법을 학습 수 있습니다. Meteor는 웹 및 모바일 애플리케이션을 만들기 위한 JavaScript 프레임워크 입니다. 이 프레임워크 Vue를 포함하여 사용자 인터페이스를 구축하기 위한 범위 프론트엔드 라이브러리를 지원합니다.
이 튜토리얼의 애플리케이션 다음과 같은 계층으로 구성되어 있습니다.
데이터베이스 계층: MongoDB 데이터 저장 및 검색을 제공합니다.
애플리케이션 계층: Meteor는 통합 빌드 도구로 클라이언트 및 서버 측 로직을 모두 처리합니다.
프레젠테이션 계층: Vue는 반응형 데이터 바인딩으로 사용자 인터페이스를 구현합니다.
Meteor 및 Vue와 함께 MongoDB 사용하는 이유
Meteor는 MongoDB의 document model 기반으로 하며, Meteor 애플리케이션은 기본값 으로 MongoDB 구성합니다. 최소한의 종속성 설치나 상용구 코드로 MongoDB 에 데이터를 저장하는 전체 스택 애플리케이션 빠르게 만들 수 있습니다.
MongoDB의 유연한 문서 구조는 JavaScript 객체와 자연스럽게 일치합니다. 따라서 Vue 구성 요소에서 MongoDB 데이터로 원활하게 작업할 수 있습니다. Meteor를 사용하여 MongoDB 쿼리 하면 수신한 문서를 복잡한 데이터 변환 없이 Vue 템플릿에서 직접 사용할 수 있습니다.
또한 Meteor는 MongoDB에서 데이터가 변경될 때 Vue 구성 요소를 자동으로 업데이트하는 내장 실시간 데이터 동기화를 제공합니다. 한 사용자가 데이터를 수정하면 연결된 모든 사용자는 수동으로 새로 고침하거나 폴링할 필요 없이 Vue 인터페이스에서 변경 사항을 즉시 볼 수 있습니다. Meteor 및 Vue와 함께 MongoDB 사용하면 Vue의 반응형 구성 요소 시스템과 함께 Meteor의 실시간 데이터 동기화 역량을 활용할 수 있습니다.
빠른 시작 튜토리얼
이 튜토리얼에서는 Meteor와 Vue를 사용하여 웹 애플리케이션 빌드 방법을 보여줍니다. 애플리케이션 샘플 레스토랑 데이터에 액세스하고, 데이터를 쿼리하고, 로컬에서 호스팅되는 사이트 에 결과를 표시합니다. 이 튜토리얼에는 MongoDB Atlas 에서 호스팅되는 MongoDB 클러스터 에 연결하고 데이터베이스 의 데이터에 액세스하고 표시하는 방법에 대한 지침도 포함되어 있습니다.
팁
Meteor 없이 노드.js 드라이버 사용하여 MongoDB 에 연결하려는 경우 노드.js 드라이버 시작하기 가이드 참조하세요.
프로젝트 설정
이 섹션의 단계에 따라 프로젝트 종속성을 설치하고, Atlas 클러스터를 만들고, 애플리케이션 디렉토리를 설정합니다.
전제 조건 확인
빠른 시작 애플리케이션 만들려면 개발 환경에 다음 소프트웨어를 설치하세요.
전제 조건 | 참고 사항 |
|---|---|
버전 20 이상을 사용하세요. | |
코드 편집기 | 이 튜토리얼에서는 Visual Studio Code를 사용하지만 원하는 편집기를 사용할 수 있습니다. |
터미널 앱 및 shell | MacOS 사용자의 경우 터미널 또는 유사한 앱을 사용하세요. Windows 사용자의 경우 PowerShell을 사용하세요. |
MongoDB Atlas 클러스터 생성
MongoDB Atlas 는 MongoDB 배포를 호스팅하는 완전 관리형 클라우드 데이터베이스 서비스입니다. MongoDB deployment 없는 경우,MongoDB 시작하기 튜토리얼을 완료하여 무료로 MongoDB cluster 생성할 수 있습니다( 크레딧 카드 필요 없음). MongoDB 시작하기 튜토리얼에서는 sample_restaurants 이 튜토리얼에서 사용되는 데이터베이스 포함하여 샘플 데이터 세트를 클러스터 에 로드하는 방법도 보여줍니다.
MongoDB 클러스터에 연결하려면 연결 URI를 사용해야 합니다. 연결 URI를 조회 방법을 학습하려면 MongoDB 시작하기 튜토리얼의 연결 문자열 추가하기 섹션을 참조하세요.
팁
연결 string 을 안전한 위치 에 저장합니다.
MongoDB Node.js 드라이버 설치
터미널에서 다음 명령을 실행하여 노드.js 드라이버를 설치합니다.
npm install mongodb
드라이버 설치에 대해 자세히 알아보려면 Node.js 드라이버 시작하기 가이드 를 참조하세요.
MongoDB 연결 구성
프로젝트 구조를 설정한 후 이 섹션의 단계에 따라 Meteor 애플리케이션 MongoDB 에 연결합니다.
연결 URI 제공
이전 단계에서 저장한 연결 URI를 조회합니다.
sample_restaurants 데이터베이스 에 액세스 하려면 데이터베이스 이름을 포함하도록 연결 URI를 수정합니다. 다음 형식을 사용하여 URI를 업데이트 .
mongodb+srv://<username>:<password>@<cluster>/sample_restaurants?<options>
그런 다음 meteor-vue-quickstart 디렉토리 에서 다음 명령을 실행 하여 MONGO_URL 환경 변수를 이 수정된 연결 URI로 설정하다 .
export MONGO_URL="<connection URI>"
<connection URI> 자리 표시자를 연결 URI로 바꿉니다.
데이터 게시 설정
imports/api 디렉토리 에 restaurantsPublications.js 이라는 파일 만들고 다음 코드를 붙여넣습니다.
import { Meteor } from 'meteor/meteor'; import { RestaurantsCollection } from './restaurantsCollection'; // Publishes all restaurants Meteor.publish('restaurants', function publishRestaurants() { console.log('Publishing all restaurants...'); const cursor = RestaurantsCollection.find({}, { limit: 200 }); // Limit for performance console.log('Publication cursor created for all restaurants'); return cursor; }); // Publishes restaurants that match the "borough" and "name" filters Meteor.publish('restaurants.filtered', function publishFilteredRestaurants() { console.log('Publishing filtered restaurants...'); const query = { borough: 'Queens', name: { $regex: 'Moon', $options: 'i' } }; const cursor = RestaurantsCollection.find(query); console.log('Publication cursor created for filtered restaurants'); return cursor; });
이 파일 클라이언트 레스토랑 데이터를 구독 수 있도록 하는 Meteor 게시를 정의합니다. 여기에는 다음과 같은 간행물이 포함됩니다.
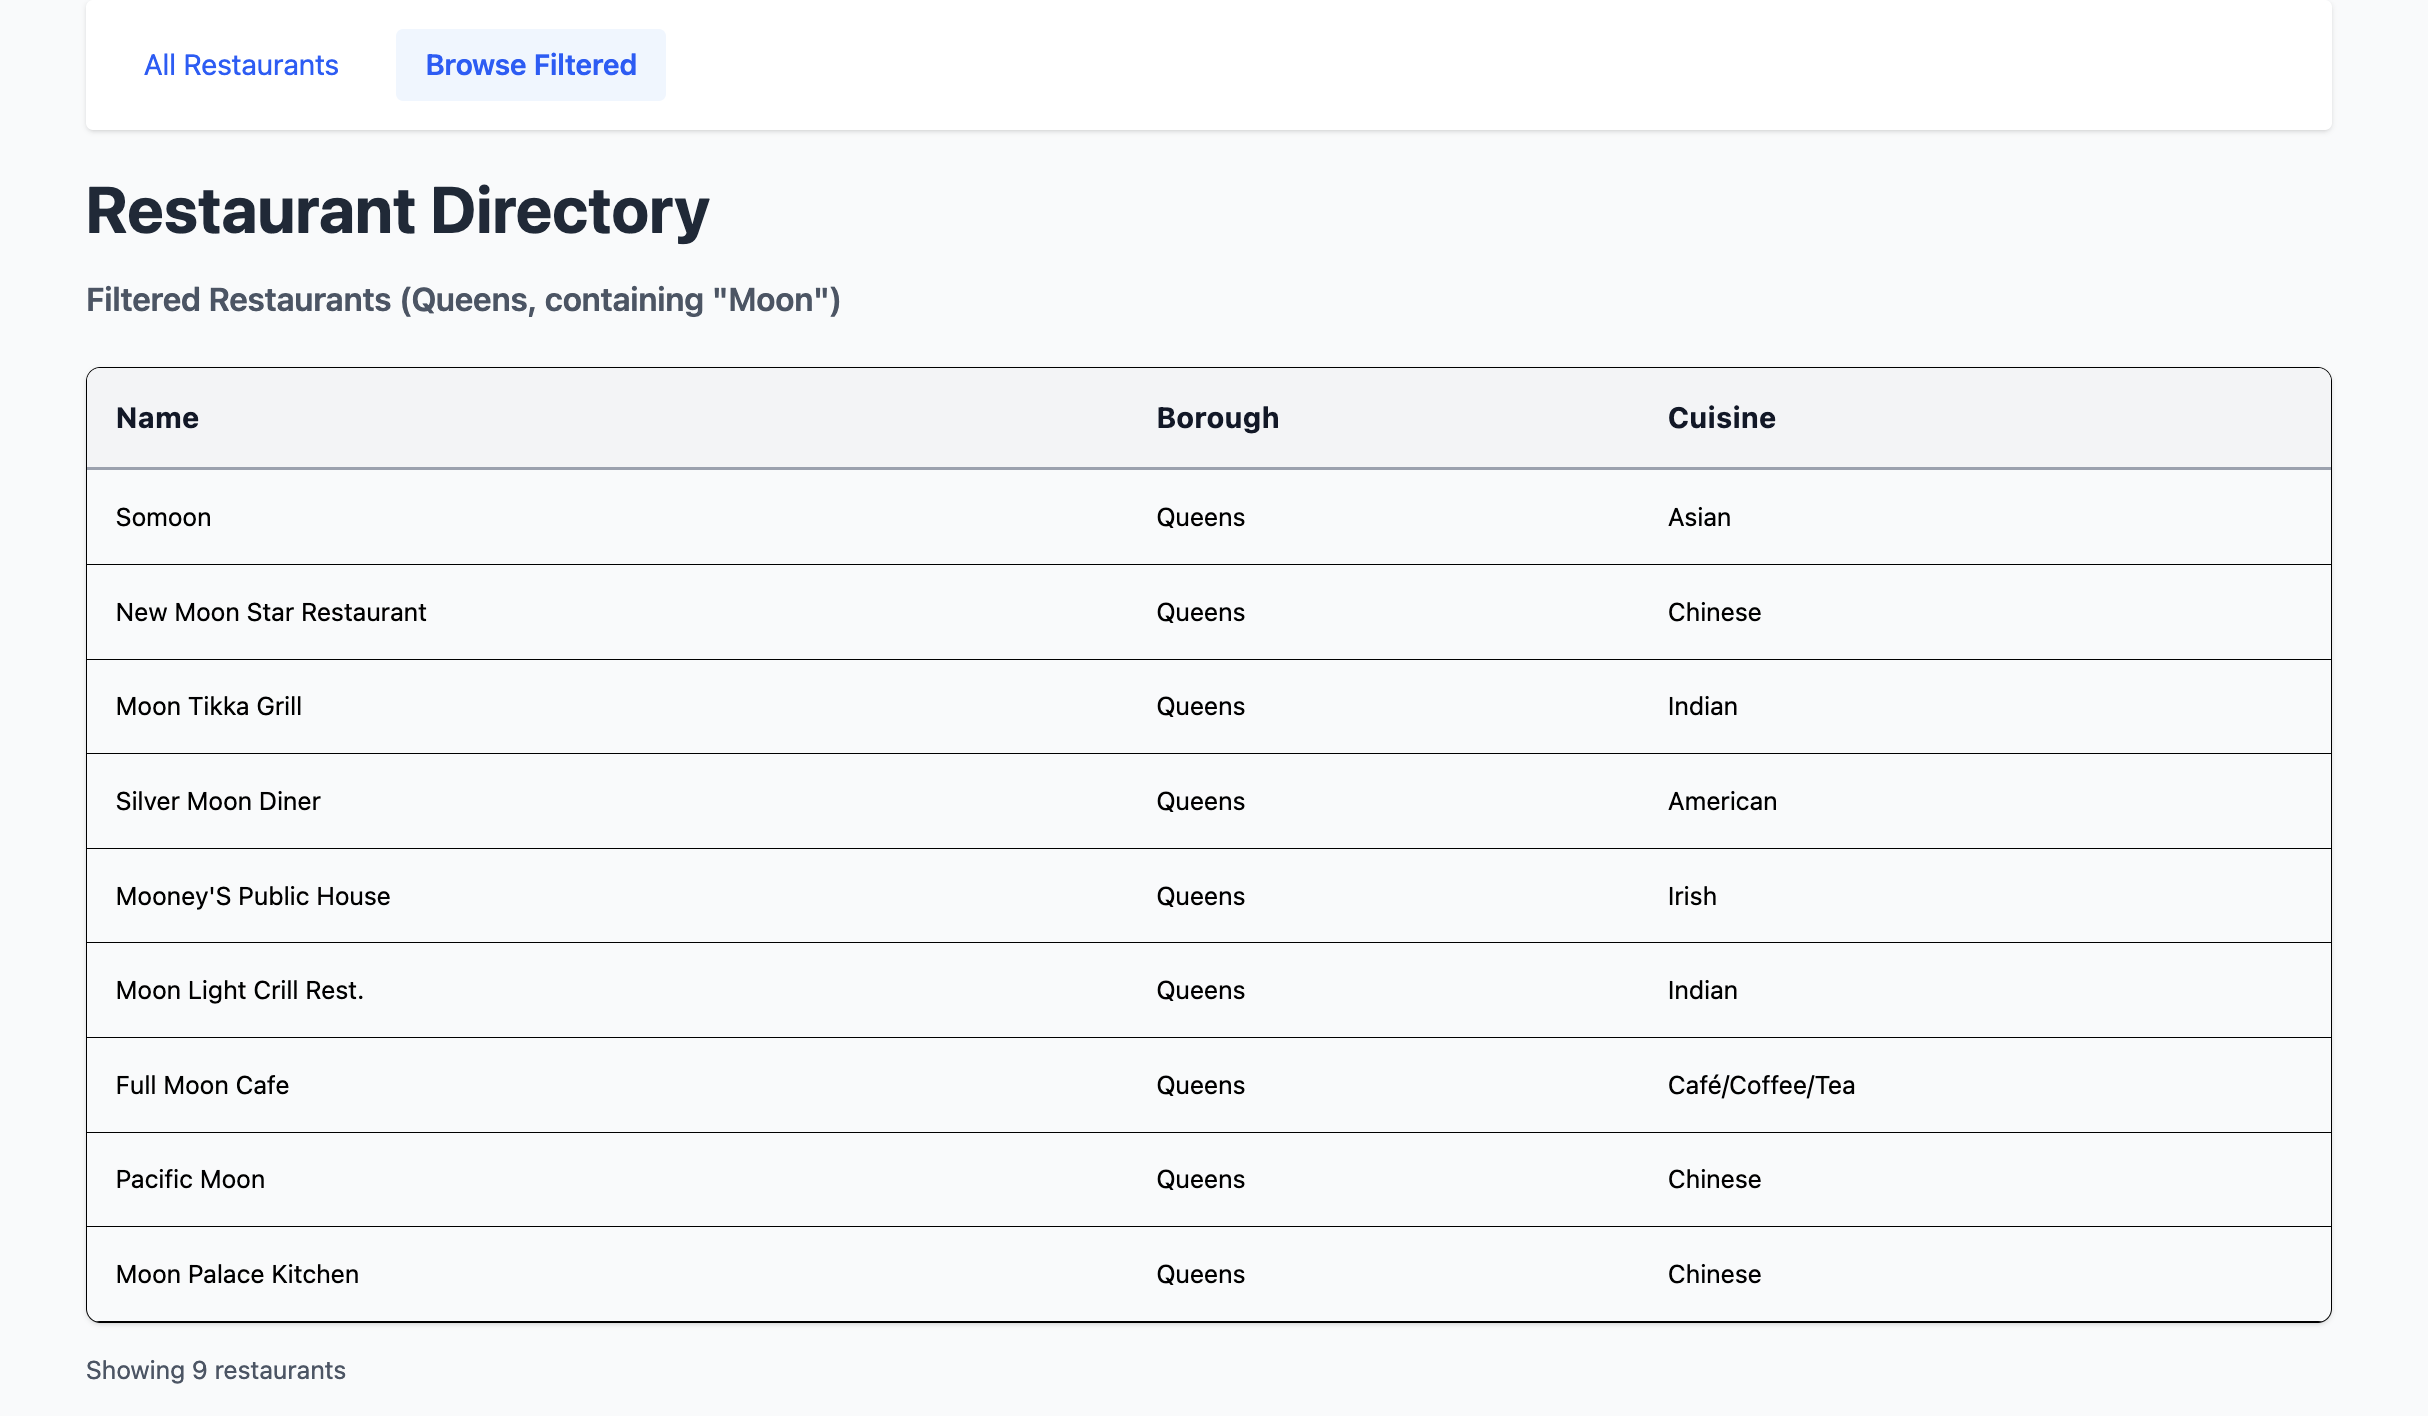
restaurants: 모든 레스토랑을 게시하지만 성능 문제를 방지하기 위해200(으)로 제한합니다.restaurants.filtered: 이름에"Moon"가 포함된 퀸즈의 레스토랑을 게시합니다.$options인수는 이 정규식 문자열 일치가 대소문자를 구분하지 않도록 지정합니다.
삽입 작업 정의
scripts(이)라는 새 디렉토리 만든 다음 이 디렉토리 에 insertDemo.js(이)라는 파일 만듭니다. 다음 코드를 insertDemo.js에 붙여넣습니다.
const { MongoClient } = require('mongodb'); const MONGO_URL = process.env.MONGO_URL; async function insertSampleRestaurant() { const client = new MongoClient(MONGO_URL); try { await client.connect(); const db = client.db(); const collection = db.collection('restaurants'); const doc = { name: "Honey Moon Coffee Shop", borough: "Queens", cuisine: "Café/Coffee/Tea", }; const result = await collection.insertOne(doc); console.log('Inserted restaurant with ID:', result.insertedId); } catch (error) { console.error('Error:', error); } finally { await client.close(); } } insertSampleRestaurant();
이 파일 다음 필드를 저장하는 문서 삽입하는 insertSampleRestaurant()라는 메서드를 정의합니다.
name:"Honey Moon Coffee Shop"borough:"Queens"cuisine:"Café/Coffee/Tea"
이후 단계에서 이 파일 사용하여 Meteor의 실시간 데이터 동기화 기능을 시연하게 됩니다.
서버 구성 업데이트
server/main.js 의 내용을 다음 코드로 바꿉니다.
import { Meteor } from 'meteor/meteor'; import { RestaurantsCollection } from '../imports/api/restaurantsCollection'; import '../imports/api/restaurantsPublications'; Meteor.startup(async () => { // Check connection to restaurants collection try { const restaurantCount = await RestaurantsCollection.find().countAsync(); console.log(`Connected to MongoDB Atlas. Found ${restaurantCount} restaurants in the collection`); } catch (error) { console.error('Error connecting to restaurants collection:', error); } });
이 파일 필요한 컬렉션과 발행물을 가져옵니다. 또한 restaurants 컬렉션 의 문서 수를 출력하여 MongoDB 연결을 확인하는 스타트업 함수를 만듭니다.
Vue 구성 요소 구성
데이터 계층을 설정한 후 이 섹션의 단계에 따라 레스토랑 데이터를 표시하는 Vue 구성 요소를 만듭니다.
라우팅 설정
imports/ui/router.js 파일 로 이동하여 다음 코드를 붙여넣습니다.
import { createRouter, createWebHistory } from 'vue-router'; import RestaurantList from './views/RestaurantList.vue'; export const router = createRouter({ history: createWebHistory(), routes: [ { path: '/', name: 'home', component: RestaurantList, meta: { filter: false } }, { path: '/browse', name: 'browse', component: RestaurantList, meta: { filter: true } } ], });
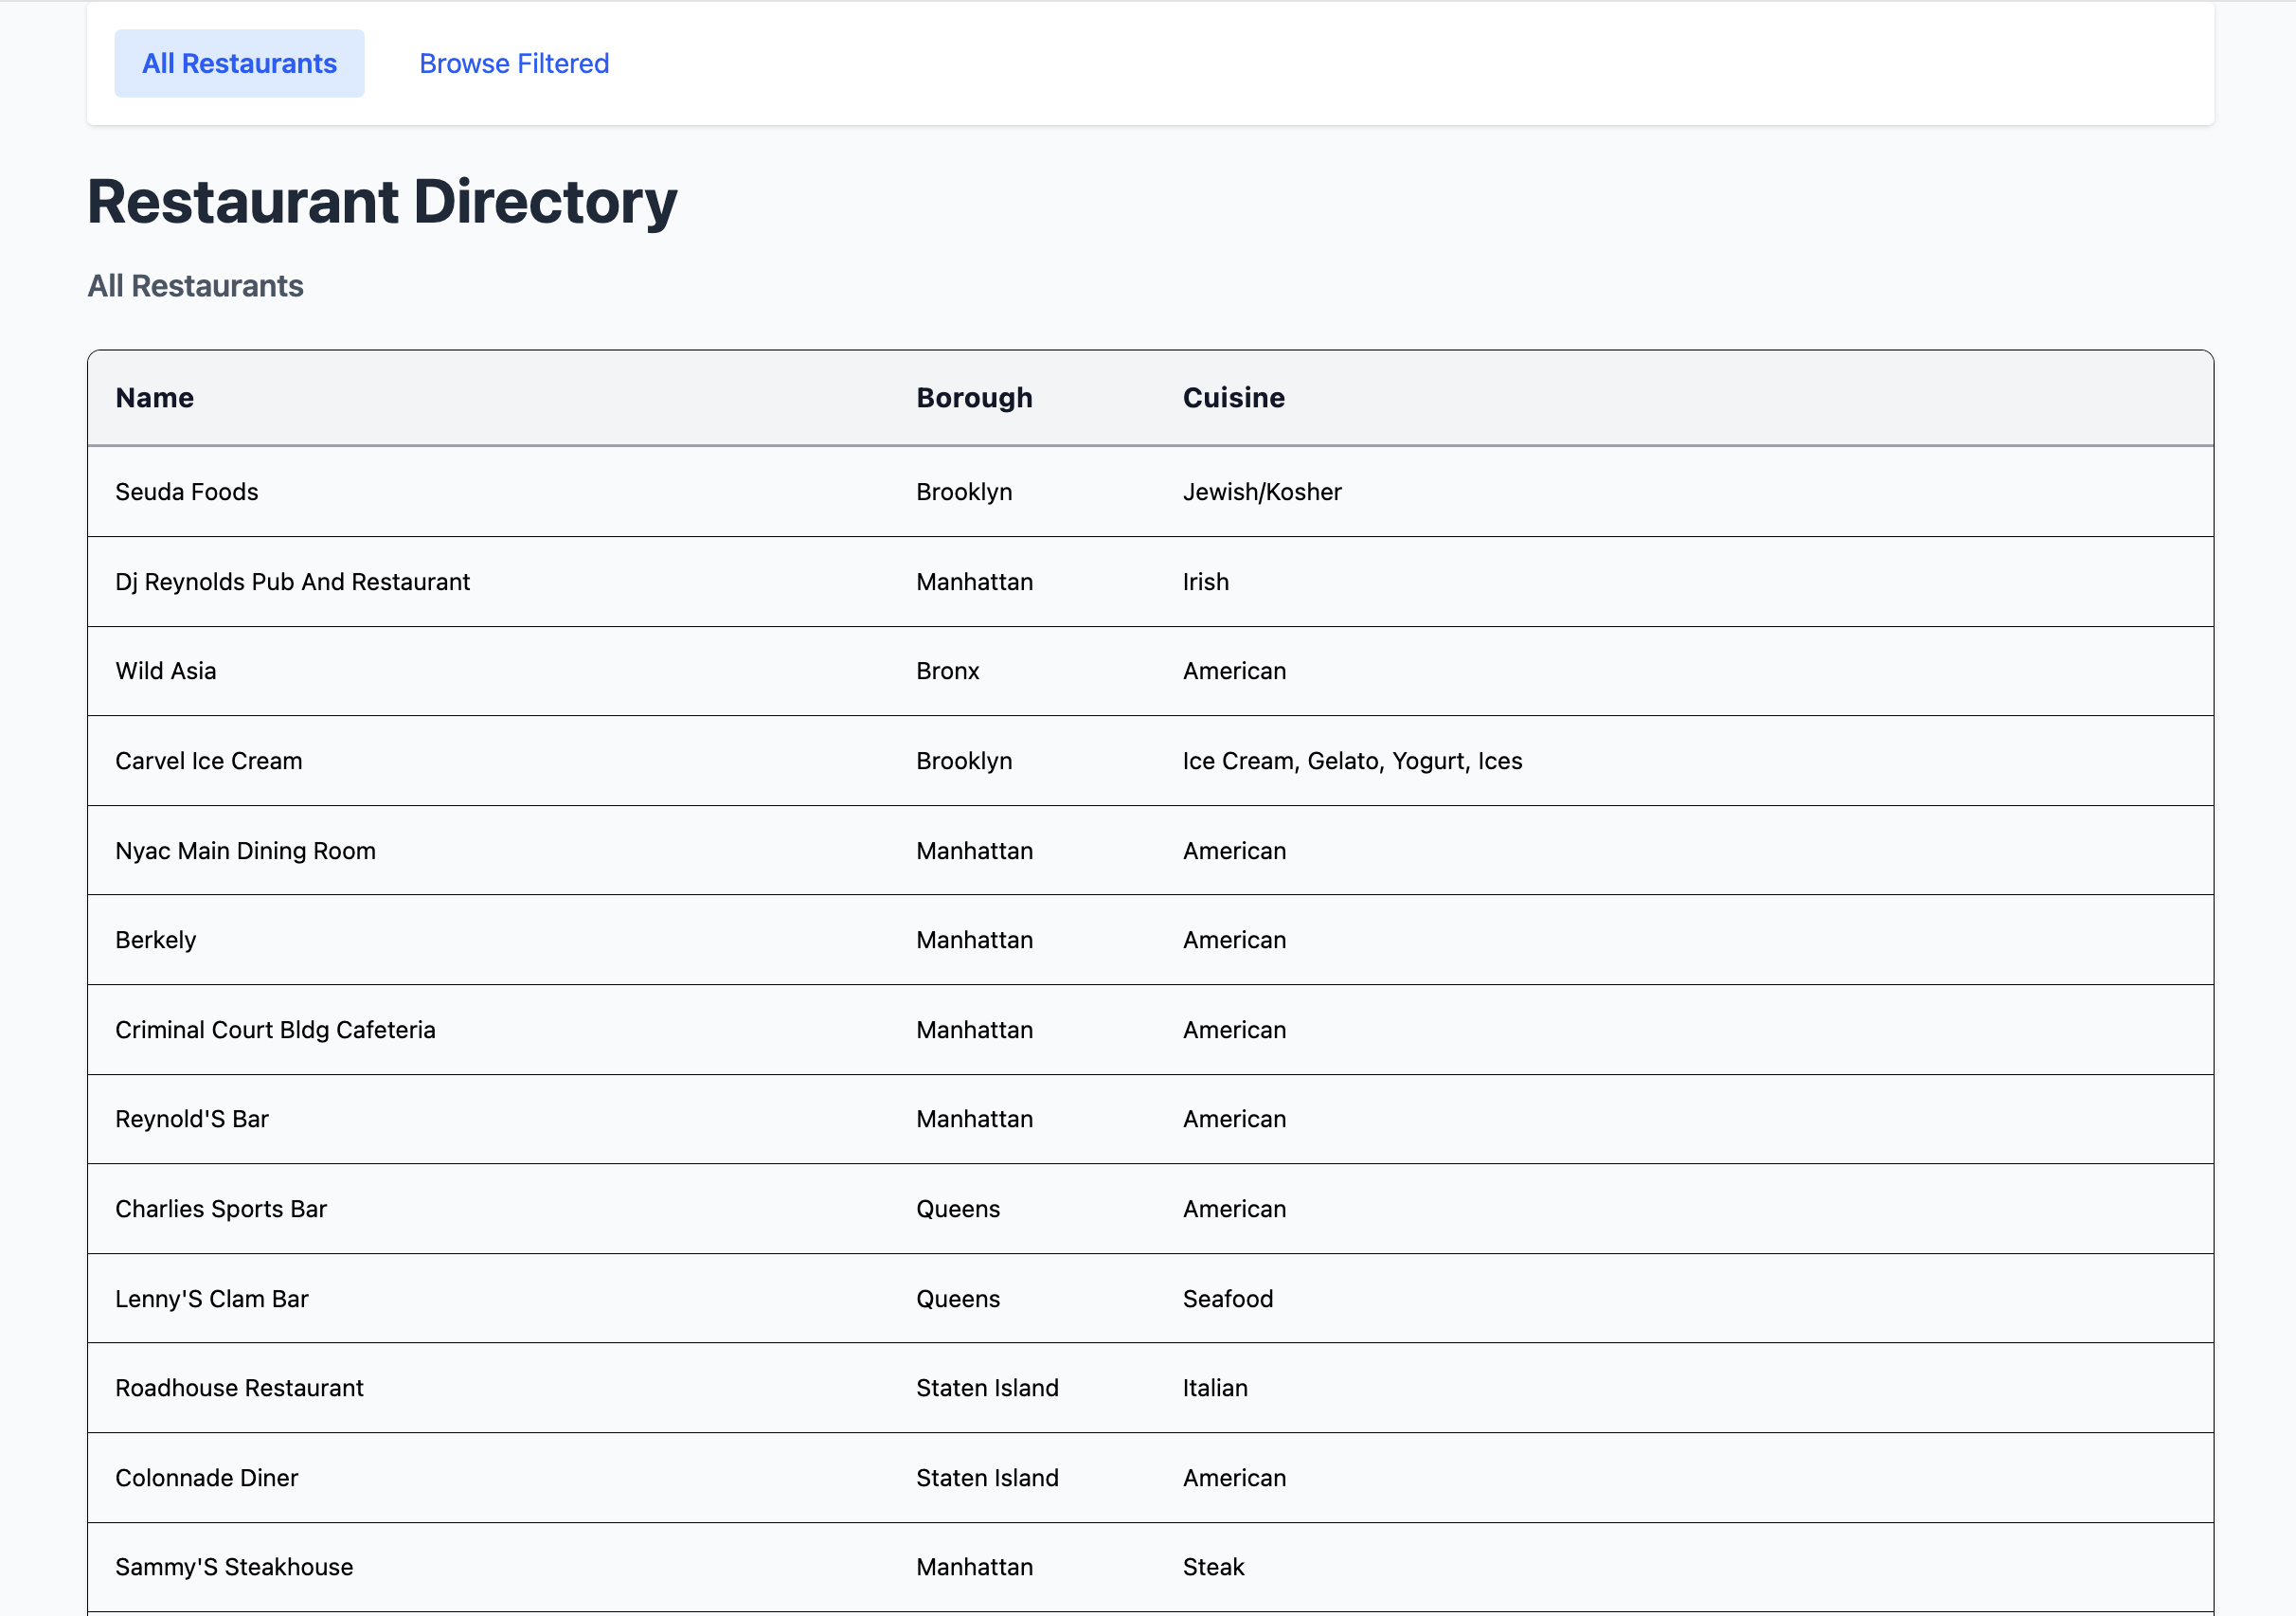
이 파일 Vue 경로를 구성하고 각 경로에 대해 렌더링할 콘텐츠를 결정합니다. / 경로는 모든 레스토랑 데이터를 표시하고 /browse 경로는 필터링된 레스토랑 데이터를 표시합니다.
Restaurant 구성 요소 만들기
imports/ui/components 디렉토리 에서 다음 코드가 포함된 Restaurant.vue 파일 만듭니다.
<script setup> defineProps({ restaurant: { type: Object, required: true, }, }); </script> <template> <tr class="border-b transition-colors hover:bg-gray-50"> <td class="p-4 align-middle">{{ restaurant.name }}</td> <td class="p-4 align-middle">{{ restaurant.borough }}</td> <td class="p-4 align-middle">{{ restaurant.cuisine }}</td> </tr> </template>
이 구성 요소는 개별 레스토랑 정보를 테이블의 행으로 표시합니다.
RestaurantList 뷰 만들기
imports/ui/views 디렉토리 에서 다음 코드가 포함된 RestaurantList.vue 파일 만듭니다.
<script setup> import Restaurant from '../components/Restaurant.vue'; import { subscribe, autorun } from 'vue-meteor-tracker'; import { RestaurantsCollection } from '../../api/restaurantsCollection'; import { useRoute, RouterLink } from 'vue-router'; import { computed } from 'vue'; const route = useRoute(); // Determines whether to show filtered results const isFiltered = computed(() => route.path === '/browse'); // Subscribes to both publications to avoid switching issues subscribe('restaurants'); subscribe('restaurants.filtered'); // Retrieves restaurants based on current route with client-side filtering as backup const restaurants = autorun(() => { let docs; if (isFiltered.value) { docs = RestaurantsCollection.find({ borough: 'Queens', name: { $regex: 'Moon', $options: 'i' } }).fetch(); console.log('Filtered restaurants found:', docs.length); } else { docs = RestaurantsCollection.find({}, { limit: 200 }).fetch(); console.log('All restaurants found:', docs.length); } return docs; }).result; // Determines the title based on the route const getTitle = computed(() => { return isFiltered.value ? 'Filtered Restaurants (Queens, containing "Moon")' : 'All Restaurants'; }); </script> <template> <div class="container mx-auto px-4"> <!-- Navigation --> <nav class="flex justify-between items-center mb-6 p-4 bg-white shadow rounded"> <div class="flex space-x-4"> <RouterLink to="/" class="px-4 py-2 text-blue-600 hover:bg-blue-50 rounded transition-colors" :class="{ 'bg-blue-100 font-semibold': !isFiltered }" > All Restaurants </RouterLink> <RouterLink to="/browse" class="px-4 py-2 text-blue-600 hover:bg-blue-50 rounded transition-colors" :class="{ 'bg-blue-100 font-semibold': isFiltered }" > Browse Filtered </RouterLink> </div> </nav> <!-- Header --> <header class="mb-6"> <h1 class="text-4xl font-bold text-gray-800 my-4">Restaurant Directory</h1> <h3 class="text-lg font-semibold text-gray-600">{{ getTitle }}</h3> </header> <!-- Restaurant Table --> <div class="border rounded-lg overflow-hidden shadow"> <div class="relative w-full overflow-auto"> <table class="w-full text-sm"> <thead class="bg-gray-100 border-b-2 border-gray-300"> <tr class="border-b-2 border-gray-400"> <th class="h-14 px-4 text-left align-middle font-bold text-gray-900 text-base tracking-wide"> Name </th> <th class="h-14 px-4 text-left align-middle font-bold text-gray-900 text-base tracking-wide"> Borough </th> <th class="h-14 px-4 text-left align-middle font-bold text-gray-900 text-base tracking-wide"> Cuisine </th> </tr> </thead> <tbody> <Restaurant v-for="restaurant in restaurants" :key="restaurant._id" :restaurant="restaurant" /> </tbody> </table> <!-- Empty state --> <div v-if="restaurants.length === 0" class="p-8 text-center text-gray-500"> <p>No restaurants found. Ensure that your connection URI is correct and includes the sample_restaurants database name.</p> <p v-if="isFiltered" class="text-sm mt-2"> Try the "All Restaurants" tab to see all available restaurants. </p> </div> </div> </div> <!-- Restaurant count --> <div class="mt-4 text-sm text-gray-600"> Showing {{ restaurants.length }} restaurant{{ restaurants.length !== 1 ? 's' : '' }} </div> </div> </template>
이 구성 요소는 레스토랑 목록 표시를 처리하고 모든 레스토랑을 표시하거나 현재 경로를 기반으로 필터링된 결과를 표시하도록 자동으로 전환합니다.
애플리케이션 실행하기
마지막으로 이 섹션의 단계에 따라 애플리케이션 실행 하고 렌더링된 레스토랑 데이터를 확인합니다.
Meteor 애플리케이션 시작
프로젝트 디렉토리 로 이동하여 터미널에서 다음 명령을 실행 .
meteor npm run start
성공적인 하면 명령 출력은 다음 예시 와 유사합니다.
[[[[[ ~/meteor-vue-quickstart ]]]]] => Started proxy. => Started HMR server. ... Connected to MongoDB Atlas. Found 25368 restaurants in the collection => Started your app. => App running at: http://localhost:3000/
브라우저에서 애플리케이션 열기
웹 브라우저에서 http://localhost: /를 엽니다. 초기 방문 페이지에는 컬렉션 에3000있는 200 필터링되지 않은 레스토랑 목록이 표시됩니다.sample_restaurants.restaurants
페이지 상단에서 Browse Filtered 버튼을 클릭하면 이름에 "Moon" 이 포함된 퀸즈의 레스토랑을 볼 수 있습니다.
실시간 데이터 변경 사항 보기
샘플 문서 삽입하고 애플리케이션의 프런트 엔드에서 변경 사항을 확인하여 Meteor의 실시간 데이터 동기화 기능을 탐색할 수 있습니다.
두 번째 터미널 창을 열고 프로젝트 디렉토리로 이동합니다. MongoDB 연결 URI를 내보냅니다. 이전 단계에 표시된 것과 동일한 명령을 실행하여 이전 단계:
export MONGO_URL="<connection URI>"
그런 다음, 다음 명령을 실행 name 값이 "Honey Moon Coffee Shop"인 샘플 문서 삽입합니다.
node scripts/insertDemo.js
http://localhost:3000/browse URL 의 Filtered Restaurants 테이블에서 새 문서 볼 수 있습니다.
빠른 시작 튜토리얼을 완료하신 것을 축하드립니다!
이 단계를 완료하면 MongoDB 배포서버에 연결하고, 샘플 레스토랑 데이터에 대해 쿼리를 실행하고, 실시간 반응성으로 결과를 렌더링하는 Meteor 및 Vue 웹 애플리케이션 갖게 됩니다.
추가 리소스
Meteor, Vue 및 MongoDB 에 대해 자세히 학습 다음 리소스를 참조하세요.
Meteor 문서
Vue 3 documentation
vue-meteor-tracker package
Node.js 운전자 문서