You can integrate MongoDB with MLflow to store your MLflow tracking and model registry data in MongoDB. MLflow is an open-source platform for managing the lifecycle of machine learning and GenAI applications. The mlflow-mongodb integration works with Atlas, MongoDB Enterprise Advanced, and MongoDB Community Edition deployments that run MongoDB 8.0 or later. This page shows how to configure MLflow to use MongoDB, log a run, register a model, and capture traces from a GenAI application.
Overview
The mlflow-mongodb package is an MLflow plugin that runs inside your MLflow server. The plugin stores only the following MLflow metadata in MongoDB:
Model registry data: registered models, versions, aliases, tags, and prompts.
Artifacts are the files that your runs produce, such as model files, images, and trace payloads. MLflow writes artifacts to a separate artifact store, not to MongoDB. This tutorial stores artifacts on the local disk of the MLflow server. For production deployments, configure an artifact store such as Amazon S3.
You can configure the tracking store and the model registry store independently. For example, one store can use MongoDB while the other uses a different MLflow backend. This tutorial uses MongoDB for both stores.
Prerequisites
Before you begin, ensure that you have the following:
A MongoDB deployment that runs MongoDB version 8.0 or later.
A database user with read and write access to the database that stores your MLflow data.
Network access from your MLflow server to the deployment.
Python 3.11 through 3.14.
MLflow 3.5 or a later 3.x release.
Note
The setup steps differ by deployment type:
Atlas: Create a database user. Then add the IP address of your MLflow server to your project's access list.
Enterprise Advanced and Community Edition: Create a user with the
readWriterole on the database that stores your MLflow data. Ensure that your MLflow server can connect to the host and port of the deployment.
Install and Configure
The following procedure installs the mlflow-mongodb package and starts an MLflow server that stores data in MongoDB:
Prepare your connection string.
The plugin requires the name of the database that stores your MLflow data in the path of the connection string. Replace the placeholders in the following connection strings with your values:
mongodb+srv://<db_username>:<db_password>@<cluster-host>/<database>?retryWrites=true&w=majorityTo find your Atlas connection string, see Connect to a Cluster via Client Libraries.
mongodb://<db_username>:<db_password>@<host>:<port>/<database>?retryWrites=true&w=majorityTo learn more about self-managed connection strings, see Connection Strings.
Start the MLflow server.
Run the following commands to start the server. Replace <connection-string> with the connection string from the previous step:
export TRACKING_STORE_URI="<connection-string>"export REGISTRY_STORE_URI="<connection-string>"export MLFLOW_BIND_HOST="127.0.0.1"export MLFLOW_BIND_PORT="5000"
mlflow server \  --backend-store-uri "${TRACKING_STORE_URI}" \  --registry-store-uri "${REGISTRY_STORE_URI}" \  --host "${MLFLOW_BIND_HOST}" \  --port "${MLFLOW_BIND_PORT}"
MLflow stores artifacts in the mlartifacts directory on the server. To view the MLflow UI, open http://127.0.0.1:5000 in your browser.
Log a Run
The following procedure logs a run that stores a parameter, a metric, and an artifact:
Create the example file.
The following example creates an experiment named mongodb-backend-demo, then starts a run by calling the mlflow.start_run() method. The run logs the following items:
model_typeparameteraccuracymetricrun-summary.txtartifact
The examples in this tutorial connect to the server by calling the mlflow.set_tracking_uri() method. To connect MLflow clients without changing the client code, set the MLFLOW_TRACKING_URI environment variable to http://127.0.0.1:5000.
Save the following code in a file named log_run.py:
import mlflow
mlflow.set_tracking_uri("http://127.0.0.1:5000")mlflow.set_experiment("mongodb-backend-demo")
with mlflow.start_run() as run:    mlflow.log_param("model_type", "example")    mlflow.log_metric("accuracy", 0.92)    mlflow.log_text("Hello from the MongoDB backend", "run-summary.txt")    print("run_id:", run.info.run_id)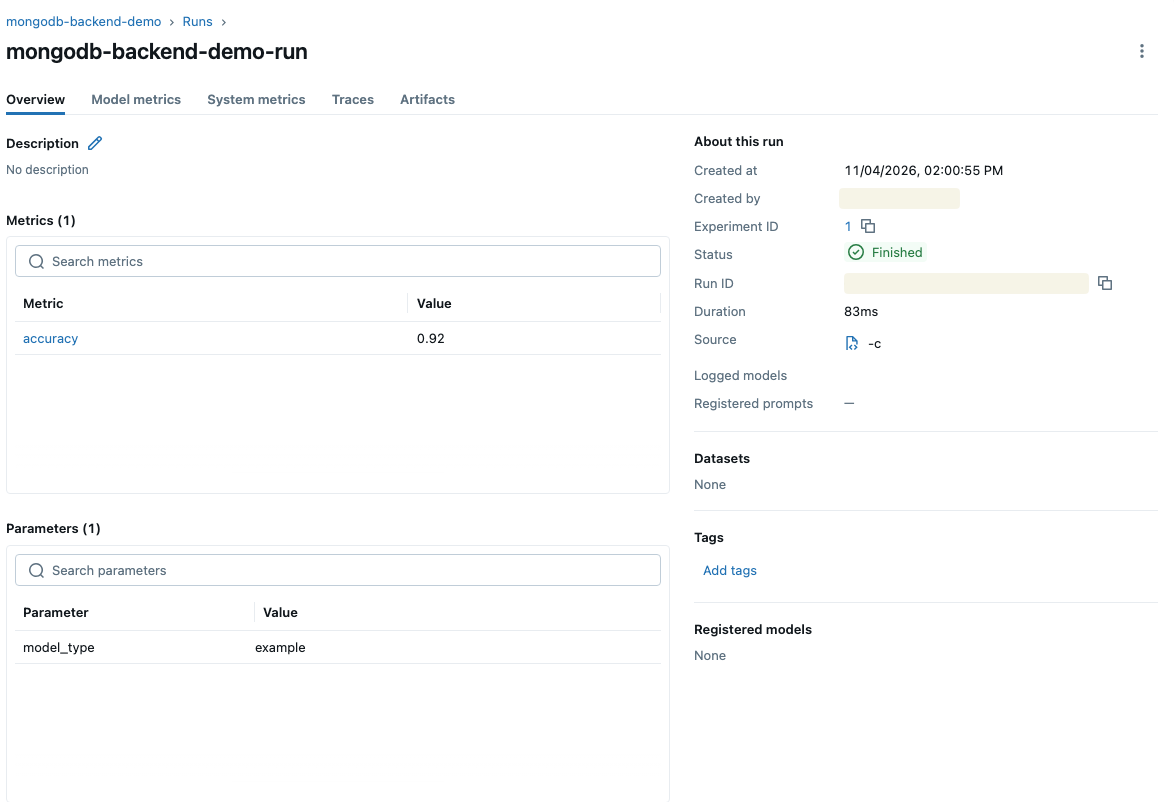
Model Registry
To register a model, use one of the following methods:
Pass the
registered_model_nameargument when you log a model by using alog_model()method, such asmlflow.pyfunc.log_model().Call the
mlflow.register_model()method and pass the URI of a model that a run logged, such asruns:/<run-id>/model.
Each time you register a model with an existing name, MLflow creates a new version of that model. To manage versions, use MlflowClient methods, such as set_registered_model_alias() and set_model_version_tag().
Create the example file.
The following example calls the log_model() method and registers the model as mongodb-backend-demo-model. The code then sets the alias and tag. Save the file as register_model.py:
import mlflowfrom mlflow import MlflowClientfrom mlflow.pyfunc import PythonModel
mlflow.set_tracking_uri("http://127.0.0.1:5000")mlflow.set_experiment("mongodb-backend-demo")
class EchoModel(PythonModel):    def predict(self, context, model_input):        return model_input
with mlflow.start_run():    mlflow.pyfunc.log_model(        name="model",        python_model=EchoModel(),        registered_model_name="mongodb-backend-demo-model",    )
client = MlflowClient()client.set_registered_model_alias("mongodb-backend-demo-model", "mongo-verified", 1)client.set_model_version_tag("mongodb-backend-demo-model", 1, "validated_by", "doc-test")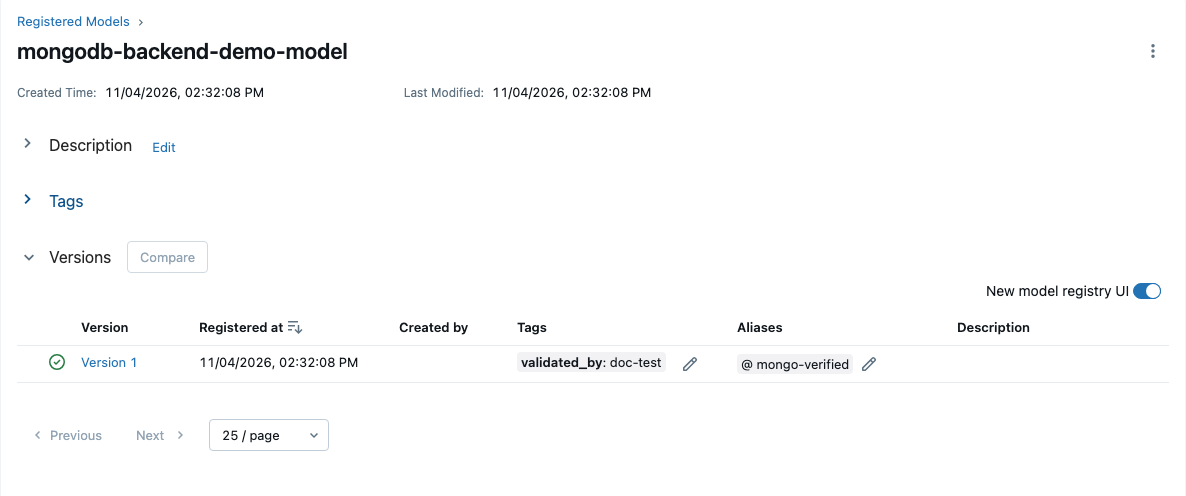
Tracing and GenAI Observability
MLflow Tracing records the inputs, outputs, and duration of each step in your LLM application or agent. When you use MongoDB for the tracking store, MLflow stores traces and their spans in MongoDB.
Enable tracing.
To enable tracing, use one of the following approaches:
Call the
mlflow.<flavor>.autolog()method to trace calls to a supported framework or provider, such as OpenAI or LangChain. To learn more, see Automatic Tracing in the MLflow documentation.Add the
@mlflow.tracedecorator to the functions that you want to trace.
The following example uses the @mlflow.trace decorator to trace a function that calls an agent. Save the file as trace_agent.py:
import mlflow
mlflow.set_tracking_uri("http://127.0.0.1:5000")mlflow.set_experiment("agent-traces")
mlflow.tracedef call_agent(prompt: str) -> str: # Replace this line with your actual LLM or agent call return f"Echo: {prompt}"
call_agent("Summarize this document")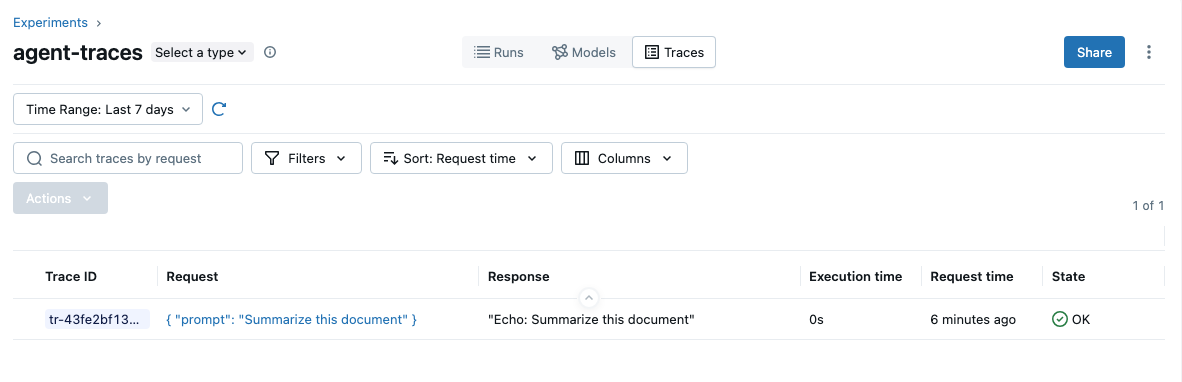
Note
Trace storage and retrieval depend on your MLflow version. MLflow 3.5 clients upload full trace payloads to the experiment's artifact store. MongoDB stores the spans. On MLflow 3.6 and later, clients retrieve traces directly from MongoDB. Aggregated trace metrics require MLflow 3.9 or later.
Next Steps
To learn more about MLflow concepts and features, see the following MLflow documentation:
Learn More
To learn more about the concepts from this tutorial, see the following resources: