Overview
In this tutorial, you create and deploy a Hello World agent on the MongoDB Atlas Agent Engine. You install the agentengine CLI and scaffold a project from a starter template. Then, you run the agent locally, register it, and build and deploy it to the Atlas Agent Engine.
The tutorial uses Anthropic as the large language model (LLM) provider and macOS as the operating system.
Prerequisites
Ensure that you have the following prerequisites before you begin:
A macOS machine. To view Windows and Linux setup instructions, see the Install and Authenticate guide.
Git
Docker Desktop running on your machine
An Atlas account with access to at least one Atlas organization
An API key for your chosen LLM provider. This tutorial uses Anthropic, but you can use any provider.
Procedure
Complete the following steps to install the agentengine CLI, scaffold a Hello World agent, run it locally, and deploy it to the Atlas Agent Engine.
Install the agentengine CLI.
Sign in to the Atlas Agent Engine, then download the CLI from the CLI download page. The Version dropdown is pre-filled with the latest CLI version, and the Platform dropdown is pre-filled with your detected operating system.
Click the Download for <your platform> button. Save the SHA-256 checksum value displayed on the page for use in the following step.
Complete the CLI installation.
In your terminal, navigate to your downloads directory and run the following command:
shasum -a 256 agentengine
The output must match the SHA-256 value that you saved. If the values don't match, delete the binary and download it again.
Run the following commands to mark the binary as executable and move it to the ~/.local/bin directory:
chmod +x ./agentengine mkdir -p ~/.local/bin mv ./agentengine ~/.local/bin/agentengine
Confirm that ~/.local/bin is on your PATH. Installing the binary in a user-writable directory lets you run the agentengine self-update command without using the sudo command.
To learn more, see Install the agentengine CLI.
Create an agent project.
Run the following command to scaffold a Hello World agent project:
agentengine create
When prompted by the CLI, choose the following values:
Template: Hello World Agent
LLM provider: Anthropic Claude
API key: your Anthropic API key
Enable memory: no
The command creates a project root directory that contains a project-config.yaml configuration file and an agents/ directory. Your agent's files, which include the agent.yaml configuration file, a .env file with your API key, and a pyproject.toml file, are in a subdirectory of agents/. The following example shows the structure that the command creates:
my-project/ ├── project-config.yaml └── agents/ └── my-agent/ ├── agent.yaml ├── pyproject.toml ├── .env └── src/
Run all subsequent agentengine commands from your agent directory, which is my-agent/ in this example.
Run the agent locally.
Local development requires access to the runner-base image hosted in MongoDB's container image registry. The CLI pulls the image by using your agentengine auth login session, so you don't need a separate registry login.
Navigate to your agent directory and run the following command to start the local development environment:
agentengine dev up The CLI builds a Docker image and starts the full agent stack. When the stack starts successfully, the command output resembles the following:
◆ Workspace <your organization> / Default Project / <your project> ✓ Created .agentengine/docker-compose.dev.yml ✓ Created .agentengine/Dockerfile.dev ✓ Created .agentengine/Dockerfile.dev.dockerignore ✓ Created .agentengine/dev-entrypoint.py ✓ Created .agentengine/entrypoint.py ✓ Created .devcontainer/devcontainer.json ✓ Reused existing .agentengineignore [+] Building 1.6s (17/17) FINISHED [+] up 5/5 ✔ Container <your-project>-mongodb-1 Healthy ✔ Container <your-project>-oe-1 Healthy ✔ Container <your-project>-app-1 Started ✓ Stack running (hot-reload) oe http://localhost:51331 mongo mongodb://localhost:51333 ui http://localhost:3000 Invoke: curl -X POST 'http://localhost:3000/invoke' \ -H 'Content-Type: application/json' \ -d '{"message": "Hello"}' Next: Open VS Code and run "Dev Containers: Reopen in Container" for editing and debugging inside the running app container Restart: from this workspace dir, run agentengine dev restart Logs: agentengine dev logs Stop: agentengine dev stop Clean: agentengine dev clean When all services are ready, open the
http://localhost:3000URL in your browser to chat with your agent.Note
The UI might run on a different port than the default port
3000. To view your URL, check theuifield in theagentengine dev upcommand output.The following example shows a successful exchange with your agent:
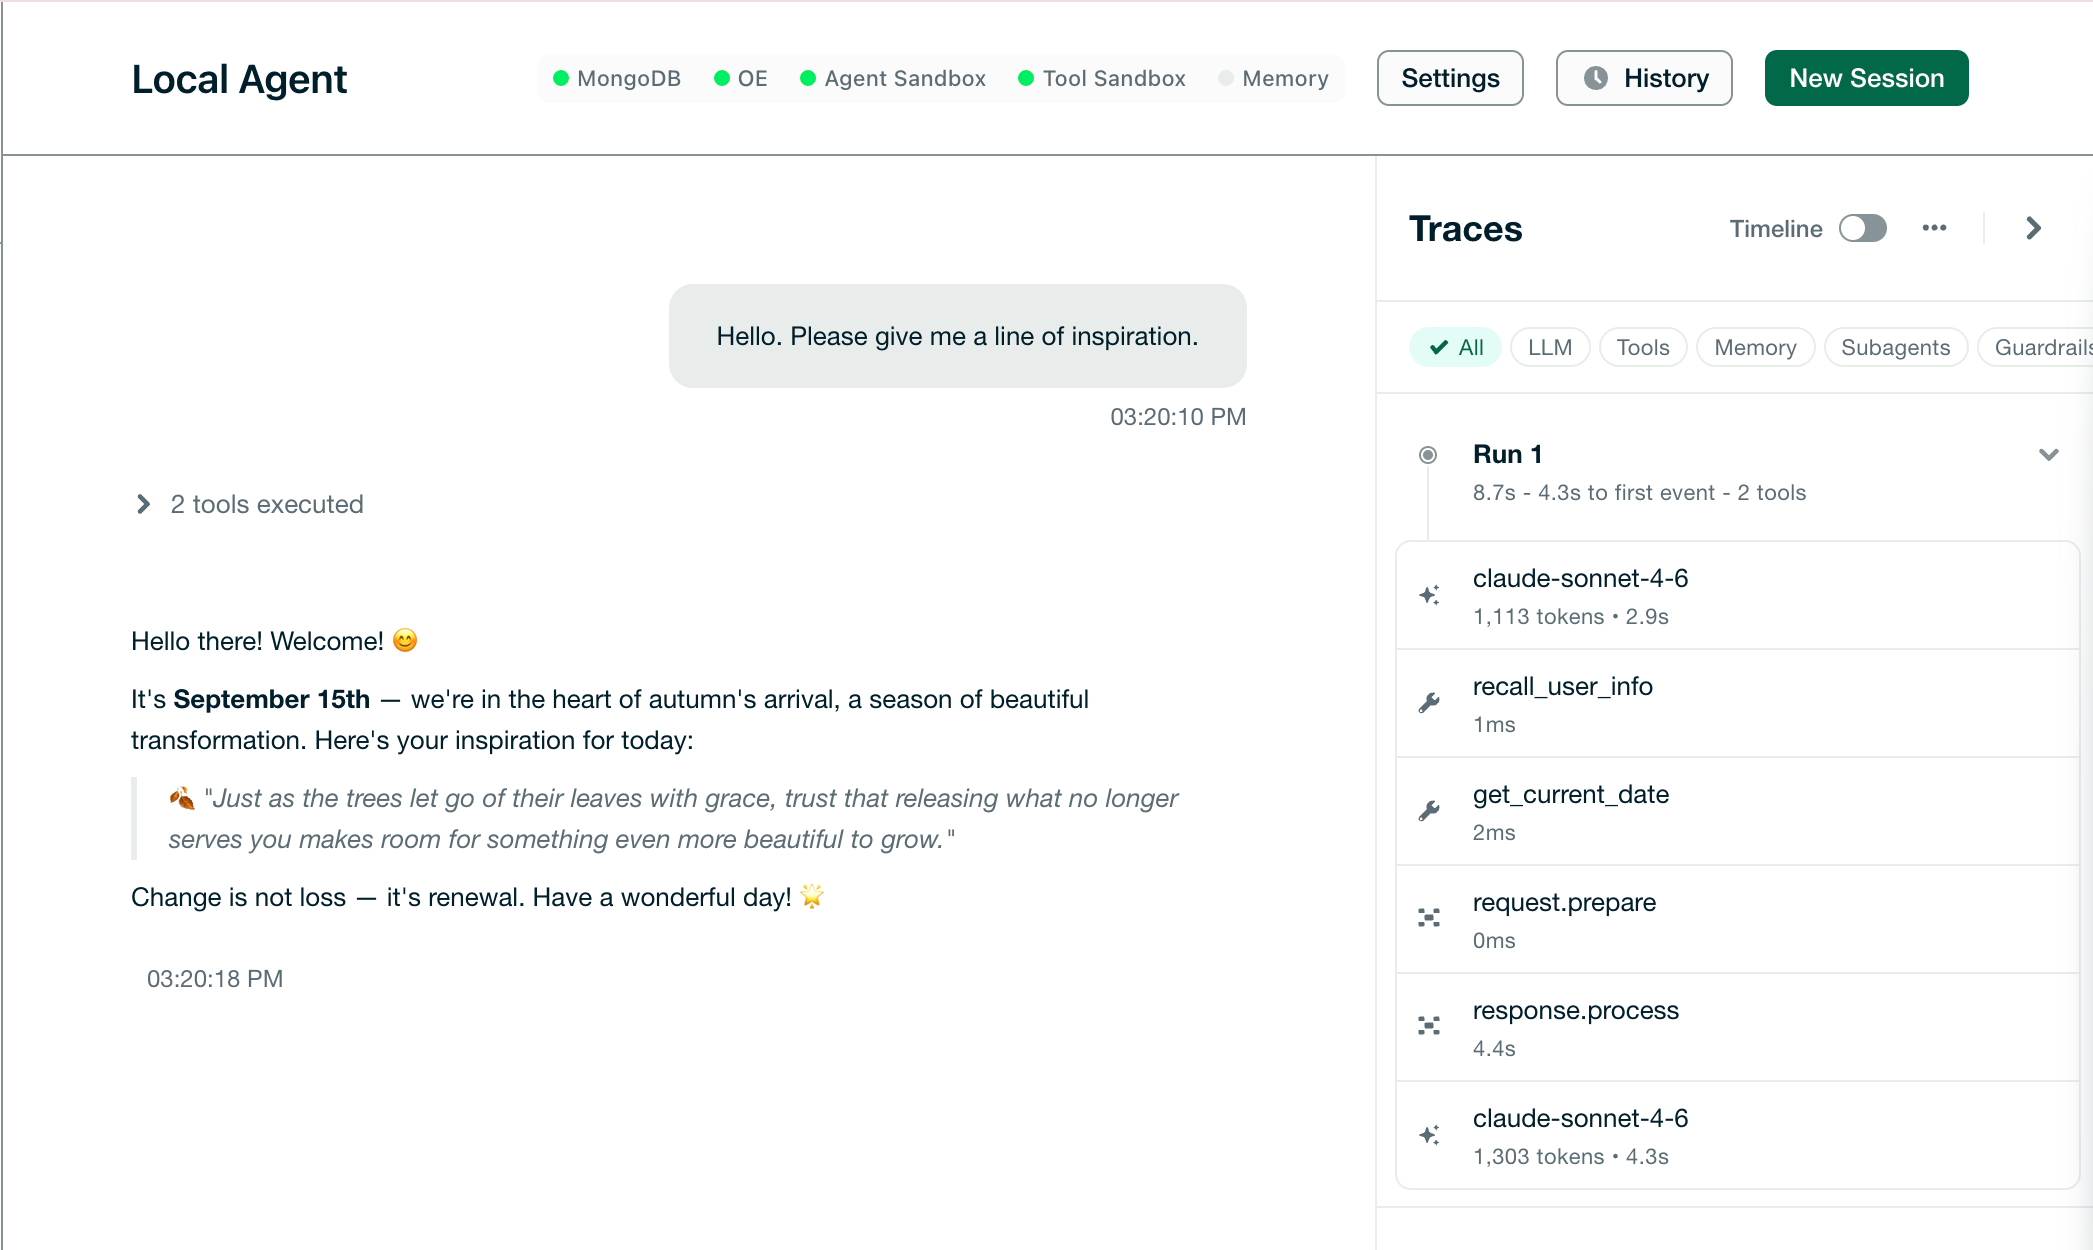 click to enlarge
To stop the local environment, run the following command:
agentengine dev stop
Set up Atlas resources.
The Atlas Agent Engine requires an Atlas cluster to store execution state, checkpoints, and history. The CLI supports Atlas service account credentials only. Atlas user account logins and legacy Atlas API public and private keys are not supported.
Important
Atlas Billing
In this step, you can select an existing Atlas cluster or create a new one. If you create a new cluster, the CLI provisions a paid Atlas Flex cluster by default. Atlas charges you for cluster operations until you terminate the cluster. To clean up the resources created in this tutorial, see Clean Up Resources.
In the Atlas UI, create or select a service account:
Open the Atlas project that you want to use.
Go to Applications in the Project Identity & Access menu and create or select a service account.
Grant the service account the Project Owner permission. To learn why this role is required, see Atlas Roles for Project Management.
Run the following command to set up and provision a cluster:
agentengine atlas setup When prompted, enter your Atlas service account client ID and secret. The CLI provisions a cluster, configures network access, and stores the
MONGODB_URIas a platform secret. To learn more about Atlas resources, see Set Up Atlas Resources.
Set cloud secrets.
Your deployed agent requires secrets to invoke the LLM and connect to Atlas.
Run the following command to set the Anthropic API key. The CLI prompts you for the value.
agentengine secret set ANTHROPIC_API_KEY
To learn more about managing secrets, see Provision Cloud Secrets.
Build and deploy the agent.
Run the following command to build the agent image and deploy it in one step:
agentengine deploy --auto
The command bundles your agent code, starts a remote build job, and monitors the deployment that the build triggers. The build takes 5 to 10 minutes, and the deployment takes another 5 to 10 minutes. During deployment, the output might show Agent Sandbox: waiting and Tool Sandbox: waiting for several minutes. When the deployment succeeds, the command output resembles the following:
Waiting for auto-deploy to start... ✓ Auto-deploy started (deployment_id: <deployment-id>) ✓ Deployment succeeded version: v0.1.0 components: Orchestration Engine ready (2 replicas) Agent Sandbox ready (3 replicas) Tool Sandbox ready (4 replicas) url: https://agentengine.mongodb.com/project/<project-id>/deployments/<deployment-id>
Your agent is now running on the MongoDB Atlas Agent Engine.
The --auto flag applies to single-agent projects only. To build and deploy in separate steps, or to deploy a specific build, run agentengine build and then agentengine deploy. To learn more, see Start a Deployment.
Troubleshooting a Failed Deployment
The most common causes of deployment failures are:
Misconfigured secrets
An Atlas cluster whose IP access list is not configured to allow traffic from the Atlas Agent Engine
To debug a failed deployment, run the following commands to see Atlas Agent Engine logs:
# View deployment logs agentengine deploy logs # View deployed agent workspace logs agentengine logs
For more information about each command, see the View Deployment Event Log and Use the CLI guides.
Clean Up Resources
This tutorial provisions resources that persist until you remove them. When you no longer need these resources, remove them in the following ways:
Atlas cluster: To terminate a cluster, open your Atlas project's Clusters page, click the ellipsis (
...) next to the cluster, and then click Terminate. If you selected an existing cluster, the tutorial does not create a new one, so you can leave it unchanged.Workspace: The
agentengine initcommand creates a workspace on the Atlas Agent Engine that contains your deployed agent. To find the workspace ID, run the following command:agentengine workspace list Then, run the following command to delete the workspace:
agentengine workspace delete <workspace-id> --yes Database user: The setup flow creates a database user that your agent uses to connect to Atlas. In the Atlas UI, open Database & Network Access and click the delete icon next to the database user.
Voyage AI API key: The setup flow creates a Voyage AI API key to support memory features for your agent. In the Atlas UI, open AI Model APIs and click the delete icon next to the API key.
Platform secrets: The setup flow asks whether to store your
MONGODB_URIandVOYAGE_API_KEYvalues as platform secrets. If you choose to store these secrets, you can remove them by following the instructions in Delete a Secret.
Next Steps
After deploying your agent, see the following pages for additional resources:
To authenticate and call your deployed agent, see Invoke an Agent.
To test the agent and iterate on your code, see Test the Agent.
To monitor agent executions in the platform UI, see Monitor.