Overview
在本指南中,您可以学习如何创建使用 Meteor 作为前端框架的全栈 Vue 应用程序。Meteor 是一个用于创建 Web 和移动应用程序的JavaScript框架。该框架支持范围用于构建用户界面的前端库,包括 Vue。
本教程中的应用程序由以下各层组成:
数据库层:MongoDB提供数据存储和检索
应用程序层:Meteor 使用集成的构建工具处理客户端和服务器端逻辑
表示层:Vue 使用响应式数据绑定实现用户界面
为何将MongoDB与 Meteor 和 Vue 结合使用?
Meteor 构建在 MongoDB 的 document model 之上,Meteor 应用程序默认配置MongoDB 。您只需最少的依赖安装或样板代码,即可快速创建在MongoDB中存储数据的全堆栈应用程序。
MongoDB 灵活的文档结构自然而然地与JavaScript对象保持一致。因此,您可以在 Vue 组件中无缝使用MongoDB数据。当您使用 Meteor查询MongoDB时,您收到的文档可以直接在 Vue 模板中使用,无需复杂的数据转换。
此外,Meteor 提供内置的实时数据同步功能,可在MongoDB中的数据发生变化时自动更新 Vue 组件。当一个用户修改数据时,所有连接的用户会立即在其 Vue 界面中看到更改,而无需手动刷新或轮询。通过将MongoDB与 Meteor 和 Vue 结合使用,您可以同时利用 Meteor 的实时数据同步功能和 Vue 的响应式组件系统。
快速入门教程
本教程向您展示如何使用 Meteor 和 Vue构建Web应用程序。该应用程序访问示例餐厅数据,查询数据,并在本地托管站点上显示结果。本教程还包括有关连接到MongoDB Atlas上托管的MongoDB 集群以及访问和显示数据库中的数据的说明。
提示
如果您希望使用 Node.js驱动程序而不使用 Meteor 连接到MongoDB ,请参阅Node.js驱动程序指南。
设置您的项目
按照本节中的步骤安装项目依赖项、创建Atlas集群并设立应用程序目录。
验证先决条件
要创建快速入门应用程序,请在开发环境中安装以下软件:
先决条件 | 注意 |
|---|---|
使用 20 或更高版本。 | |
代码编辑器 | 本教程使用Visual Studio Code,但你也可以使用自己选择的编辑器。 |
终端应用和shell | 对于 MacOS 用户,请使用终端或类似应用程序。对于 Windows 用户,请使用 PowerShell。 |
创建 MongoDB Atlas 集群
MongoDB Atlas is a fully managed cloud database service that hosts your MongoDB deployments. If you do not have a MongoDB deployment, you can create a MongoDB cluster for free (no credit card required) by completing the MongoDB Get Started tutorial. The MongoDB Get Started tutorial also demonstrates how to load sample datasets into your cluster, including the sample_restaurants database that is used in this tutorial.
要连接到MongoDB集群,您必须使用连接 URI。学习如何检索连接 URI,请参阅MongoDB入门教程的添加连接字符串部分。
提示
将连接string保存在安全位置。
安装MongoDB Node.js驱动程序
通过在终端中运行以下命令来安装 Node.js驱动程序:
npm install mongodb
要学习有关安装驱动程序的更多信息,请参阅 Node.js 节点驱动程序入门指南。
配置 MongoDB 连接
设置项目结构后,请按照本节中的步骤将 Meteor应用程序连接到MongoDB。
提供您的连接 URI
在上一步中检索保存的连接 URI。
要访问权限sample_restaurants数据库,请修改连接 URI 以包含数据库名称。使用以下格式更新URI:
mongodb+srv://<username>:<password>@<cluster>/sample_restaurants?<options>
然后,通过从 meteor-vue-quickstart目录运行以下命令,将 MONGO_URL 环境变量设立为此修改后的连接 URI:
export MONGO_URL="<connection URI>"
将 <connection URI> 占位符替换为您的连接 URI。
设置数据发布
在 imports/api目录中创建名为 restaurantsPublications.js 的文件,然后粘贴以下代码:
import { Meteor } from 'meteor/meteor'; import { RestaurantsCollection } from './restaurantsCollection'; // Publishes all restaurants Meteor.publish('restaurants', function publishRestaurants() { console.log('Publishing all restaurants...'); const cursor = RestaurantsCollection.find({}, { limit: 200 }); // Limit for performance console.log('Publication cursor created for all restaurants'); return cursor; }); // Publishes restaurants that match the "borough" and "name" filters Meteor.publish('restaurants.filtered', function publishFilteredRestaurants() { console.log('Publishing filtered restaurants...'); const query = { borough: 'Queens', name: { $regex: 'Moon', $options: 'i' } }; const cursor = RestaurantsCollection.find(query); console.log('Publication cursor created for filtered restaurants'); return cursor; });
此文件定义了允许客户端订阅餐厅数据的 Meteor 发布。其中包括以下出版物:
restaurants:发布所有餐厅,但将其限制为200,以避免性能问题restaurants.filtered:发布位于皇后区且名称中包含"Moon"的餐厅。$options参数指定此正则表达式字符串匹配不区分大小写。
定义插入操作
创建一个名为 scripts 的新目录,然后在此目录中创建一个名为 insertDemo.js 的文件。将以下代码粘贴到 insertDemo.js 中:
const { MongoClient } = require('mongodb'); const MONGO_URL = process.env.MONGO_URL; async function insertSampleRestaurant() { const client = new MongoClient(MONGO_URL); try { await client.connect(); const db = client.db(); const collection = db.collection('restaurants'); const doc = { name: "Honey Moon Coffee Shop", borough: "Queens", cuisine: "Café/Coffee/Tea", }; const result = await collection.insertOne(doc); console.log('Inserted restaurant with ID:', result.insertedId); } catch (error) { console.error('Error:', error); } finally { await client.close(); } } insertSampleRestaurant();
此文件定义了一个名为 insertSampleRestaurant() 的方法,该方法插入一个存储以下字段的文档:
name:"Honey Moon Coffee Shop"borough:"Queens"cuisine:"Café/Coffee/Tea"
您将在后续步骤中使用此文件演示 Meteor 的实时数据同步功能。
更新服务器配置
将 server/main.js 的内容替换为以下代码:
import { Meteor } from 'meteor/meteor'; import { RestaurantsCollection } from '../imports/api/restaurantsCollection'; import '../imports/api/restaurantsPublications'; Meteor.startup(async () => { // Check connection to restaurants collection try { const restaurantCount = await RestaurantsCollection.find().countAsync(); console.log(`Connected to MongoDB Atlas. Found ${restaurantCount} restaurants in the collection`); } catch (error) { console.error('Error connecting to restaurants collection:', error); } });
此文件导入必要的集合和发布。它还创建一个初创企业函数,通过打印 restaurants集合中的文档数量来验证MongoDB连接。
配置 Vue 组件
设置数据层后,按照本节中的步骤创建显示餐厅数据的 Vue 组件。
设置路由
导航到 imports/ui/router.js文件并粘贴以下代码:
import { createRouter, createWebHistory } from 'vue-router'; import RestaurantList from './views/RestaurantList.vue'; export const router = createRouter({ history: createWebHistory(), routes: [ { path: '/', name: 'home', component: RestaurantList, meta: { filter: false } }, { path: '/browse', name: 'browse', component: RestaurantList, meta: { filter: true } } ], });
此文件配置 Vue 路由并确定为每个路由渲染哪些内容。/ 路由显示所有餐厅数据,/browse 路由显示过滤后的餐厅数据。
创建 Restaurant 组件
在 imports/ui/components目录中,创建名为 Restaurant.vue 的文件,其中包含以下代码:
<script setup> defineProps({ restaurant: { type: Object, required: true, }, }); </script> <template> <tr class="border-b transition-colors hover:bg-gray-50"> <td class="p-4 align-middle">{{ restaurant.name }}</td> <td class="p-4 align-middle">{{ restaurant.borough }}</td> <td class="p-4 align-middle">{{ restaurant.cuisine }}</td> </tr> </template>
该组件将单个餐厅信息显示为表中的一行。
创建 RestaurantList 视图
在 imports/ui/views目录中,创建名为 RestaurantList.vue 的文件,其中包含以下代码:
<script setup> import Restaurant from '../components/Restaurant.vue'; import { subscribe, autorun } from 'vue-meteor-tracker'; import { RestaurantsCollection } from '../../api/restaurantsCollection'; import { useRoute, RouterLink } from 'vue-router'; import { computed } from 'vue'; const route = useRoute(); // Determines whether to show filtered results const isFiltered = computed(() => route.path === '/browse'); // Subscribes to both publications to avoid switching issues subscribe('restaurants'); subscribe('restaurants.filtered'); // Retrieves restaurants based on current route with client-side filtering as backup const restaurants = autorun(() => { let docs; if (isFiltered.value) { docs = RestaurantsCollection.find({ borough: 'Queens', name: { $regex: 'Moon', $options: 'i' } }).fetch(); console.log('Filtered restaurants found:', docs.length); } else { docs = RestaurantsCollection.find({}, { limit: 200 }).fetch(); console.log('All restaurants found:', docs.length); } return docs; }).result; // Determines the title based on the route const getTitle = computed(() => { return isFiltered.value ? 'Filtered Restaurants (Queens, containing "Moon")' : 'All Restaurants'; }); </script> <template> <div class="container mx-auto px-4"> <!-- Navigation --> <nav class="flex justify-between items-center mb-6 p-4 bg-white shadow rounded"> <div class="flex space-x-4"> <RouterLink to="/" class="px-4 py-2 text-blue-600 hover:bg-blue-50 rounded transition-colors" :class="{ 'bg-blue-100 font-semibold': !isFiltered }" > All Restaurants </RouterLink> <RouterLink to="/browse" class="px-4 py-2 text-blue-600 hover:bg-blue-50 rounded transition-colors" :class="{ 'bg-blue-100 font-semibold': isFiltered }" > Browse Filtered </RouterLink> </div> </nav> <!-- Header --> <header class="mb-6"> <h1 class="text-4xl font-bold text-gray-800 my-4">Restaurant Directory</h1> <h3 class="text-lg font-semibold text-gray-600">{{ getTitle }}</h3> </header> <!-- Restaurant Table --> <div class="border rounded-lg overflow-hidden shadow"> <div class="relative w-full overflow-auto"> <table class="w-full text-sm"> <thead class="bg-gray-100 border-b-2 border-gray-300"> <tr class="border-b-2 border-gray-400"> <th class="h-14 px-4 text-left align-middle font-bold text-gray-900 text-base tracking-wide"> Name </th> <th class="h-14 px-4 text-left align-middle font-bold text-gray-900 text-base tracking-wide"> Borough </th> <th class="h-14 px-4 text-left align-middle font-bold text-gray-900 text-base tracking-wide"> Cuisine </th> </tr> </thead> <tbody> <Restaurant v-for="restaurant in restaurants" :key="restaurant._id" :restaurant="restaurant" /> </tbody> </table> <!-- Empty state --> <div v-if="restaurants.length === 0" class="p-8 text-center text-gray-500"> <p>No restaurants found. Ensure that your connection URI is correct and includes the sample_restaurants database name.</p> <p v-if="isFiltered" class="text-sm mt-2"> Try the "All Restaurants" tab to see all available restaurants. </p> </div> </div> </div> <!-- Restaurant count --> <div class="mt-4 text-sm text-gray-600"> Showing {{ restaurants.length }} restaurant{{ restaurants.length !== 1 ? 's' : '' }} </div> </div> </template>
该组件处理餐厅列表显示,并根据当前路线在显示所有餐厅或筛选结果之间自动切换。
运行应用程序
最后,按照本节中的步骤运行应用程序并查看呈现的餐厅数据。
在浏览器中打开应用程序
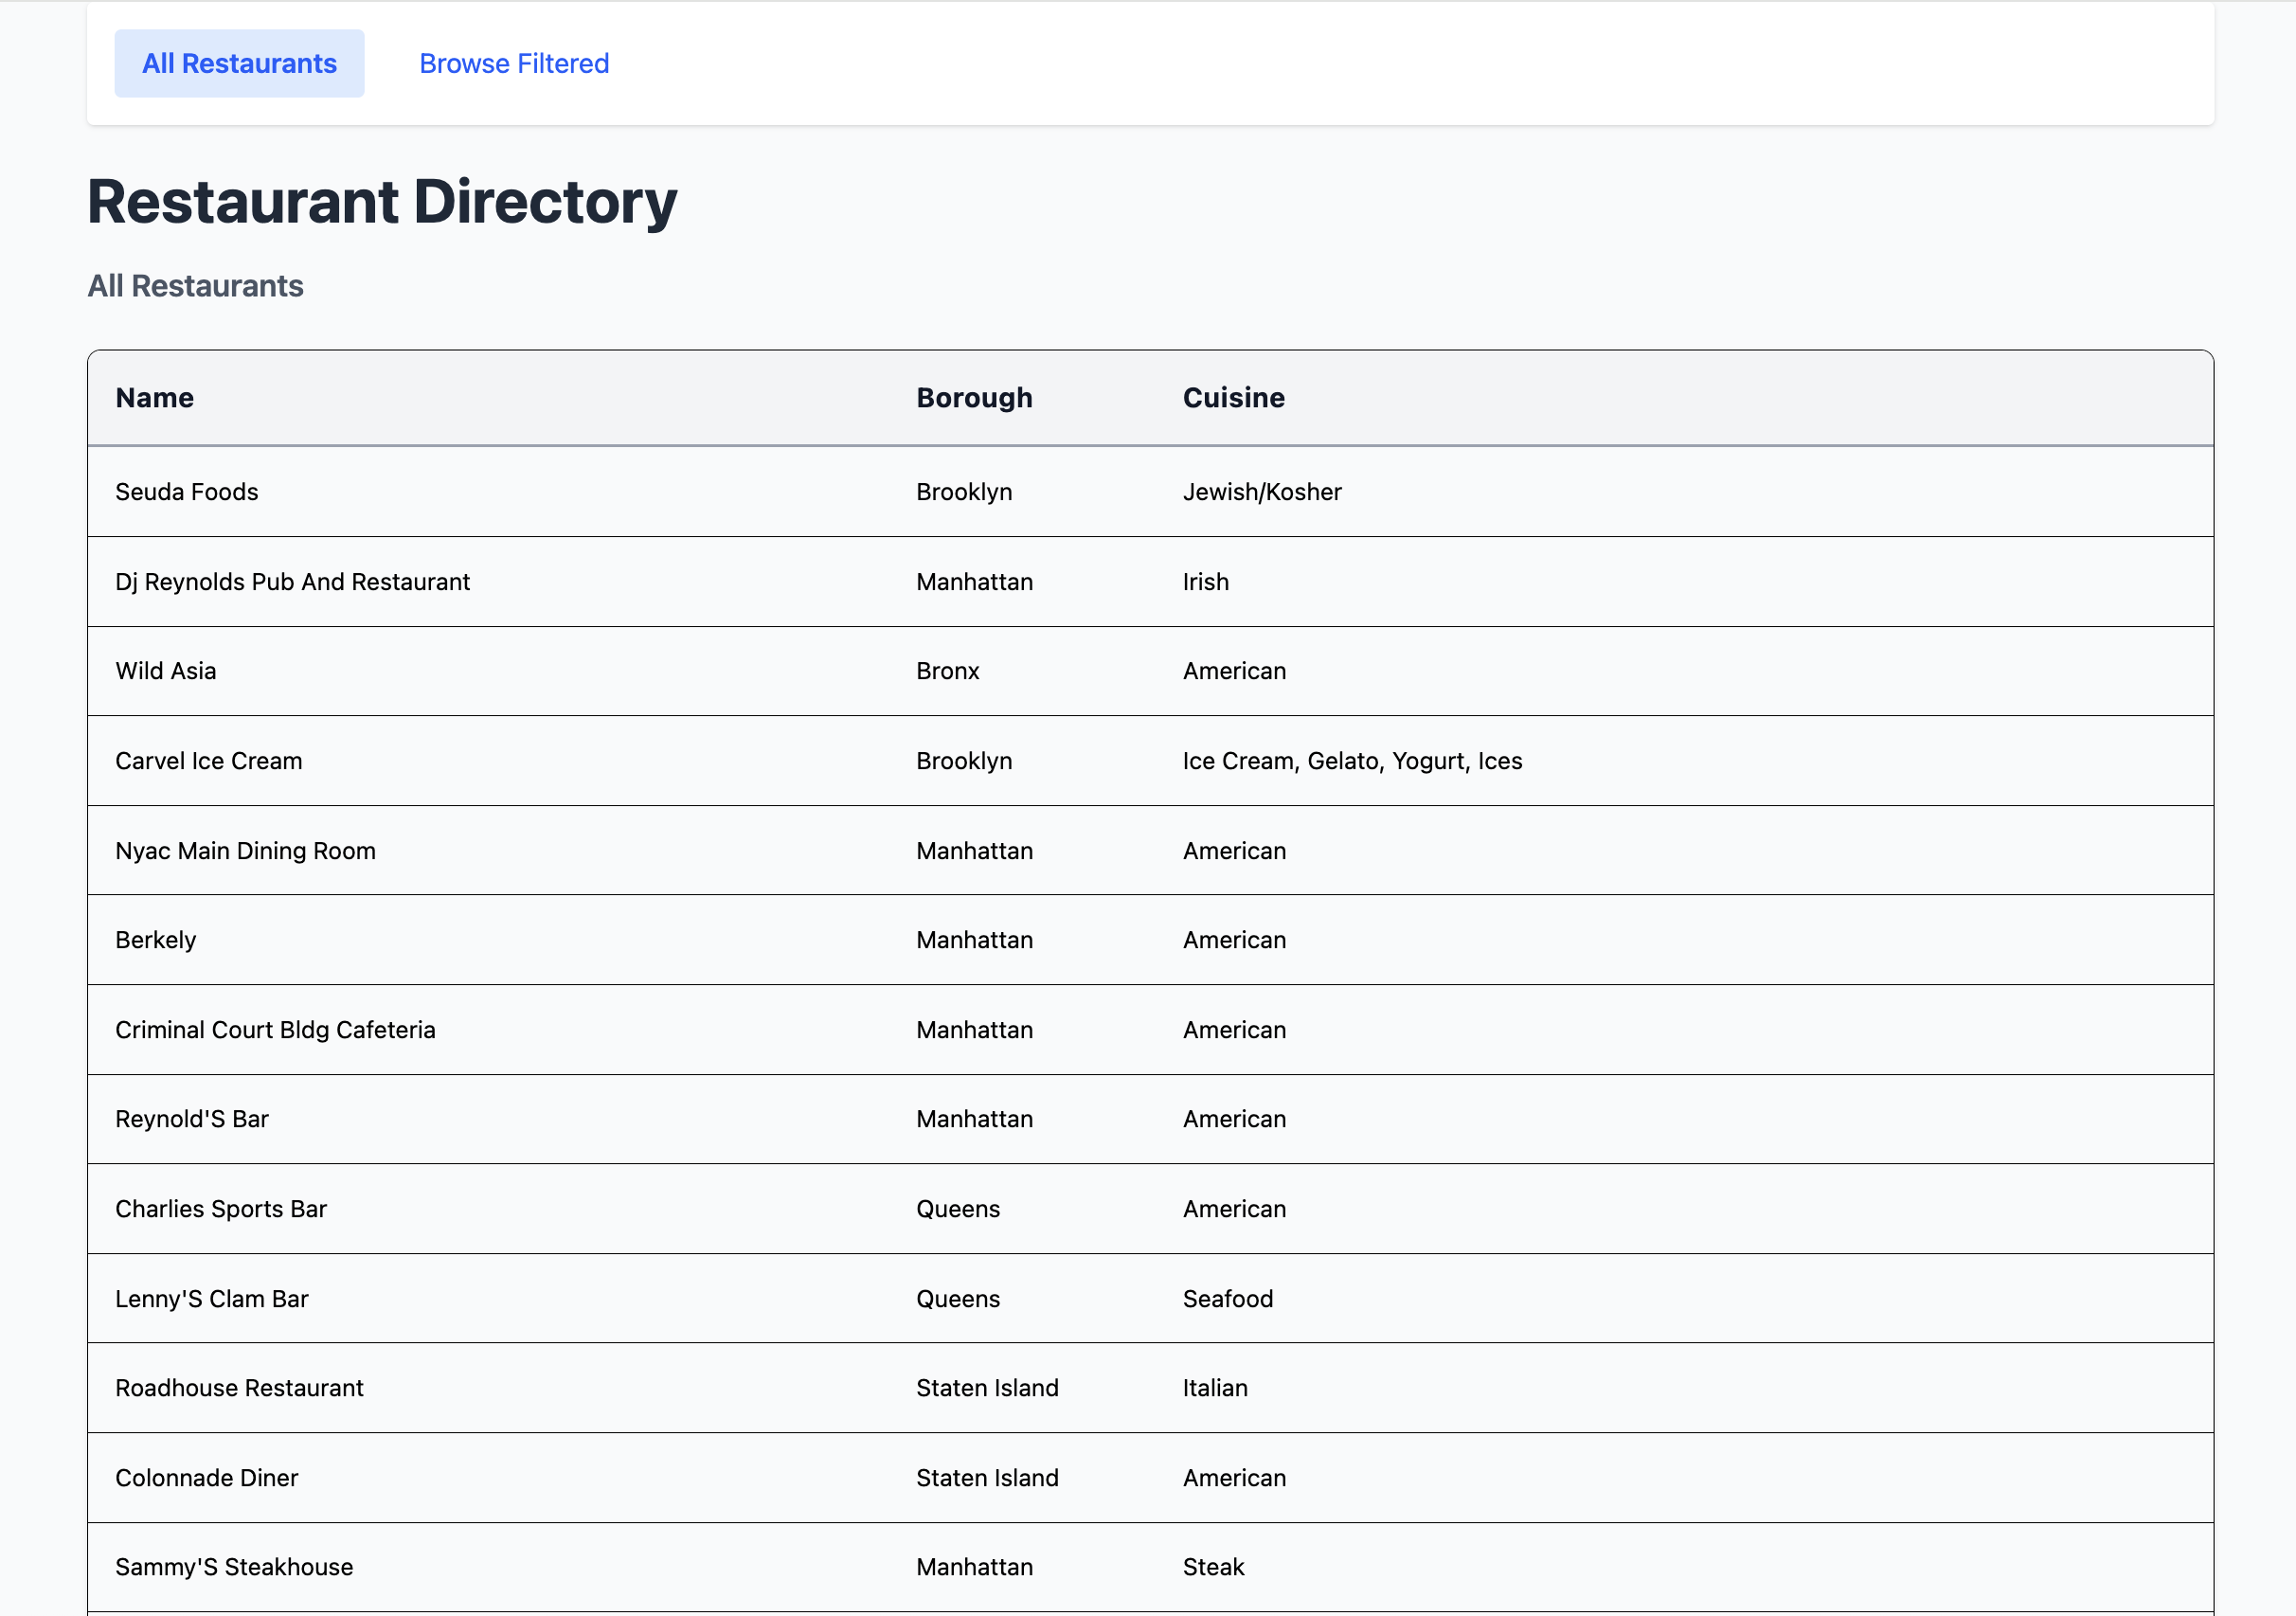
在网络浏览器中打开 http://localhost:3000 / 。初始登陆页面显示200 sample_restaurants.restaurants集合中的 未经筛选的餐厅列表:
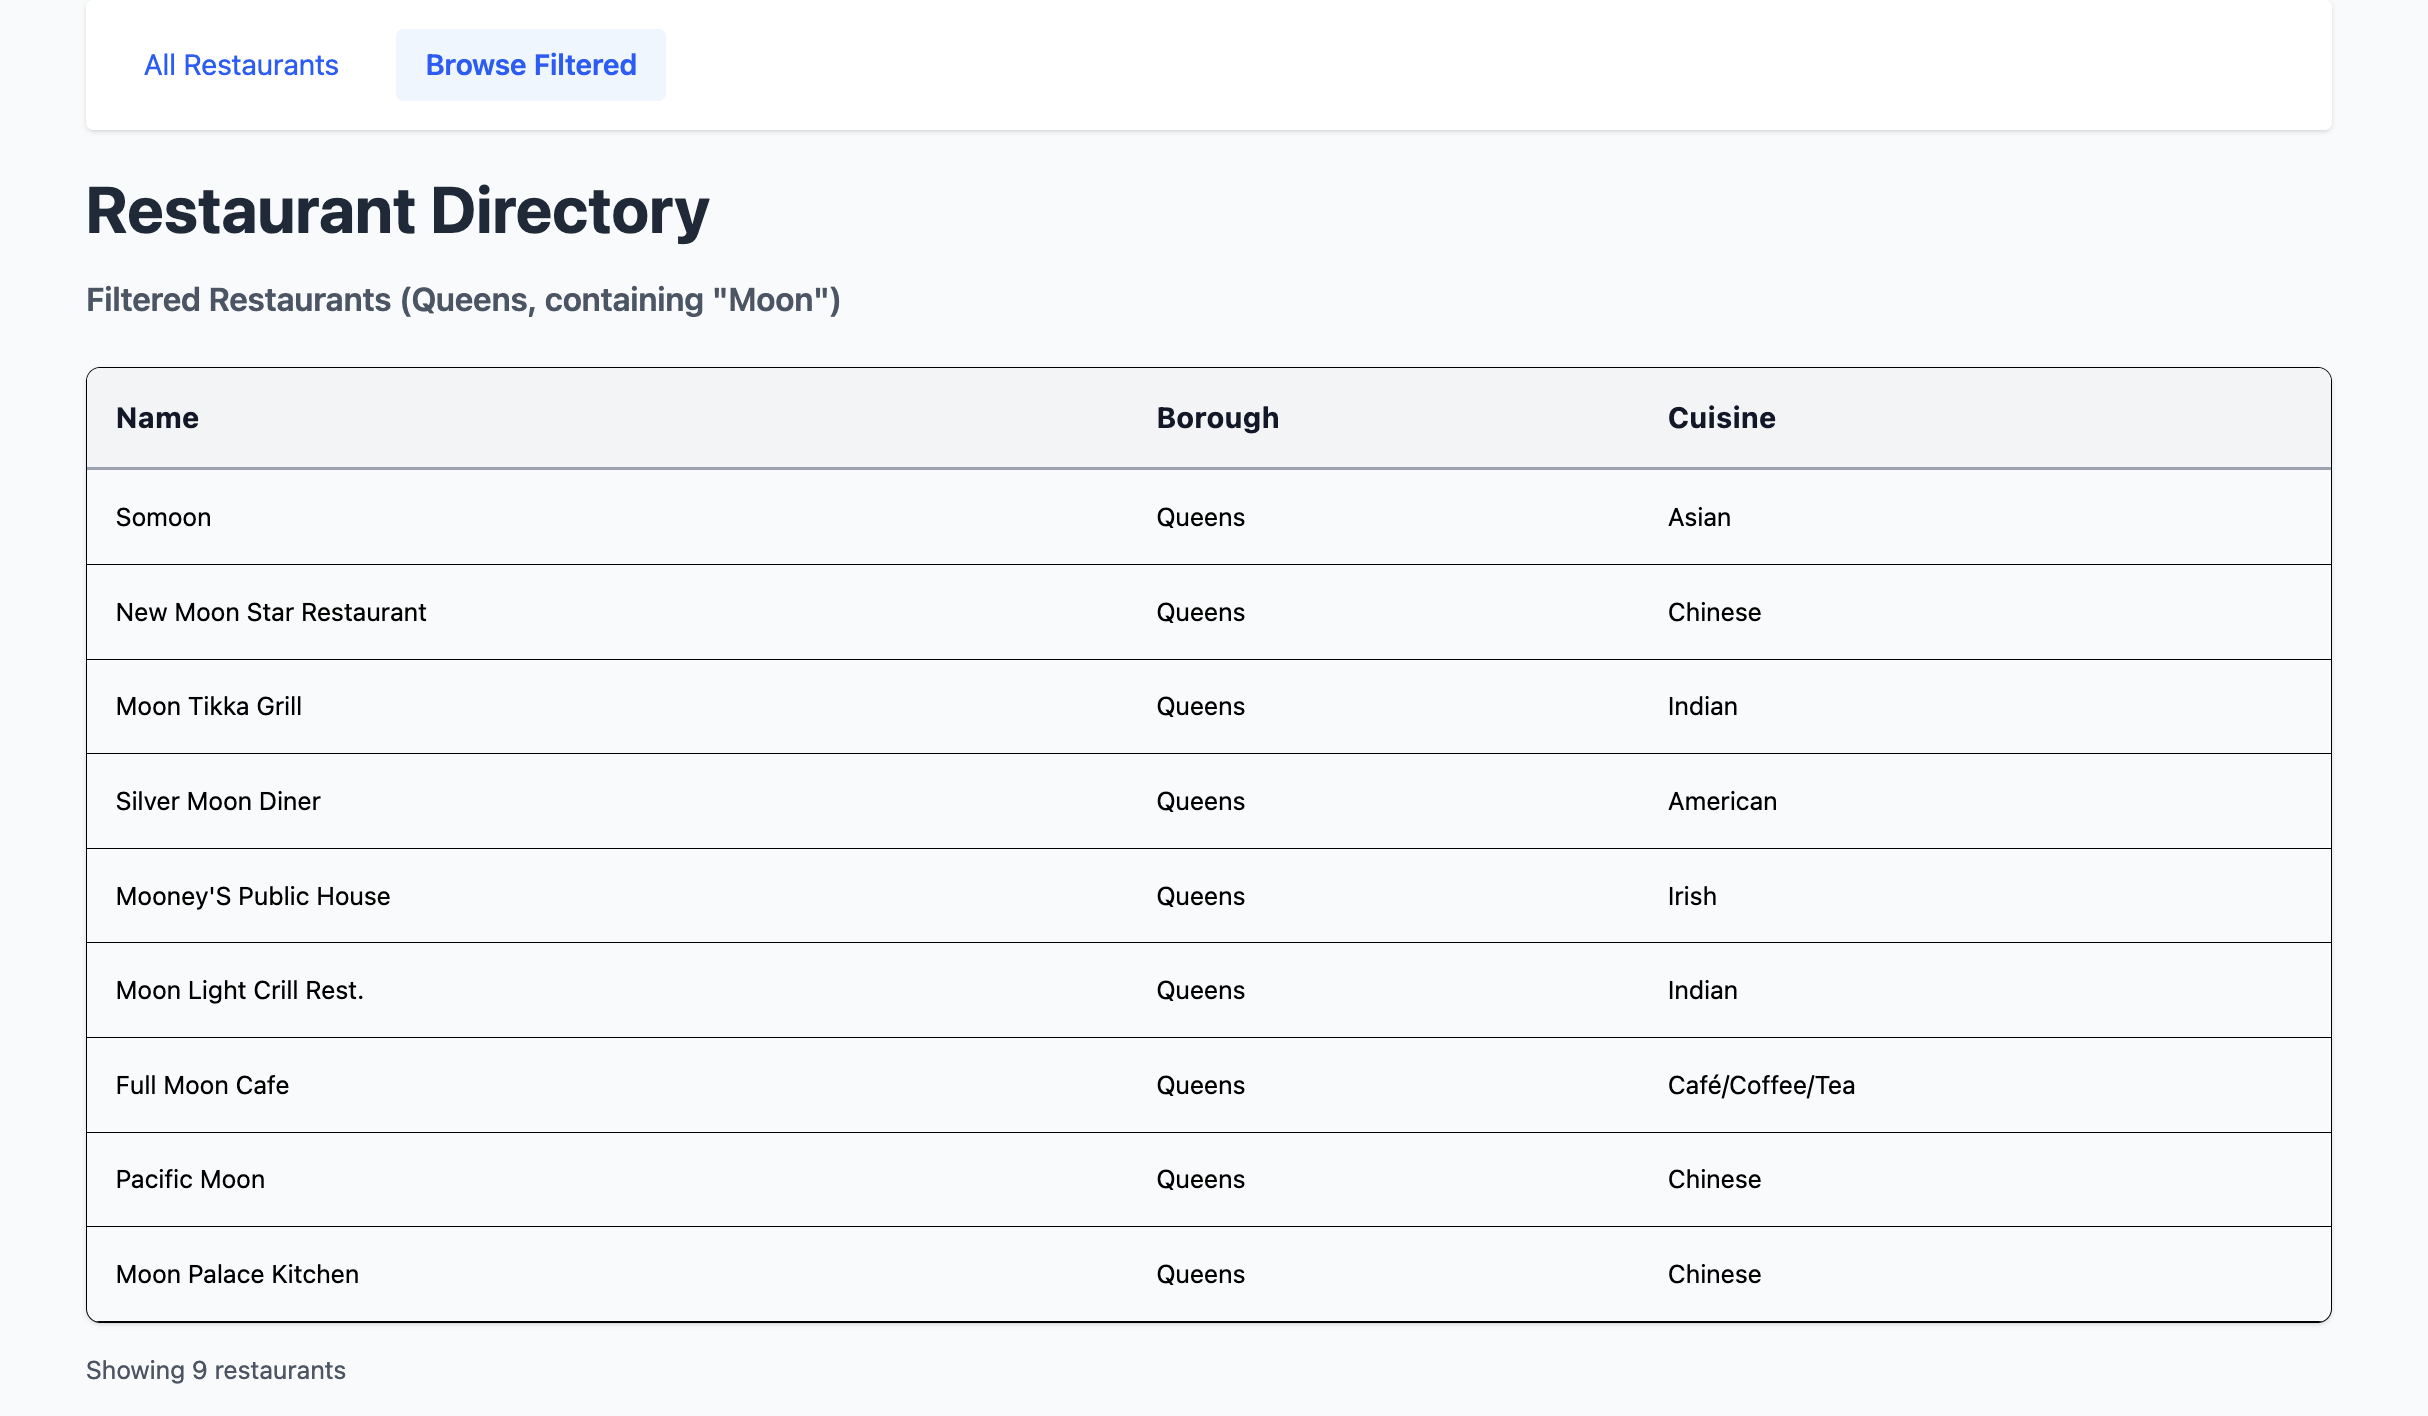
在页面顶部,单击 Browse Filtered 按钮可查看皇后区名称中包含 "Moon" 的餐厅:
查看实时数据变化
您可以通过插入示例文档并在应用程序前端查看更改来探索 Meteor 的实时数据同步功能。
打开第二个终端窗口并导航到项目目录。运行与上一个步骤中所示相同的命令来导出MongoDB连接 URI:
export MONGO_URL="<connection URI>"
然后,运行以下命令插入 name 值为 "Honey Moon Coffee Shop" 的示例文档:
node scripts/insertDemo.js
您可以在Filtered Restaurants http://localhost:3000 /browse URL 的 表中查看新文档。
恭喜您完成快速入门教程!
完成这些步骤后,您就拥有一个 Meteor 和 Vue Web应用程序,它连接到您的MongoDB 部署、对示例餐厅数据运行查询,并通过实时响应性渲染结果。
其他资源
要学习、了解有关 Meteor、Vue 和 MongoDB 的更多信息,请查看以下资源:
Meteor 文档
Vue 3 documentation
vue-meteor-tracker package