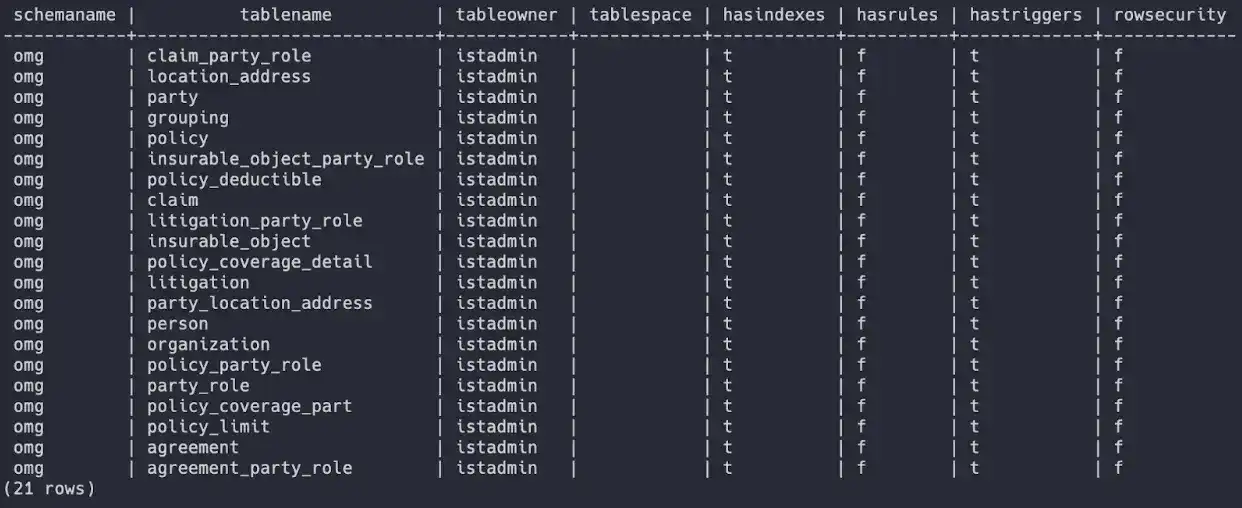
This sample tutorial uses the Relational Migrator to transform a 21-table insurance data schema into a simple five-collection MongoDB model.
About this Task
In the sample data set, all people, organizations, and groups are represented as Parties, which can be related to other major objects with specified roles. The Party design also provides a common approach for describing communication identifiers, relationships between parties, and legal identifiers.
In this tutorial, you will use the Relational Migrator to port the Object Management Group’s Party Role model from a relational structure to MongoDB’s document model. Specifically, you will refactor the Party model in the context of the Policy, Claim, and Litigation domains.
Before You Begin
This example requires the following applications:
MongoDB Relational Migrator version 1.4.3 or higher. To download the latest version, see the MongoDB Relational Migrator release page.
MongoDB Atlas: Ensure you have access to an Atlas cluster with write permissions to create the new database to where you will migrate the data.
PostgreSQL version 16 or higher: Ensure you have access to a PostgreSQL database server instance with permissions to create a new database and user. The instance can be in the cloud, on-prem, or on your local machine. In addition to PostgreSQL, install the following PostgreSQL Client Applications:
psql: a command-line application that allows you to interactively type in queries, issue them to PostgreSQL, and see the query results.
pg_restore: A command-line application that restores the PostgreSQL database from the sample archive file.
Additionally, download the mongodb_insurance_model.tar
sample archive file.
This file contains all the tables, relationships, and sample data from the Party
Role model in a tabular format.
To replicate the Party Role model in PostgreSQL, follow the following steps:

Steps
The example tutorial consists of the following steps:
Connect to Relational Migrator
Connect your PostgreSQL database to Relational Migrator. See Connect to Relational Migrator.
Refactor the Party domain
Refactor the Party domain in the MongoDB view of Relational Migrator. See Refactor the Party Domain.
Refactor the Policy domain
Refactor the Policy domain in the MongoDB view of Relational Migrator. See Refactor the Policy Domain.
Refactor the Claim domain
Refactor the Claim domain in the MongoDB view of Relational Migrator. See Refactor the Claim Domain.
Refactor the Litigation domain
Refactor the Litigation domain in the MongoDB view of Relational Migrator. See Refactor the Litigation Domain.
Migrate your data to MongoDB
Migrate your data to your MongoDB instance by using the Relational Migrator. See Migrate Your Data to MongoDB.