Visão geral
Neste guia, você pode aprender como criar um aplicativo da web Angular que usa a pilha MEAN. A pilha MEAN é uma estrutura de desenvolvimento web que usa MongoDB, Express, Angular e Node.js e consiste nas seguintes camadas:
Camada de banco de dados: o MongoDB fornece armazenamento e recuperação de dados.
Camada de aplicativos: Express e Node.js compõem o nível intermediário da lógica do lado do servidor.
Camada de apresentação: o Angular implementa a interface do usuário e as interações de front-end.
Por que usar MongoDB em um aplicativo Angular?
Angular é uma estrutura TypeScript usada para criar aplicativos web dinâmicos. Ele fornece pacotes integrados para uma variedade de recursos de aplicativo, e sua arquitetura baseada em componentes torna os aplicativos altamente reutilizáveis.
Como o TypeScript é baseado em JavaScript, cada elemento da pilha MEAN é baseado em JavaScript e JSON. Como resultado, a integração entre estes elementos é simples. O front-end Angular cria documentos JSON que o MongoDB pode armazenar diretamente no formato BSON, uma extensão JSON binária, e o Express fornece uma framework mínima que usa JavaScript. O MongoDB oferece recursos avançados de indexação e query para documentos BSON e inclui um driver nativo para Node.js , o que o torna o armazenamento de dados ideal para aplicativos JavaScript.
Tutorial de início rápido
Este tutorial mostra como criar um aplicativo da web usando a pilha MEAN. O aplicativo acessa dados de restaurantes de amostra, queries os dados e exibe os resultados em um site hospedado localmente. O tutorial também inclui instruções para se conectar a um cluster MongoDB hospedado no MongoDB Atlas e acessar e exibir dados de seu banco de dados.
Dica
Se você preferir se conectar ao MongoDB usando o driver Node.js sem o Angular, consulte o guia Introdução ao driver Node.js.
Configurar seu projeto
Siga as etapas nesta seção para instalar as dependências do projeto, criar um cluster do Atlas e configurar os diretórios do aplicativo.
Verifique os pré-requisitos.
Para criar o aplicativo Quick Start, instale o seguinte software em seu ambiente de desenvolvimento:
Pré-requisitos | Notas |
|---|---|
Baixe a versão LTS mais recente ou a versão mais recente. | |
Instale globalmente executando o | |
Editor de código | Use o editor de sua escolha. |
Aplicativo de terminal e shell | Para usuários do MacOS, use o Terminal ou um aplicativo semelhante. Para usuários do Windows, use o PowerShell. |
Crie um cluster do MongoDB Atlas.
O MongoDB Atlas é um serviço de banco de dados em nuvem totalmente gerenciado que hospeda suas implantações do MongoDB. Se você não tiver uma implementação do MongoDB, poderá criar um cluster do MongoDB gratuitamente concluindo o tutorial de Introdução ao MongoDB. O tutorial de Introdução ao MongoDB também demonstra como carregar conjuntos de dados de exemplo em seu cluster, incluindo o banco de dados sample_restaurants usado neste tutorial.
Para se conectar ao cluster MongoDB, você deve usar um URI de conexão. Para aprender como recuperar seu URI de conexão, veja a seção Adicionar sua string de conexão do tutorial de Introdução ao MongoDB.
Importante
Salve sua string de conexão em um local seguro.
Crie seus diretórios de projeto .
Execute os seguintes comandos no seu terminal para criar um diretório para seu projeto denominado angular-quickstart:
mkdir angular-quickstart cd angular-quickstart
Em seguida, execute os seguintes comandos a partir do diretório angular-quickstart para criar uma pasta para o backend denominada server e inicializar o arquivo package.json:
mkdir server cd server npm init -y
Modifique seu arquivo package.json.
Navegue até o arquivo package.json no diretório angular-quickstart/server. Para usar os módulos ECMAScript, o formato padrão para empacotar código JavaScript para reutilização, substitua a linha existente que especifica o campo "type" pela seguinte linha:
"type": "module",
Instale as dependências.
Execute o seguinte comando para instalar as dependências mongodb, express, cors e dotenv:
npm install mongodb express cors dotenv
Este comando instala o MongoDB, o framework web Express, o pacote cors Node.js para compartilhamento de recursos entre origens e Dotenv para carregar variáveis de ambiente.
Em seguida, execute o seguinte comando para instalar o TypeScript e as definições de tipo necessárias:
npm install -D typescript @types/node @types/cors @types/express tsx
Este comando instala o TypeScript, definições de tipo para Node.js e Express, e tsx, uma ferramenta para executar arquivos TypeScript diretamente.
Configurar o back-end
Após configurar a estrutura e as dependências do projeto, siga as etapas desta seção para configurar seu servidor da web e conectar-se ao MongoDB.
Configure seu servidor da web Express .
Crie um arquivo denominado server.ts no seu diretório angular-quickstart/server e cole o seguinte código:
import express from "express"; import cors from "cors"; import restaurants from "./routes/restaurant.js"; const PORT = process.env.PORT || 5050; const app = express(); app.use(cors()); app.use(express.json()); app.use("/restaurant", restaurants); // start the Express server app.listen(PORT, () => { console.log(`Server listening on port ${PORT}`); });
Defina variáveis de ambiente.
No diretório server, crie um arquivo .env e cole o seguinte código:
MONGODB_URI=<connection string> PORT=5050
Substitua o placeholder <connection string> pela string de conexão que você salvou em uma etapa anterior.
Conecte seu servidor ao banco de dados.
No diretório server, crie um subdiretório denominado db. Adicione um novo arquivo denominado connection.ts a este subdiretório e cole o seguinte código:
import "dotenv/config"; import { MongoClient, Db } from "mongodb"; const uri = process.env.MONGODB_URI || ""; const client = new MongoClient(uri); try { // Connects the client to the server await client.connect(); // Sends a ping to confirm a successful connection await client.db("admin").command({ ping: 1 }); console.log( "Pinged your deployment. You successfully connected to MongoDB!" ); } catch(err) { console.error(err); } const db: Db = client.db("sample_restaurants"); export default db;
Esse arquivo se conecta à sua implantação do MongoDB, acessa o banco de dados sample_restaurants e testa a conexão com o banco de dados.
Criar pontos de extremidade API do servidor.
No diretório server, crie um subdiretório denominado routes. Crie um arquivo denominado restaurant.ts neste subdiretório e cole o seguinte código:
import express, { Request, Response } from "express"; import db from "../db/connection.js"; // Creates an instance of the Express router, used to define our routes const router = express.Router(); // Gets a list of all the restaurants router.get("/", async (req: Request, res: Response) => { let collection = db.collection("restaurants"); let results = await collection.find({}).toArray(); res.send(results).status(200); }); // Lists restaurants that match the query filter router.get("/browse", async (req: Request, res: Response) => { try { let collection = db.collection("restaurants"); let query = { borough: "Queens", name: { $regex: "Moon", $options: "i" }, }; let results = await collection.find(query).toArray(); res.send(results).status(200); } catch (err) { console.error(err); res.status(500).send("Error browsing restaurants"); } }); export default router;
Este arquivo acessa a coleção restaurants no banco de dados do sample_restaurants e define os seguintes pontos de extremidade do GET:
/: recupera todos os restaurantes da coleção de amostras/browse: recupera restaurantes que correspondem aos critérios de query, que aplica um filtro para restaurantes em Queens que contêm a palavra"Moon"no nome
Configurar o front-end
Depois de configurar o backend do aplicativo, siga as etapas nesta seção para configurar o Angular e adicionar os componentes de frontend.
Crie o aplicativo Angular.
Navegue até o diretório angular-quickstart e execute o seguinte comando para criar um novo aplicativo Angular:
ng new client
Este comando solicita que você responda a uma série de perguntas de configuração. Para cada pergunta, escolha as seguintes respostas:
Qual sistema de folha de estilo você gostaria de usar? Selecionar CSS do Tailwind
Deseja ativar a renderização do lado do servidor (SSR) e a geração de sites estáticos (SSG/Prerendering)?Insira N
Quais ferramentas de IA você deseja configurar com as práticas recomendadas do Angular? Selecione as ferramentas de sua escolha
Após executar o comando, seu projeto tem um diretório client que contém andaime front-end. O comando também configura seu projeto para usar o TailwindCSS, uma framework para formatação da IU.
Crie o serviço de restaurante.
No diretório client, execute o seguinte comando para gerar um serviço que lida com chamadas de API para seu backend:
ng generate service restaurant
Navegue até o arquivo client/src/app/restaurant.ts e substitua o conteúdo pelo seguinte código:
import { Injectable } from '@angular/core'; import { HttpClient } from '@angular/common/http'; import { Observable } from 'rxjs'; export interface Restaurant { _id: string; name: string; borough: string; cuisine: string; } ({ providedIn: 'root' }) export class RestaurantService { private apiUrl = 'http://localhost:5050/restaurant'; constructor(private http: HttpClient) {} getAllRestaurants(): Observable<Restaurant[]> { return this.http.get<Restaurant[]>(this.apiUrl); } getFilteredRestaurants(): Observable<Restaurant[]> { return this.http.get<Restaurant[]>(`${this.apiUrl}/browse`); } }
Este serviço define métodos para buscar dados de restaurantes de sua API Express.
Configurar roteamento.
Navegue até o arquivo client/src/app/app.routes.ts e substitua o conteúdo pelo seguinte código:
import { Routes } from '@angular/router'; import { RestaurantListComponent } from './restaurant-list/restaurant-list'; export const routes: Routes = [ { path: '', component: RestaurantListComponent }, { path: 'browse', component: RestaurantListComponent } ];
Este arquivo configura o roteamento do lado do cliente e define as seguintes rotas:
/: exibe todos os restaurantes do ponto de extremidade da API/restaurant//browse: exibe restaurantes filtrados do ponto de extremidade da API/restaurant/browse
Atualize a configuração do aplicativo.
Navegue até o arquivo client/src/app/app.config.ts e substitua o conteúdo pelo seguinte código:
import { ApplicationConfig, provideZoneChangeDetection } from '@angular/core'; import { provideRouter } from '@angular/router'; import { provideHttpClient } from '@angular/common/http'; import { routes } from './app.routes'; export const appConfig: ApplicationConfig = { providers: [ provideZoneChangeDetection({ eventCoalescing: true }), provideRouter(routes), provideHttpClient() ] };
Esta configuração ativa a funcionalidade do cliente HTTP para fazer solicitações de API.
Crie o componente da lista de restaurantes.
Execute o seguinte comando a partir do diretório client para gerar um componente para exibir restaurantes:
ng generate component restaurant-list
Navegue até o arquivo client/src/app/restaurant-list/restaurant-list.ts e substitua o conteúdo pelo seguinte código:
import { Component, OnInit } from '@angular/core'; import { CommonModule } from '@angular/common'; import { Router } from '@angular/router'; import { RestaurantService, Restaurant } from '../restaurant'; ({ selector: 'app-restaurant-list', standalone: true, imports: [CommonModule], templateUrl: './restaurant-list.html', styleUrl: './restaurant-list.css' }) export class RestaurantListComponent implements OnInit { restaurants: Restaurant[] = []; loading = true; error = ''; constructor( private restaurantService: RestaurantService, public router: Router ) {} ngOnInit(): void { this.loadRestaurants(); } loadRestaurants(): void { const isFiltered = this.router.url === '/browse'; const observable = isFiltered ? this.restaurantService.getFilteredRestaurants() : this.restaurantService.getAllRestaurants(); observable.subscribe({ next: (data) => { this.restaurants = data; this.loading = false; }, error: (err) => { this.error = 'Failed to load restaurants'; this.loading = false; console.error('Error loading restaurants:', err); } }); } }
Em seguida, navegue até o arquivo client/src/app/restaurant-list/restaurant-list.html e substitua o conteúdo pelo seguinte código:
<div *ngIf="loading" class="text-center py-8"> <p class="text-gray-600">Loading restaurants...</p> </div> <div *ngIf="error" class="bg-red-100 border border-red-400 text-red-700 px-4 py-3 rounded"> {{ error }} </div> <div *ngIf="!loading && !error"> <h3 class="text-lg font-semibold p-4"> {{ router.url === '/browse' ? 'Filtered Restaurants (Queens, containing "Moon")' : 'All Restaurants' }} </h3> <div class="border rounded-lg overflow-hidden"> <div class="relative w-full overflow-auto"> <table class="w-full caption-bottom text-sm"> <thead class="[&_tr]:border-b"> <tr class="border-b transition-colors hover:bg-muted/50 data-[state=selected]:bg-muted"> <th class="h-12 px-4 text-left align-middle font-medium text-muted-foreground [&:has([role=checkbox])]:pr-0"> Name </th> <th class="h-12 px-4 text-left align-middle font-medium text-muted-foreground [&:has([role=checkbox])]:pr-0"> Borough </th> <th class="h-12 px-4 text-left align-middle font-medium text-muted-foreground [&:has([role=checkbox])]:pr-0"> Cuisine </th> </tr> </thead> <tbody class="[&_tr:last-child]:border-0"> @for (restaurant of restaurants; track restaurant._id) { <tr class="border-b transition-colors hover:bg-muted/50 data-[state=selected]:bg-muted"> <td class="p-4 align-middle [&:has([role=checkbox])]:pr-0"> {{ restaurant.name }} </td> <td class="p-4 align-middle [&:has([role=checkbox])]:pr-0"> {{ restaurant.borough }} </td> <td class="p-4 align-middle [&:has([role=checkbox])]:pr-0"> {{ restaurant.cuisine }} </td> </tr> } </tbody> </table> </div> </div> </div>
Este componente recupera e exibe as informações do restaurante com base na rota atual.
Atualize o componente principal do aplicativo.
Navegue até o arquivo client/src/app/app.ts e substitua o conteúdo pelo seguinte código:
import { Component } from '@angular/core'; import { RouterOutlet, RouterLink, RouterLinkActive } from '@angular/router'; ({ selector: 'app-root', standalone: true, imports: [RouterOutlet, RouterLink, RouterLinkActive], templateUrl: './app.html', styleUrl: './app.css' }) export class AppComponent { title = 'Restaurant Browser'; }
Em seguida, navegue até o arquivo client/src/app/app.html e substitua o conteúdo pelo seguinte código:
<div class="w-full p-6"> <nav class="flex justify-between items-center mb-6"> <a routerLink="/"> <img alt="MongoDB logo" class="h-10 inline" src="https://d3cy9zhslanhfa.cloudfront.net/media/3800C044-6298-4575-A05D5C6B7623EE37/4B45D0EC-3482-4759-82DA37D8EA07D229/webimage-8A27671A-8A53-45DC-89D7BF8537F15A0D.png" /> </a> <div class="flex gap-4"> <a routerLink="/" routerLinkActive="font-bold" [routerLinkActiveOptions]="{exact: true}" class="text-blue-600 hover:underline"> All Restaurants </a> <a routerLink="/browse" routerLinkActive="font-bold" class="text-blue-600 hover:underline"> Filtered Restaurants </a> </div> </nav> <router-outlet></router-outlet> </div>
Este é o principal componente do aplicativo que inclui navegação e renderiza os componentes secundários apropriados com base na rota atual.
Atualize seu arquivo principal.
Navegue até o arquivo client/src/main.ts e substitua o conteúdo pelo seguinte código:
import 'zone.js'; import { bootstrapApplication } from '@angular/platform-browser'; import { appConfig } from './app/app.config'; import { AppComponent } from './app/app'; bootstrapApplication(AppComponent, appConfig) .catch((err) => console.error(err));
Este arquivo atua como o ponto de entrada para seu aplicativo, aplicando e renderizando sua configuração.
Execute seu aplicativo
Por fim, siga as etapas nesta seção para executar seu aplicativo e visualizar os dados renderizados do restaurante.
Execute o aplicativo cliente.
Em uma janela de terminal separada, navegue até o diretório client. Execute o seguinte comando para iniciar o frontend do Angular:
ng serve
Se bem-sucedido, este comando gera as seguintes informações:
Application bundle generation complete. Watch mode enabled. Watching for file changes... NOTE: Raw file sizes do not reflect development server per-request transformations. ➜ Local: http://localhost:4200/ ➜ press h + enter to show help
Seu aplicativo Angular faz solicitações HTTP da porta 4200 para a porta 5050 para recuperar dados.
Abra o site do aplicativo.
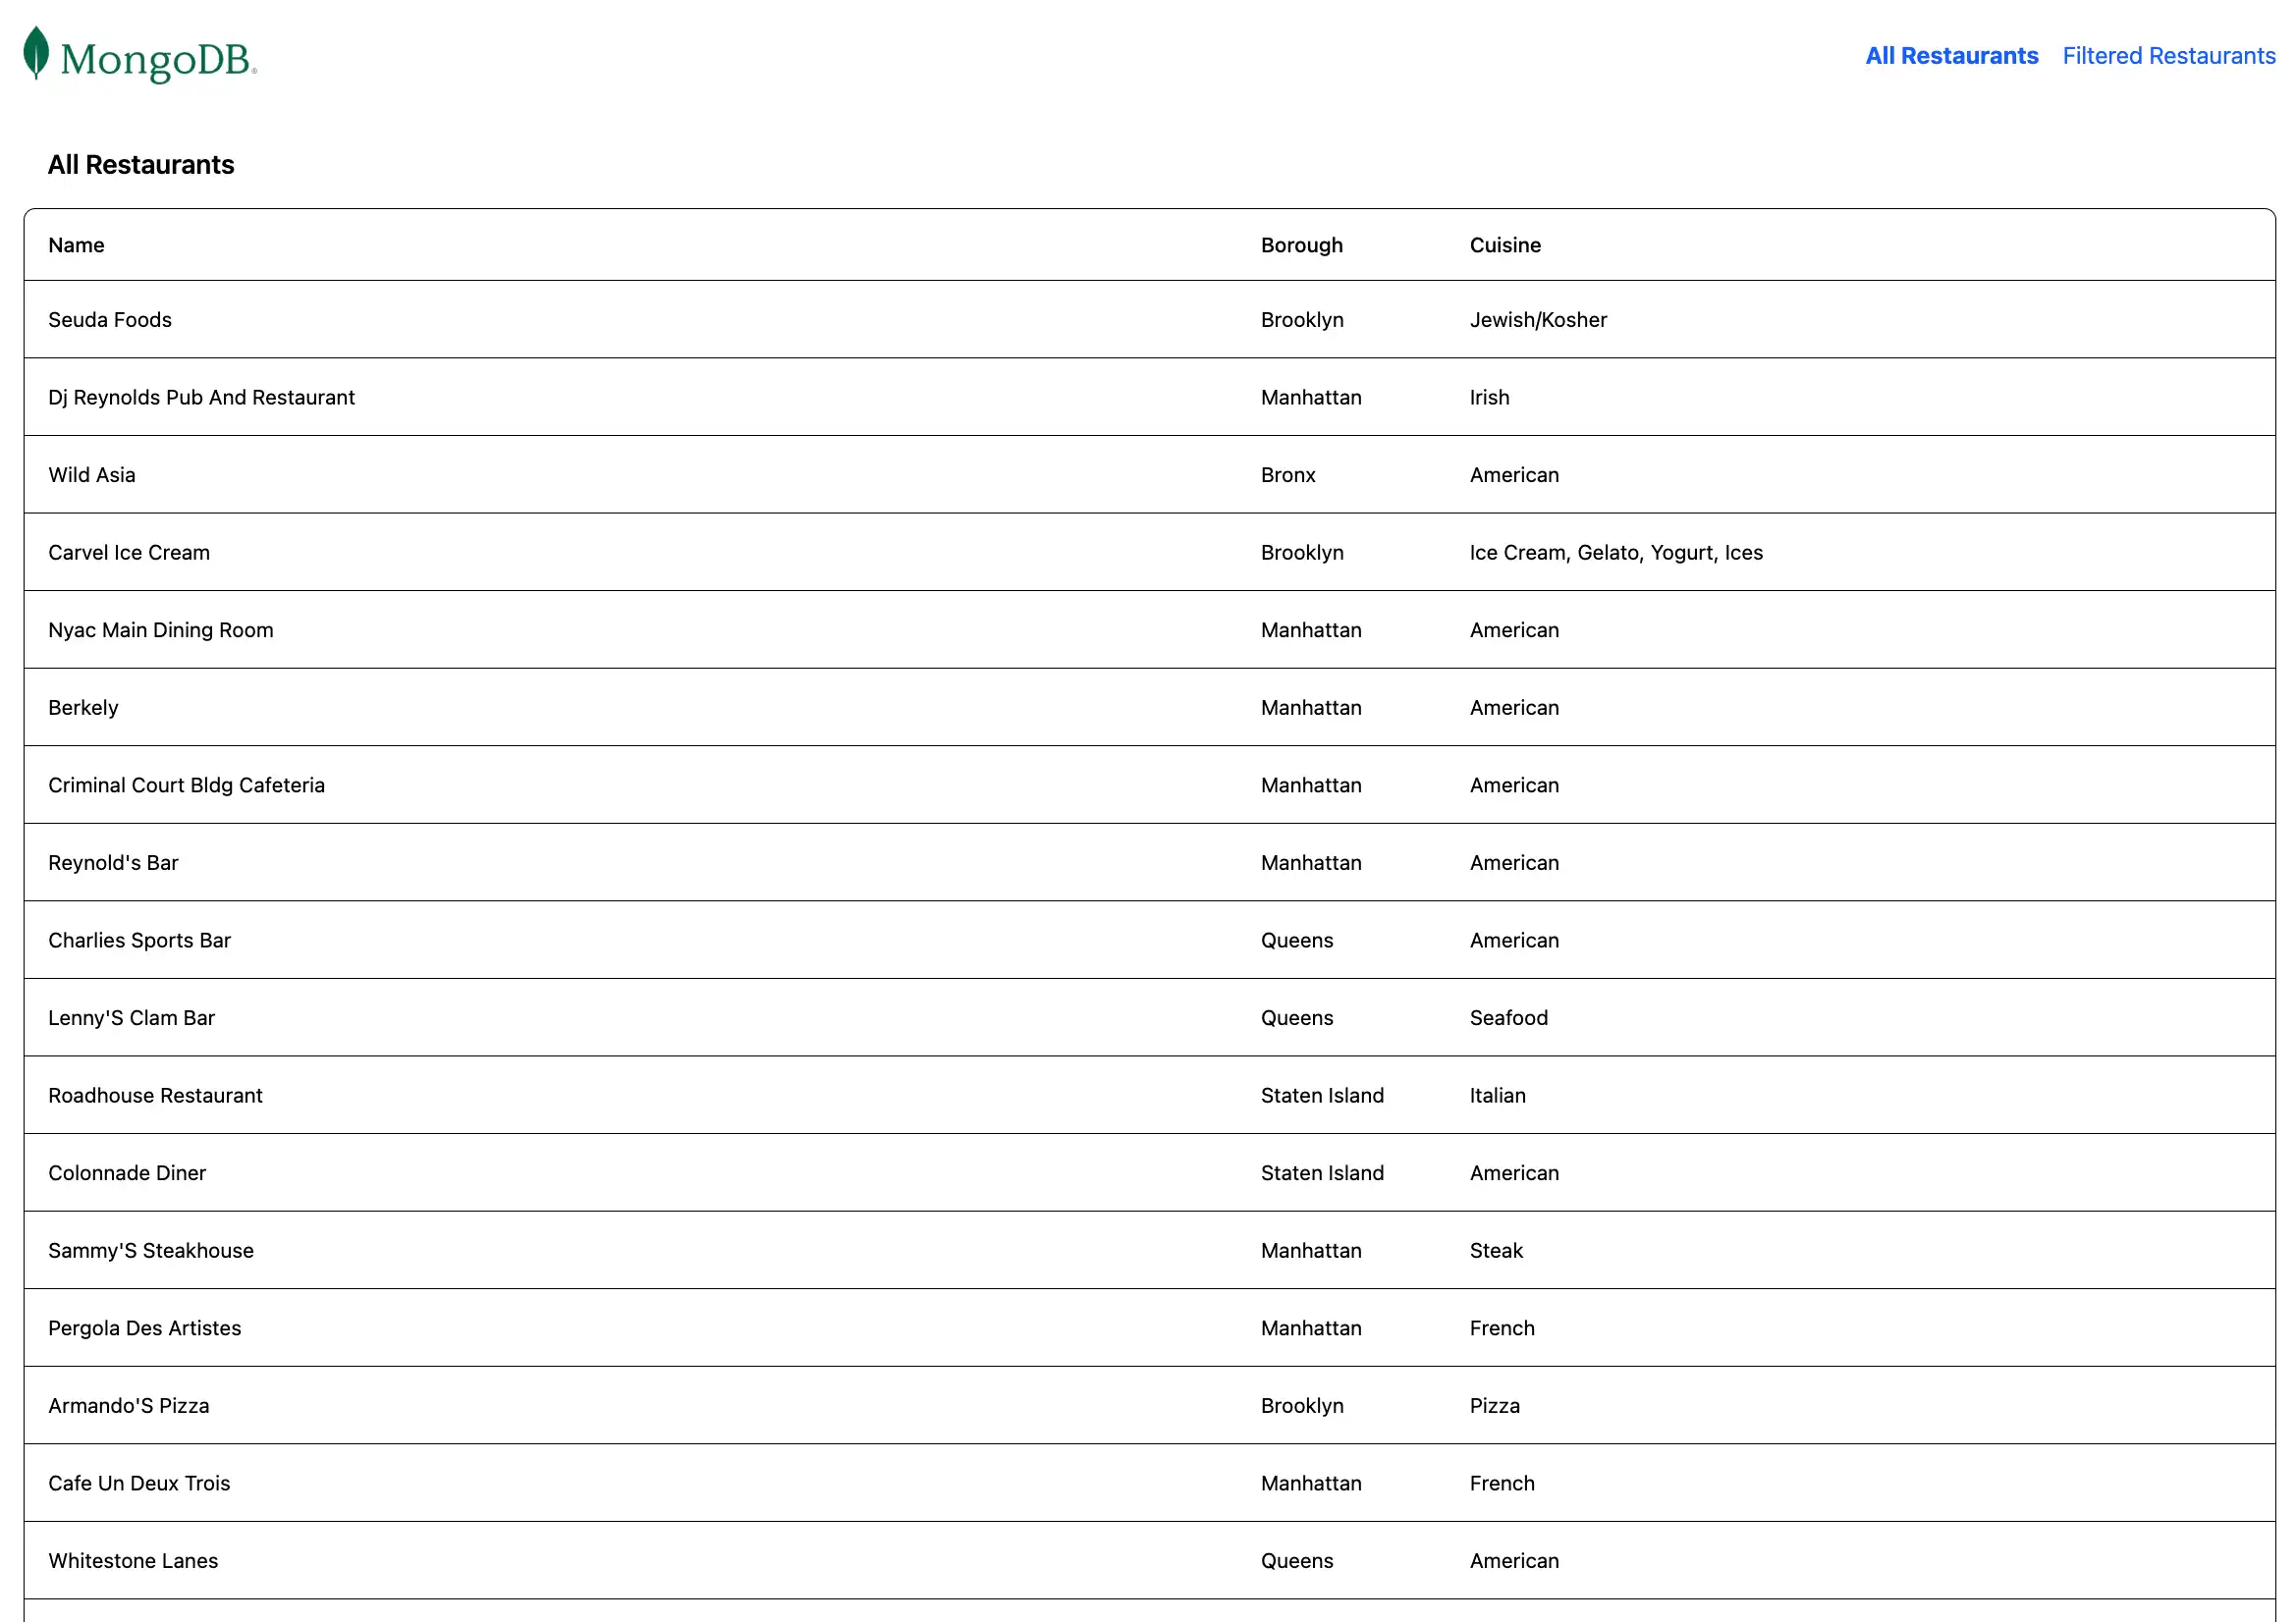
Abra o http://localhost:4200/ URL. A página de destino inicial exibe uma lista de todos os restaurantes na coleção sample_restaurants.restaurants:

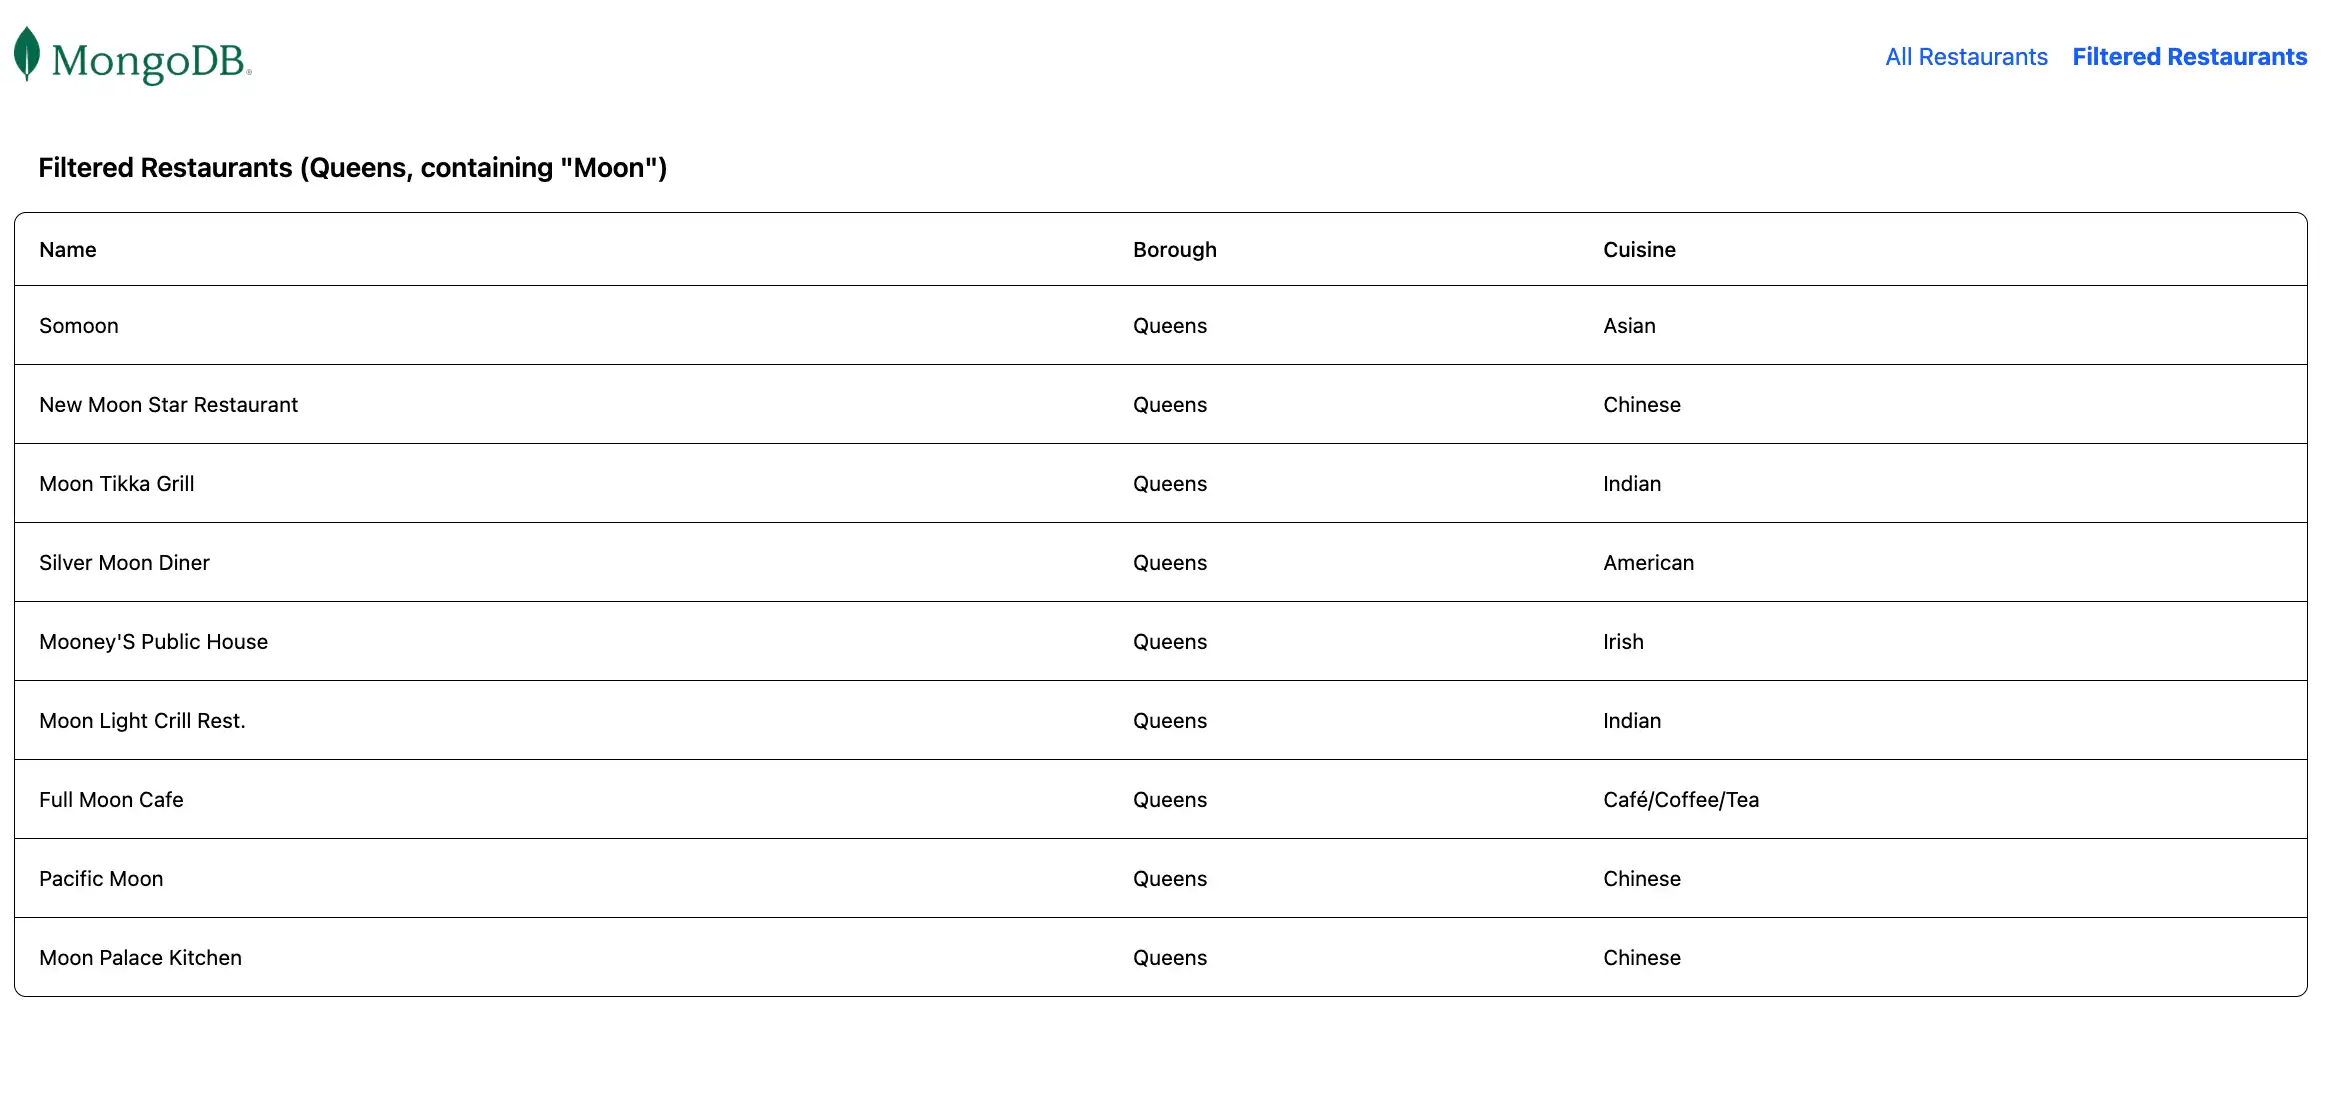
Em seguida, clique no link Filtered Restaurants na barra de navegação para visualizar os restaurantes que correspondem à query de campo name e borough:

Parabéns por concluir o tutorial de início rápido!
Depois de concluir essas etapas, você tem um aplicativo web Angular que se conecta à implantação do MongoDB, executa uma query em dados de restaurante de amostra e renderiza os resultados em um website hospedado localmente.
Recursos adicionais
Para saber mais sobre Angular, MongoDB e a pilha MEAN, consulte os seguintes recursos:
Angular documentation
O que é a pilha MEAN? artigo