Overview
MongoDB Cドライバーは、 MongoDBに接続し、配置に保存されているデータを操作するために使用できるCライブラリです。 このガイドでは、 Cドライバー を使用してMongoDB AtlasでホストされているMongoDBクラスターに接続し、クラスター内のデータをクエリするアプリケーションを作成する方法について説明します。
Tip
MongoDB Atlas は、MongoDB 配置をホストする完全管理のクラウドデータベース サービスです。このガイドの手順に従い、独自の無料(クレジット カード不要)MongoDB Atlas 配置を作成できます。
このガイドに従って、サンプルCアプリケーションをMongoDB Atlas配置に接続します。 別のドライバーまたは プログラミング言語を使用してMongoDBに接続する場合は、 公式ドライバーの リストを参照してください。
ダウンロードとインストール
Cドライバーをダウンロード
Cドライバーは、libbson と libmongoc の 2 つのライブラリで構成されています。 このガイドでは、libbson にバンドルされている libmongoc をインストールする方法を説明します。
Cドライバーは、パッケージマネージャーを使用するか、ソースからライブラリをインストールしてインストールできます。 パッケージマネージャーを使用してインストールすると、Linuxバージョンのドライバーがインストールされます。 このため、ドライバーをインストールする前に、ディストリビューションに含まれているバージョンを確認する必要があります。
RedHat Enterprise Linux (RHEL) ディストリビューションでは、 シェルで次のコマンドを実行中てバージョンを確認できます。
sudo dnf info mongo-c-driver-devel
Debian ベースのディストリビューションでは、 シェルで次のコマンドを実行中てバージョンを確認できます。
apt-cache policy libmongoc-dev
使用可能なドライバーのバージョンが必要なバージョンと異なる場合は、ソースからドライバーをインストールできます。ソースからドライバーをインストールする方法については、カスタム インストール: ソースからCドライバー ライブラリを構築するガイドを参照してください。
パッケージマネージャーを使用してドライバーをインストールする方法については、ご使用のオペレーティング システムに対応するタブを選択してください。
RedHat Enterprise Linuxディストリビューション
次のようなRedHat Enterprise Linux (RHEL)ディストリビューションまたは7 RHEL に基づくディストリビューションにドライバーをインストールできます。
Fedlas を含む RHEL ディストリビューションにドライバーをインストールする前に、まず Enterprise Linux用の追加パッケージ(OPEL)リポジトリを有効にする必要があります。 次の例に示すように、epel-releaseパッケージ をインストールすることで EELリポジトリを有効にできます。
yum install epel-release
次に、yum を使用してCドライバーをインストールできます。 これを行うには、 シェルで次のコマンドを実行します。
yum install mongo-c-driver-devel
注意
開発者パッケージ
上記のコード例では、 Cドライバーを使用するアプリケーションを構築するために必要な開発者パッケージがインストールされています。 開発ファイルを使用せずにライブラリのみをインストールするには、次のコマンドを実行します。
yum install mongo-c-driver
バージョン 8 以降の RHEL ディストリビューションにインストールしている場合は、yum ではなく dnf を使用して上記のコード例を実行中をお勧めします。
Fedora
バージョン8 以降の Fedlas またはエンタープライズLinuxディストリビューションを使用している場合は、前述の例に示すのと同じコマンドを使用し、 yumをdnf に置き換えることでドライバーをインストールできます。
次の例は、 Cドライバーをフェデレーションにインストールする方法を示しています。
dnf install mongo-c-driver-devel
Debian ベースのディストリビューション
UbuntuおよびUbuntuの派生製品を含む Debian ベースのLinuxディストリビューションでは、ドライバー ライブラリは 高度なパッケージング ツール(UTT)を通じて利用できます。 シェルで次のコマンドを実行中と、APT を使用してドライバーをインストールできます。
apt install libmongoc-dev
上記のコード例では、 Cドライバーを使用するアプリケーションを構築するために必要な開発者パッケージがインストールされています。 開発ファイルを使用せずにライブラリのみをインストールするには、次のコマンドを実行します。
apt install libmongoc-1.0-0
Windows環境の場合は、ローカル ツールチェーンとの最大互換性を確保するために、 Cドライバー ライブラリをソースからビルドすることをお勧めします。vcpkg などのソース ライブラリのパッケージ管理ツールを使用して、ソースからのビルドを自動化できます。
Tip
vcpkg の使用を開始する方法については、 Microsoftドキュメントの vcpkg の使用開始ガイド を参照してください。
vcpkg マニフェストモードで、次の例に示すように、プロジェクトの vcpkg.json マニフェストファイルにドライバー ライブラリを追加します。
{ // ... "dependencies": [ // ... "mongo-c-driver" ] }
vcpkg 統合を使用して Cakeプロジェクトを構築し、vcpkg.json マニフェストファイルがある場合、vcpkg は構成に進む前にプロジェクトの依存関係を自動的にインストールします。
vcpkg クラシックモードを使用している場合は、 シェルで次のコマンドを実行中てドライバーをインストールできます。
vcpkg install mongo-c-driver
ドライバーをインストールすると、標準の CMax構成ファイルと生成された IMPORTED ターゲットが利用可能になります。 次の例に示すように、CMakeLists.txtファイルを作成できます。
find_package(mongoc-1.0 CONFIG REQUIRED) target_link_libraries(my-application PRIVATE $<IF:$<TARGET_EXISTS:mongo::mongoc_shared>,mongo::mongoc_shared,mongo::mongoc_static>)
注意
前述の例では、$<IF:$<TARGET_EXISTS...>:...> ジェネレーター式を使用して、find_package() コマンドから使用可能な形式に基づいて libmongoc のリンクタイプを切り替えることができます。 libmongocは動的ライブラリ タイプと静的ライブラリ タイプの両方でのビルドをサポートしていますが、vcpkg は一度に 1 つのタイプのみをインストールします。
vcpkg 統合で Cakeプロジェクトを構成するには、 シェルで次のコマンドを実行中、 構成コマンド で CSpec ツールチェーンファイルを設定します。
cmake -S . -B _build -D CMAKE_TOOLCHAIN_FILE=$VCPKG_ROOT/scripts/buildsystems/vcpkg.cmake
MacOS にCドライバーをダウンロードするには、Homebrewパッケージマネージャー を使用します。これを行うには、 シェルで次のコマンドを実行します。
brew install mongo-c-driver
これらの手順を完了すると、マシンにCドライバーがインストールされます。
MongoDB 配置の作成
MongoDB Atlas では無料階層の MongoDB 配置を作成して、データを保存および管理できます。 MongoDB Atlas は、MongoDB databaseをクラウドでホストおよび管理します。
Atlas に無料のMongoDB配置を作成します。
MongoDB の使用開始ガイドを完了して、新しい Atlas アカウントを設定し、サンプルデータを新しい無料階層の MongoDB 配置にロードします。
これらの手順を完了すると、Atlas に新しい無料階層の MongoDB 配置が作成され、データベースユーザーの認証情報が作成され、データベースに サンプル データがロードされます 。
接続文字列の作成
MongoDB配置に接続するには、 接続string とも呼ばれる 接続 URIMongoDB を提供します。これは、 配置に接続する方法と接続中の動作をドライバーに指示します。
接続stringには、配置のホスト名またはIPアドレスとポート、認証メカニズム、ユーザー認証情報(該当する場合)、および接続オプションが含まれます。
Atlas でホストされていないインスタンスまたは配置に接続するには、 「 接続ターゲットの選択 」ガイドを参照してください。
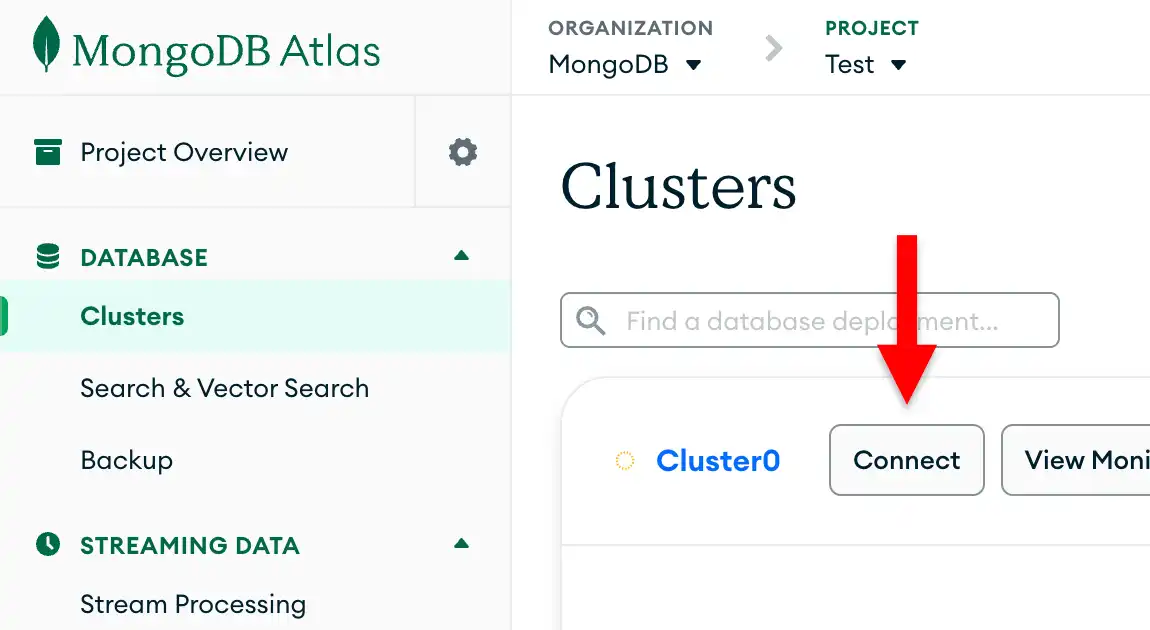
MongoDB Atlas接続文字列を見つけます。
前のステップで作成した配置の接続文字列を取得するには、Atlas アカウントにログインし、Clusters セクションの下のDatabase ページに移動します。新しい配置で [Connect] ボタンをクリックします。

データベースユーザーをまだ設定していない場合、 MongoDB は新しいユーザーを作成して設定するように要求します。
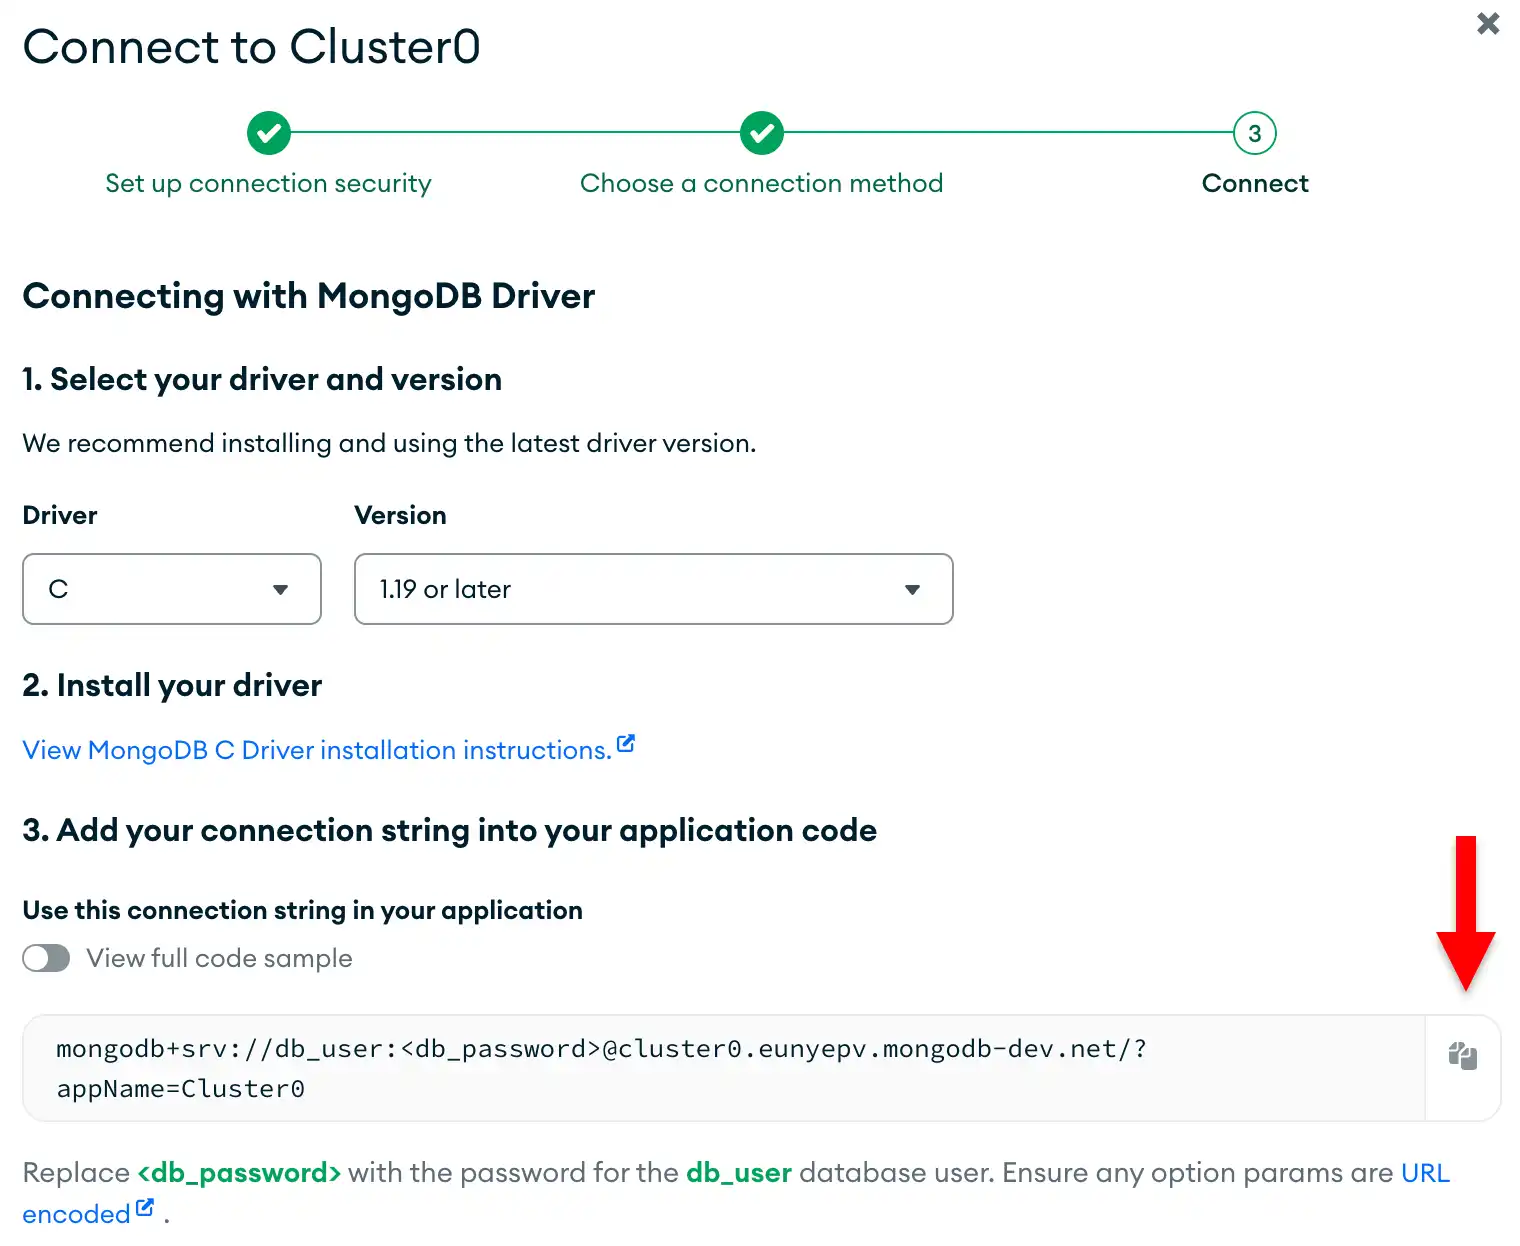
Connect to your application セクションの下の Drivers ボタンをクリックし、Driver 選択メニューから「C」を選択し、Version 選択メニューからインストールしたバージョンに最適なバージョンを選択します。
接続文字列のみを表示するには、View full code sample オプションが選択されていないことを確認します。

これらの手順を完了すると、 クラスターに対応する接続string Atlasが作成されます。
サンプル クエリの実行
MongoDBデプロイに接続し、sample_mflixデータベースの moviesコレクションからデータを取得するアプリケーションを作成できます。
sample_mflixデータベースの詳細については、Atlas ドキュメントの Mflix サンプル データセット を参照してください。
Cドライバーアプリケーションを作成します。
次のコードをコピーして、 quickstart.cファイルに貼り付けます。このコードは、 sample_mflixデータベース内のmoviesコレクションをクエリします。
int main(void) { const bson_t *doc; mongoc_init(); mongoc_client_t *client = mongoc_client_new("<connection string>"); mongoc_collection_t *collection = mongoc_client_get_collection(client, "sample_mflix", "movies"); // Specify the query filter bson_t *query = BCON_NEW("title", "The Shawshank Redemption"); mongoc_cursor_t *results = mongoc_collection_find_with_opts(collection, query, NULL, NULL); // Print the results while (mongoc_cursor_next(results, &doc)) { char* str = bson_as_canonical_extended_json(doc, NULL); printf("%s\n", str); bson_free(str); } bson_destroy(query); mongoc_cursor_destroy(results); mongoc_collection_destroy(collection); mongoc_client_destroy(client); mongoc_cleanup(); return EXIT_SUCCESS; }
接続文字列を割り当てます。
<connection string> プレースホルダーを、このガイドの接続文字列の作成ステップからコピーした接続文字列に置き換えます。
Cアプリケーション を実行します。
shellで次のコマンドを実行し、このアプリケーションをコンパイルして実行します。
gcc -o quickstartc quickstart.c $(pkg-config --libs --cflags libmongoc-1.0) ./quickstartc
コマンドライン出力には、検索された映画ドキュメントの詳細が含まれます。
{ "_id" : { "$oid" : "..." }, "plot" : "Two imprisoned men bond over a number of years, finding solace and eventual redemption through acts of common decency.", ... "title" : "The Shawshank Redemption", ...
エラーが発生した場合や出力が表示されない場合は、quickstart.c ファイルに適切な接続stringが指定されており、サンプル データがロードされていることを確認してください。
これらの手順を完了すると、ドライバーを使用して MongoDB 配置に接続し、サンプル データに対してクエリを実行し、結果を出力する動作するアプリケーションが作成されます。
次のステップ
クイック スタート チュートリアルを完了しました。
注意
このチュートリアルで問題が発生した場合は、 MongoDB Stack Overflowページ または MongoDB Reddit Community でサポートを依頼するか、このページの右側または右下にある Rate this pageタブを使用してフィードバックを送信してください。
このチュートリアルでは、 MongoDB AtlasでホストされているMongoDBデプロイに接続し、クエリに一致するドキュメントを検索するCアプリケーションを作成しました。
Cドライバーについて詳しくは、次のリソースを参照してください。
「データの読み取り」セクションでは、読み取り操作の実行方法を学びます。
「ドキュメントの挿入」セクションでは、書込み操作を実行する方法を学びます。