Overview
このガイドでは、 MongoDBと統合する Next.js Webアプリケーションを作成する方法を学習できます。 Next.js は、サーバー側のレンダリング、静的サイト生成、およびAPIルートを単一のアプリケーションで提供するReactフレームワークです。このチュートリアルのアプリケーションは、次のレイヤーで構成されています。
データベースレイヤー: MongoDB は、データのストレージと検索を提供します。
APIレイヤー: Next.js APIルートは、サーバー側のロジックとデータベース操作を取り扱います。
プレゼンテーションレイヤー: Reactコンポーネントはユーザー インターフェイスとフロントエンド インタラクションを実装します。
Next.js アプリケーションでMongoDBを使用する理由
Next.js は、アプリケーションのフロントエンドとバックエンドの両方を 1 つのコードベースで構築できるフルスタックReactフレームワークです。 MongoDB をNext.js と統合することで、次のメリットを活用できます。
統合開発:クライアントとサーバーの両方のコードをJavaScript/TypeScript で記述します
サーバー側レンダリング: サーバー側レンダリング中にMongoDBからデータを取得して SE とパフォーマンスを向上させます
APIルート: MongoDBに直接接続するサーバーレスAPIエンドポイントを作成
柔軟なデータモデル: MongoDB のドキュメントモデルはJavaScriptオブジェクトやReactコンポーネントの状態と自然に整合します
MongoDBと Next.js は、動的コンテンツ、 ユーザー認証、リアルタイム更新、複雑なデータ関係を必要とするアプリケーションに適しています。
クイック スタート チュートリアル
このチュートリアルでは、Next.js とMongoDBを使用して Webアプリケーションを構築する方法を説明します。アプリケーションはサンプルレストラン データにアクセスし、データをクエリし、その結果をローカルでホストされているサイトに表示します。このチュートリアルには、 MongoDB AtlasでホストされているMongoDBクラスターに接続し、データベースのデータにアクセスして表示する手順も含まれています。
Tip
Next.js なしでNode.jsドライバーを使用してMongoDBに接続する場合は、 「 Node.jsドライバーを使い始める 」ガイドを参照してください。
プロジェクトを設定する
このセクションの手順に従って、プロジェクトの依存関係のインストール、Atlas クラスターの作成、アプリケーションディレクトリの設定を行います。
前提条件を確認します
アプリケーションを作成するには、開発環境に以下がインストールされている必要があります。
前提条件 | ノート |
|---|---|
最新の LTS または 最新リリース バージョンのいずれかをダウンロードする。 | |
コードエディター | このチュートリアルでは Visual Studio Code を使用しますが、お好みのエディターを使用できます。 |
ターミナルアプリまたはシェル | MacOS ユーザーの場合は、 ターミナル または 類似アプリを使用します。Windowsユーザーの場合は、 PowerShell を使用します。 |
MongoDB Atlasクラスターを作成する
MongoDB Atlas は、MongoDB配置をホストするマネージドクラウドデータベースサービスです。MongoDB配置がない場合は、MongoDBを使い始めるチュートリアルを完了することで、MongoDBクラスターを無料で作成できます(クレジットは不要)。MongoDBを使い始めるチュートリアルでは、このチュートリアルで使用されるsample_restaurantsデータベースなどのサンプルデータセットをクラスターにロードする方法も説明します。
MongoDBクラスターに接続するには、接続 URI を使用する必要があります。接続文字列を検索する方法については、MongoDBを使い始めるチュートリアルの接続文字列の追加セクションを参照してください。
重要
接続stringを安全な場所に保存します。
データベース接続の構成
プロジェクト構造と依存関係を設定したら、このセクションの手順に従ってデータベース接続を構成します。
環境変数を設定する
next-quickstartディレクトリに、 MongoDB接続 URI を保存する .env.localファイルを作成します。
MONGODB_URI=<connection URI>
<connection URI>プレースホルダーを、前の手順で保存した接続 URI に置き換えます。
注意
Next.js は、.env.local ファイルから環境変数を自動的に読み込みます。 NEXT_PUBLIC_ のプレフィックスが付いた変数はブラウザに公開されますが、他の変数はサーバー上でのみ利用できます。
データベース接続ユーティリティを作成する
ルートディレクトリに、lib という新しいディレクトリを作成します。このディレクトリに mongodb.ts という名前の新しいファイルを追加し、次のコードを貼り付けます。
import { MongoClient } from "mongodb"; declare global { var _mongoClientPromise: Promise<MongoClient> | undefined; } const uri = process.env.MONGODB_URI; const options = {}; let client: MongoClient; let clientPromise: Promise<MongoClient>; if (!uri) { throw new Error("Please add your Mongo URI to .env.local"); } client = new MongoClient(uri, options); clientPromise = client.connect(); // Export a module-scoped MongoClient promise. By doing this in a // separate module, the client can be shared across functions. export default clientPromise;
このファイルは、アプリケーション全体で共有される再利用可能なMongoDBクライアント接続を作成します。 Next.js がコードをホットリロードするときに、開発中に複数の接続が作成されないように、接続がキャッシュされます。
APIルートの作成
データベース接続を設定したら、このセクションの手順に従って、 MongoDBをクエリし、レストラン データを返すAPIルートを作成します。
レストランAPIルートを作成する
appディレクトリに新しい api/restaurantsディレクトリを作成します。このディレクトリに route.ts という名前の新しいファイルを追加し、次のコードを貼り付けます。
import { NextResponse } from "next/server"; import clientPromise from "@/lib/mongodb"; export async function GET() { try { const client = await clientPromise; const db = client.db("sample_restaurants"); const restaurants = await db .collection("restaurants") .find({}) .toArray(); return NextResponse.json(restaurants); } catch { return NextResponse.json( { error: "Failed to fetch restaurants" }, { status: 500 } ); } }
このファイルは、sample_restaurantsデータベースからすべてのレストランを検索する /api/restaurants の GET エンドポイントを定義します。
ブラウザAPIルートの作成
app/apiディレクトリに、browse という新しいディレクトリを作成します。このディレクトリに route.ts という名前の新しいファイルを作成し、次のコードを貼り付けます。
import { NextResponse } from "next/server"; import clientPromise from "@/lib/mongodb"; export async function GET() { try { const client = await clientPromise; const db = client.db("sample_restaurants"); const query = { borough: "Queens", name: { $regex: "Moon", $options: "i" }, }; const restaurants = await db .collection("restaurants") .find(query) .toArray(); return NextResponse.json(restaurants); } catch { return NextResponse.json( { error: "Failed to fetch restaurants" }, { status: 500 } ); } }
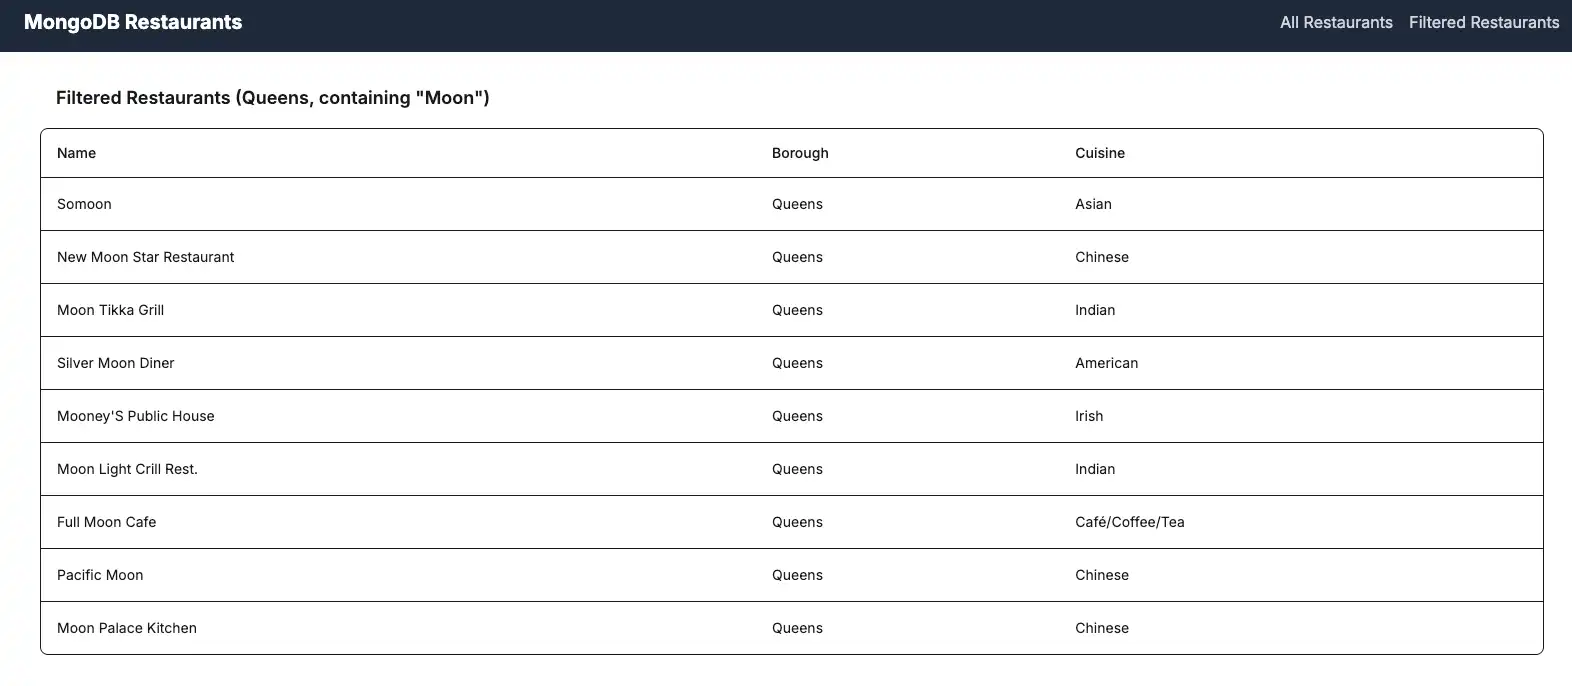
このファイルは、特定のクエリ条件に一致するレストランを検索する /api/browse の GET エンドポイントを定義します。クエリは、名前に "Moon" という単語が含まれるクイーンズのレストランをフィルタリングします。
フロントエンドの設定
APIルートを設定したら、このセクションの手順に従って、レストラン データを表示するReactコンポーネントを作成します。
Navbar コンポーネントの作成
ルートディレクトリに、components という新しいディレクトリを作成します。このディレクトリに Navbar.tsx という名前の新しいファイルを追加し、次のコードを貼り付けます。
import Link from "next/link"; export default function Navbar() { return ( <nav className="bg-gray-800 p-4"> <div className="container mx-auto flex justify-between items-center"> <Link href="/" className="text-white text-xl font-bold"> MongoDB Restaurants </Link> <div className="space-x-4"> <Link href="/" className="text-gray-300 hover:text-white transition-colors" > All Restaurants </Link> <Link href="/browse" className="text-gray-300 hover:text-white transition-colors" > Filtered Restaurants </Link> </div> </div> </nav> ); }
このコンポーネントは、すべてのレストランとフィルタリングされたレストランを表示するためのリンクを含むナビゲーション バーを作成します。
を持つRestaurantList コンポーネントの作成
componentsディレクトリに、RestaurantList.tsx という名前の新しいファイルを作成し、次のコードを貼り付けます。
"use client"; /* The above directive tells Next.js to render this component on the client side instead of the server side. Client components can use React hooks like useState and useEffect, while server components cannot. */ import { useEffect, useState } from "react"; import { ObjectId } from "mongodb"; interface Restaurant { _id: ObjectId; name: string; borough: string; cuisine: string; } interface RestaurantProps { restaurant: Restaurant; } const Restaurant = (props: RestaurantProps) => ( <tr className="border-b transition-colors hover:bg-muted/50 data-[state=selected]:bg-muted"> <td className="p-4 align-middle [&:has([role=checkbox])]:pr-0"> {props.restaurant.name} </td> <td className="p-4 align-middle [&:has([role=checkbox])]:pr-0"> {props.restaurant.borough} </td> <td className="p-4 align-middle [&:has([role=checkbox])]:pr-0"> {props.restaurant.cuisine} </td> </tr> ); interface RestaurantListProps { endpoint: string; title: string; } export default function RestaurantList({ endpoint, title }: RestaurantListProps) { const [restaurants, setRestaurants] = useState<Restaurant[]>([]); const [loading, setLoading] = useState(true); useEffect(() => { async function getRestaurants() { try { const response = await fetch(endpoint); if (!response.ok) { const message = `An error occurred: ${response.statusText}`; console.error(message); return; } const restaurants = await response.json(); setRestaurants(restaurants); } catch (error) { console.error("Error fetching restaurants:", error); } finally { setLoading(false); } } getRestaurants(); }, [endpoint]); function restaurantList() { return restaurants.map((restaurant) => { return <Restaurant restaurant={restaurant} key={restaurant._id.toString()} />; }); } if (loading) { return <div className="p-4">Loading...</div>; } return ( <> <h3 className="text-lg font-semibold p-4">{title}</h3> <div className="border rounded-lg overflow-hidden"> <div className="relative w-full overflow-auto"> <table className="w-full caption-bottom text-sm"> <thead className="[&_tr]:border-b"> <tr className="border-b transition-colors hover:bg-muted/50 data-[state=selected]:bg-muted"> <th className="h-12 px-4 text-left align-middle font-medium text-muted-foreground [&:has([role=checkbox])]:pr-0"> Name </th> <th className="h-12 px-4 text-left align-middle font-medium text-muted-foreground [&:has([role=checkbox])]:pr-0"> Borough </th> <th className="h-12 px-4 text-left align-middle font-medium text-muted-foreground [&:has([role=checkbox])]:pr-0"> Cuisine </th> </tr> </thead> <tbody className="[&_tr:last-child]:border-0"> {restaurantList()} </tbody> </table> </div> </div> </> ); }
このコンポーネントは、 APIルートからレストラン データを取得して表示します。 Reactフックを使用して状態を管理し、コンポーネントのマウント時にデータを取得します。
ホームページの更新
app/page.tsxファイルに移動し、内容を次のコードで置き換えます。
import RestaurantList from "@/components/RestaurantList"; export default function Home() { return ( <main className="container mx-auto p-4"> <RestaurantList endpoint="/api/restaurants" title="All Restaurants" /> </main> ); }
このファイルは、データベースのすべてのレストランを表示するホームページをレンダリングします。
ブラウザ ページの作成
appディレクトリに、browse という新しいディレクトリを作成します。このディレクトリに page.tsx という名前の新しいファイルを追加し、次のコードを貼り付けます。
import RestaurantList from "@/components/RestaurantList"; export default function Browse() { return ( <main className="container mx-auto p-4"> <RestaurantList endpoint="/api/browse" title='Filtered Restaurants (Queens, containing "Moon")' /> </main> ); }
このファイルはクエリ条件に基づいてフィルタリングされたレストランを表示するブラウザページをレンダリングします。
レイアウトを更新しました
app/layout.tsxファイルに移動し、内容を次のコードで置き換えます。
import "./globals.css"; import Navbar from "@/components/Navbar"; import { Metadata } from "next"; export const metadata: Metadata = { title: "MongoDB Next.js App", description: "A Next.js application with MongoDB integration", }; export default function RootLayout({ children }: { children: React.ReactNode }) { return ( <html lang="en"> <body> <Navbar /> {children} </body> </html> ); }
このファイルは、ナビゲーション バーを含みすべてのページをラップするアプリケーションのルート レイアウトを定義します。
アプリケーションの実行
最後に、このセクションの手順に従ってアプリケーションを実行し、レンダリングされたレストラン データを表示します。
アプリケーション場を開きます
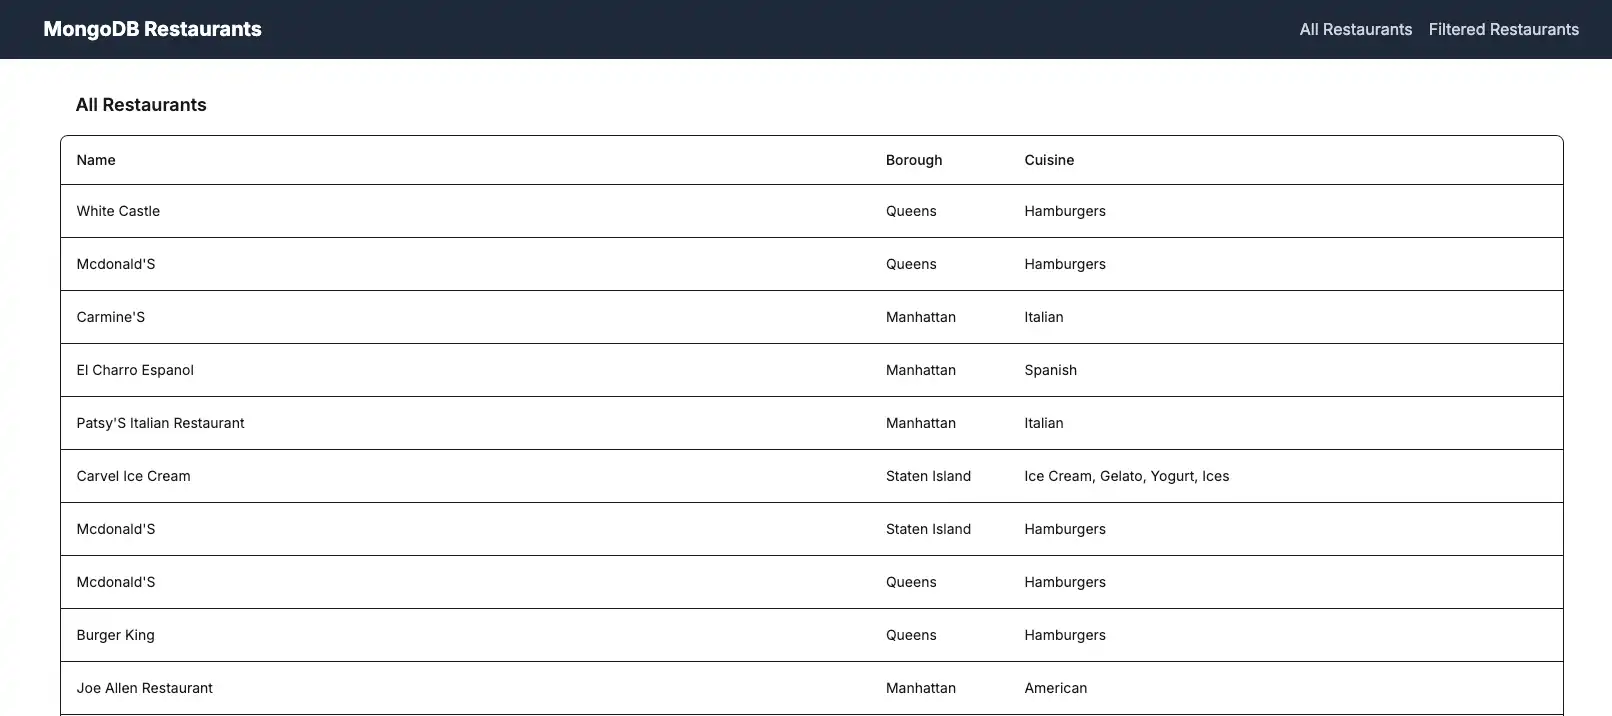
http://localhost:3000 / URLを開きます。最初のランディング ページには、sample_restaurants.restaurants コレクション内のすべてのレストランのリストが表示されます。

ナビゲーション バーの Filtered Restaurants リンクをクリックすると、name と boroughフィールドクエリに一致するレストランが表示されます。

クイック スタート チュートリアルが完了しました。
これらの手順を完了すると、 MongoDBデプロイに接続し、サンプルレストラン データに対してクエリを実行し、ローカルでホストされているウェブサイトで結果をレンダリングする Next.js Webアプリケーションが作成されます。
追加リソース
Next.js とMongoDB の詳細については、次のリソースを表示します。
ノード.jsドライバーのドキュメント
Next.js のドキュメント
Next.js API はドキュメントをルーティングします