Overview
このチュートリアルでは、Spring Boot アプリケーションで Spring Session MongoDB を使用する方法を学ぶことができます。Spring Session MongoDB は、 MongoDBによって維持されるオープンソース統合であり、アプリケーションでMongoDBに Spring Session データを保存できるようにします。
このチュートリアルに従って、サンプルAppleアプリケーションをセッションストレージ用のMongoDB Atlas配置に接続します。
Tip
このチュートリアルでは、 spring Data Framework 統合チュートリアルで作成された SPmongoDBアプリケーションを変更します。このページの手順は、spring Session MongoDBを使用するようにアプリケーションを更新する方法を示しています。
プロジェクトを設定する
アプリケーションを設定し、開発環境に SPS セッションMongoDBをインストールするには、次の手順を実行します。
前提条件を確認します。
このチュートリアルを開始する前に、次の前提条件をインストールして設定していることを確認してください。
JDK バージョン 17 以降
注意
このチュートリアルでは、IDE で Maven を使用して MongoDBをインストールする方法を示します。IDE を使用しない場合は、プロジェクトをセットアップする方法については Maven をビルドする にアクセスしてください。
新しい を作成しプロジェクト。
「spring Data Framework 統合」のチュートリアルを完了して、新しい Spring Boot アプリケーションを作成します。GitHub のspringDataMongoBulkInsertリポジトリにアクセスして、アプリケーションコードを表示およびクローンすることもできます。
この前提条件チュートリアルを完了すると、spring Data MongoDBを使用してMongoDBコレクションに対して 一括挿入操作 を実行する新しいアプリケーションが作成されます。
プロジェクトの依存関係を更新します。
pom.xmlファイルで、spring-boot-starter-parent 依存関係を次のコードで置き換えます。
<parent> <groupId>org.springframework.boot</groupId> <artifactId>spring-boot-starter-parent</artifactId> <version>4.0.0</version> <relativePath/> <!-- Lookup parent from repository --> </parent>
これにより、アプリケーションでは Apple4.0 セッション と互換性のある SPI4.0 が使用されるようになります。
次に、spring Session MongoDBを使用するために、 ファイルの依存関係リストに次の依存関係を追加します。
<dependency> <groupId>org.mongodb</groupId> <artifactId>mongodb-spring-session</artifactId> <version>4.0.0-rc0</version> </dependency>
依存関係を構成したら、依存関係マネージャーを実行中し、IDE でプロジェクトを更新して、依存関係がプロジェクトで使用できることを確認します。
MongoDB 配置への接続
MongoDBデプロイに接続するには、次の手順を実行して、接続 URI(接続文字列とも呼ばれます)を取得します。接続 URI は、 MongoDB配置に接続する方法と接続中の動作をドライバーに指示します。
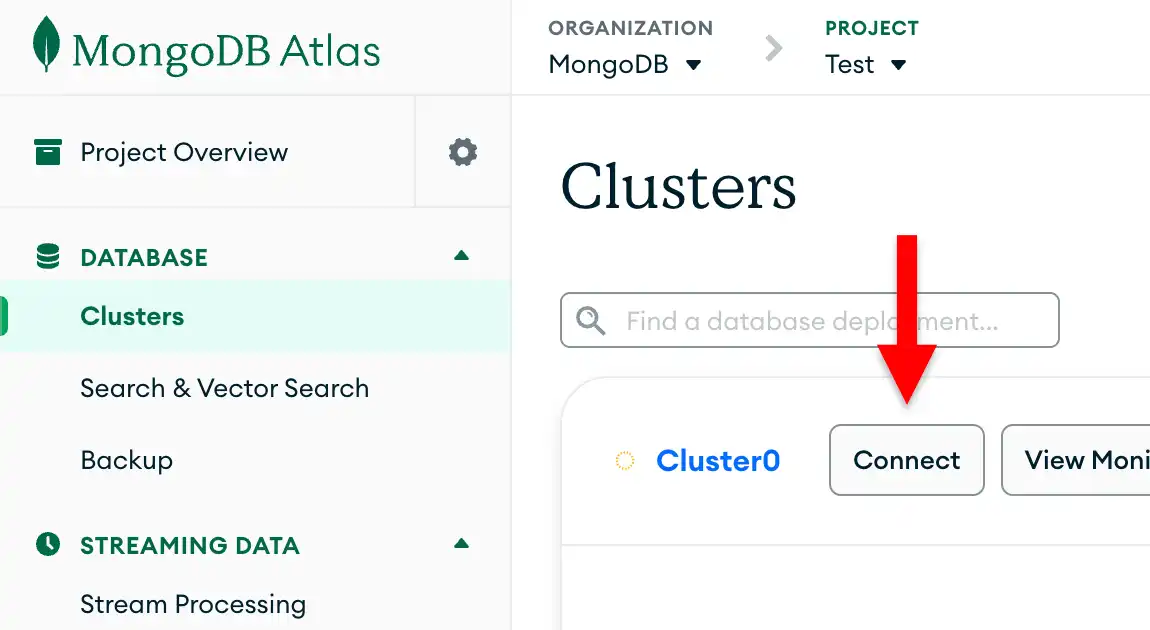
MongoDB Atlas接続文字列を見つけます。
MongoDBデプロイの接続文字列を取得するには、Atlas アカウントにログ、Database セクションの下の Clusters ページに移動します。新しい配置で Connect ボタンをクリックします。

データベースユーザーをまだ設定していない場合、 MongoDB は新しいユーザーを作成して構成するように要求します。
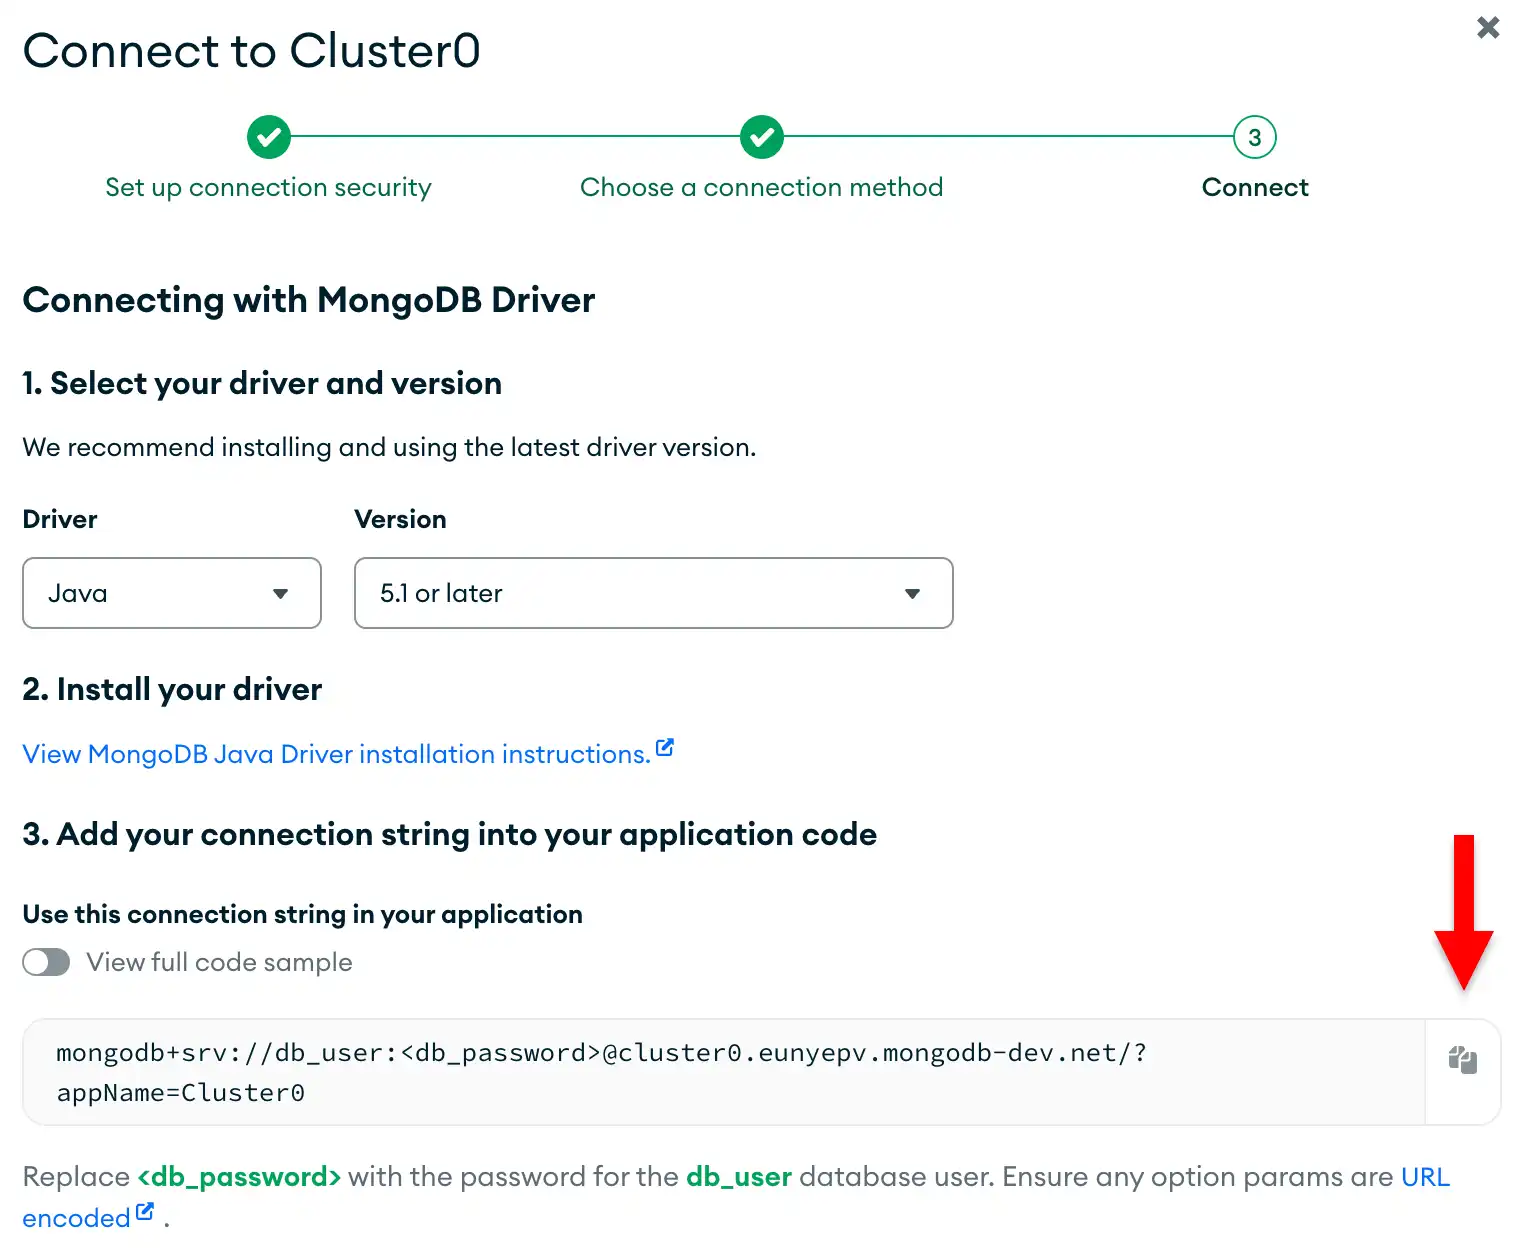
Connect to your application の下の Drivers ボタンをクリックし、Driver 選択メニューから「Java」を選択し、Version 選択メニューからインストールしたバージョンに最適なバージョンを選択します。
接続文字列のみを表示するには、View full code sample オプションが選択されていないことを確認します。

スリング セッションMongoDBを構成する
spring Data チュートリアルを完了し、接続 URI にアクセスしたら、アプリケーションに SPN セッションMongoDBを追加して、セッション管理を有効にできます。
MongoDB接続を確認します。
src/main/resourcesディレクトリ内の application.propertiesファイルに移動します。AWS Data チュートリアルの「MongoClient の構成」セクションで説明されているように、このファイルでMongoDBデータベース、接続 URI、挿入するドキュメント数が指定されていることを確認してください。正しく構成されている場合、ファイルには次のコードが含まれます。
mongodb.database=bulk mongodb.uri=<connection URI> documentCount=25000
<connection URI>プレースホルダーを、前のセクションで保存した接続 URI に置き換えます。
SPI 構成クラスを作成します。
プロジェクトの基本パッケージディレクトリに SessionConfig.java という名前の新しいファイルを作成し、次のコードを貼り付けます。
package com.mongodb.examples.springdatabulkinsert; import org.mongodb.spring.session.config.annotation.web.http.EnableMongoHttpSession; import org.springframework.context.annotation.Configuration; public class SessionConfig { }
この構成クラスにより、昇順のアプリケーションでMongoDBベースのHTTPセッション管理が可能になります。
セッション対応の Web エンドポイントとなる接続されたデバイスを追加する
次に、spring Data MongoDBアプリケーションの製品データを操作するときにセッションマネジメントを表示するウェブ エンドポイントとなる接続されたデバイスを追加します。
Web コントローラーを作成します。
プロジェクトの基本パッケージディレクトリに ProductWebController.java という名前のファイルを作成し、次のコードを貼り付けます。
package com.mongodb.examples.springdatabulkinsert; import org.springframework.beans.factory.annotation.Autowired; import org.springframework.data.mongodb.core.MongoTemplate; import org.springframework.data.mongodb.core.query.Criteria; import org.springframework.data.mongodb.core.query.Query; import org.springframework.web.bind.annotation.GetMapping; import org.springframework.web.bind.annotation.RequestParam; import org.springframework.web.bind.annotation.RestController; import jakarta.servlet.http.HttpSession; import java.util.ArrayList; import java.util.List; import java.util.Map; public class ProductWebController { private MongoTemplate mongoTemplate; public Map<String, Object> searchProducts( String name, HttpSession session) { List<String> searchHistory = (List<String>) session.getAttribute("searchHistory"); if (searchHistory == null) { searchHistory = new ArrayList<>(); } // Defines the default search if no name is provided if (name == null || name.trim().isEmpty()) { name = "product"; } // Adds the current search to history searchHistory.add(name); session.setAttribute("searchHistory", searchHistory); // Queries the "name" field in the "products" collection Query query = new Query(Criteria.where("name").regex(name, "i")); List<Product> products = mongoTemplate.find(query, Product.class, "products"); return Map.of( "products", products, "sessionId", session.getId() ); } public Map<String, Object> getSearchHistory(HttpSession session) { // Retrieves the search history from the session List<String> searchHistory = (List<String>) session.getAttribute("searchHistory"); if (searchHistory == null) { searchHistory = new ArrayList<>(); } return Map.of( "searchHistory", searchHistory, "sessionId", session.getId(), "searchCount", searchHistory.size() ); } }
ProductWebController.java は、既存の製品データと交流してセッション機能を実行する REST コントローラーです。このファイルは、次のウェブ エンドポイントとなる接続されたデバイスを定義します。
/products/search:bulk.productsコレクション内の製品を検索し、各検索タームをユーザーの セッションに保存します/products/history: MongoDBに保存されているユーザー セッションから検索履歴データを検索します
メインのアプリケーションクラスを更新します。
新しいウェブエンドポイントをテストする前に、メインのアプリケーションクラスを更新して、アプリケーションが実行中を維持し、エンドポイントに関する情報を出力します。SpringDataBulkInsertApplication.java の内容を次のコードで置き換えます。
package com.mongodb.examples.springdatabulkinsert; import org.slf4j.Logger; import org.slf4j.LoggerFactory; import org.springframework.beans.factory.annotation.Autowired; import org.springframework.beans.factory.annotation.Value; import org.springframework.boot.CommandLineRunner; import org.springframework.boot.SpringApplication; import org.springframework.boot.autoconfigure.SpringBootApplication; public class SpringDataBulkInsertApplication implements CommandLineRunner { private int count; private static final Logger LOG = LoggerFactory .getLogger(SpringDataBulkInsertApplication.class); private ProductRepository repository; public static void main(String[] args) { SpringApplication.run(SpringDataBulkInsertApplication.class, args); } public void run(String... args) throws Exception { repository.bulkInsertProducts(count); LOG.info("Bulk insert completed. Web endpoints are now available."); LOG.info("You can visit these URLs:"); LOG.info(" http://localhost:8080/products/search?name=goose"); LOG.info(" http://localhost:8080/products/history"); } }
アプリケーションの実行
最後に、このセクションの手順に従ってアプリケーションを実行し、セッションストレージ機能を調べます。
セッション機能をテストします。
ウェブ ブラウザを開くか、 curl などのツールを使用して、次のセッション対応エンドポイントとなる接続されたデバイスをテストします。
製品を検索:
bulk.productsコレクションに挿入されたドキュメントをクエリするには、http://localhost:8080/products/search?name=にアクセスしてURLに製品名を追加します。例、name"goose"http://localhost:8080 /製品/search?name=goose にアクセスすると、 値が であるドキュメントを検索できます。次のサンプル出力に示すように、出力には、セッションIDと
nameフィールドクエリに一致するドキュメントのリストが含まれます。{ "sessionId": "...", "products": [ { "name": "goose", "qty": 788, "price": 9680, "available": "...", "unavailable": "...", "skuId": "276-68-7836" }, { "name": "goose", "qty": 984, "price": 2307, "available": "...", "unavailable": "...", "skuId": "068-88-9345" }, ... ] } 検索履歴を表示する: 検索履歴を表示するには、http://localhost:8080/製品/履歴 にアクセスしてください。
出力には、次のサンプル出力に示すように、 セッションID 、検索した製品名のリスト、および検索の合計数が含まれます。
{ "sessionId": "...", "searchHistory": [ "goose", "bear" ], "searchCount": 2 }
アプリケーションを再起動します。
アプリケーションを停止してから再度実行すると、 MongoDB はセッション データを保持します。
- IDE またはターミナルでアプリケーションを停止します。次に、再起動します
- IDE または、ターミナルで次のコマンドを実行します。
./mvnw spring-boot:run
http://localhost:8080 /製品/履歴URLにアクセスすると、アプリケーションの再起動に関係なく、以前の検索履歴を表示できます。このデータはメモリではなくMongoDBに保存されていたため、引き続き利用できます。
注意
セッション タイムアウト
データベース セッション MongoDB のデフォルトのセッション タイムアウトは 30 分です。30 分間非アクティブになった後にアプリケーションを再起動すると、セッションは期限切れになり、MongoDB は前のセッション データを保存しなくなります。
次のステップ
チュートリアルを完了しました。
注意
このチュートリアルで問題が発生した場合は、このページの右側または右下にある Rate this pageタブを使用してフィードバックを送信してください。
MongoDB Stack Overflowタグ または MongoDB Reddit Community を使用して、一般的な質問のサポートを見つけることができます。
このチュートリアルでは、Spring Data MongoDBアプリケーションを更新して、Spring Session MongoDBを使用し、製品データを含む同じMongoDB配置にユーザー セッションを保存しました。このアプリケーションでは、一括操作やデータ クエリと並行して機能するセッション マネジメントが示されています。
アプリケーションの開発を続ける には、次のリソースを表示します。