Overview
In this guide, you can learn how to create a Next.js web application that integrates with MongoDB. Next.js is a React framework that provides server-side rendering, static site generation, and API routes in a single application. The application in this tutorial consists of the following layers:
Database layer: MongoDB provides data storage and retrieval.
API layer: Next.js API routes handle server-side logic and database operations.
Presentation layer: React components implement the user interface and front-end interactions.
Why Use MongoDB in a Next.js Application?
Next.js is a full-stack React framework that enables you to build both the front end and back end of your application in a single codebase. By integrating MongoDB with Next.js, you can leverage the following benefits:
Unified development: Write both client and server code in JavaScript/TypeScript
Server-side rendering: Fetch data from MongoDB during server-side rendering for improved SEO and performance
API routes: Create serverless API endpoints that connect directly to MongoDB
Flexible data model: MongoDB's document model aligns naturally with JavaScript objects and React component state
Next.js with MongoDB is well-suited for applications that require dynamic content, user authentication, real-time updates, and complex data relationships.
Quick Start Tutorial
This tutorial shows you how to build a web application by using Next.js and MongoDB. The application accesses sample restaurant data, queries the data, and displays the results on a locally hosted site. The tutorial also includes instructions for connecting to a MongoDB cluster hosted on MongoDB Atlas and accessing and displaying data from your database.
Tip
If you prefer to connect to MongoDB by using the Node.js driver without Next.js, see the Get Started with the Node.js Driver guide.
Set Up Your Project
Follow the steps in this section to install the project dependencies, create an Atlas cluster, and set up the application directories.
Verify the prerequisites
To create the application, you need the following installed in your development environment:
Prerequisite | Notes |
|---|---|
Download either the Latest LTS or Latest Release version. | |
Code editor | This tutorial uses Visual Studio Code, but you can use the editor of your choice. |
Terminal app or shell | For MacOS users, use Terminal or a similar app. For Windows users, use PowerShell. |
Create a MongoDB Atlas cluster
MongoDB Atlas is a fully managed cloud database service that hosts your
MongoDB deployments. If you do not have a MongoDB deployment, you can create a MongoDB
cluster for free (no credit card required) by completing the
MongoDB Get Started
tutorial. The MongoDB Get Started tutorial also demonstrates how to load sample
datasets into your cluster, including the sample_restaurants database
that is used in this tutorial.
To connect to your MongoDB cluster, you must use a connection URI. To learn how to retrieve your connection URI, see the Add your connection string section of the MongoDB Get Started tutorial.
Important
Save your connection string in a secure location.
Create your Next.js application
Run the following command in your terminal to create a new Next.js application.
npx create-next-app@latest next-quickstart
The command prompts you to select some configuration options for your project. When prompted, select the option to use the recommended defaults.
After running the command, navigate to the project directory:
cd next-quickstart
Configure the Database Connection
After you set up the project structure and dependencies, follow the steps in this section to configure your database connection.
Set environment variables
In the next-quickstart directory, create a .env.local file that stores
your MongoDB connection URI:
MONGODB_URI=<connection URI>
Replace the <connection URI> placeholder with the connection
URI that you saved in a previous step.
Note
Next.js automatically loads environment variables from .env.local
files. Variables prefixed with NEXT_PUBLIC_ are exposed to the
browser, while other variables are only available on the server.
Create the database connection utility
In the root directory, create a new directory called lib.
Add a new file named mongodb.ts to this directory and paste
the following code:
import { MongoClient } from "mongodb"; declare global { var _mongoClientPromise: Promise<MongoClient> | undefined; } const uri = process.env.MONGODB_URI; const options = {}; let client: MongoClient; let clientPromise: Promise<MongoClient>; if (!uri) { throw new Error("Please add your Mongo URI to .env.local"); } client = new MongoClient(uri, options); clientPromise = client.connect(); // Export a module-scoped MongoClient promise. By doing this in a // separate module, the client can be shared across functions. export default clientPromise;
This file creates a reusable MongoDB client connection that is shared across your application. The connection is cached to prevent creating multiple connections during development when Next.js hot-reloads your code.
Create API Routes
After you set up the database connection, follow the steps in this section to create API routes that query MongoDB and return restaurant data.
Create the restaurant API route
In the app directory, create a new
api/restaurants directory. Add a new file named route.ts to this
directory and paste the following code:
import { NextResponse } from "next/server"; import clientPromise from "@/lib/mongodb"; export async function GET() { try { const client = await clientPromise; const db = client.db("sample_restaurants"); const restaurants = await db .collection("restaurants") .find({}) .toArray(); return NextResponse.json(restaurants); } catch { return NextResponse.json( { error: "Failed to fetch restaurants" }, { status: 500 } ); } }
This file defines a GET endpoint at /api/restaurants that
retrieves all restaurants from the sample_restaurants database.
Create the browse API route
In the app/api directory, create a new directory called
browse. Create a new file named route.ts in this directory
and paste the following code:
import { NextResponse } from "next/server"; import clientPromise from "@/lib/mongodb"; export async function GET() { try { const client = await clientPromise; const db = client.db("sample_restaurants"); const query = { borough: "Queens", name: { $regex: "Moon", $options: "i" }, }; const restaurants = await db .collection("restaurants") .find(query) .toArray(); return NextResponse.json(restaurants); } catch { return NextResponse.json( { error: "Failed to fetch restaurants" }, { status: 500 } ); } }
This file defines a GET endpoint at /api/browse that retrieves
restaurants matching specific query criteria. The query filters for
restaurants in Queens that contain the word "Moon" in the name.
Configure the Front End
After you set up the API routes, follow the steps in this section to create the React components that display the restaurant data.
Create the Navbar component
In the root directory, create a new directory called components.
Add a new file named Navbar.tsx to this directory and paste
the following code:
import Link from "next/link"; export default function Navbar() { return ( <nav className="bg-gray-800 p-4"> <div className="container mx-auto flex justify-between items-center"> <Link href="/" className="text-white text-xl font-bold"> MongoDB Restaurants </Link> <div className="space-x-4"> <Link href="/" className="text-gray-300 hover:text-white transition-colors" > All Restaurants </Link> <Link href="/browse" className="text-gray-300 hover:text-white transition-colors" > Filtered Restaurants </Link> </div> </div> </nav> ); }
This component creates a navigation bar with links to view all restaurants and filtered restaurants.
Create the RestaurantList component
In the components directory, create a new file named
RestaurantList.tsx and paste the following code:
"use client"; /* The above directive tells Next.js to render this component on the client side instead of the server side. Client components can use React hooks like useState and useEffect, while server components cannot. */ import { useEffect, useState } from "react"; import { ObjectId } from "mongodb"; interface Restaurant { _id: ObjectId; name: string; borough: string; cuisine: string; } interface RestaurantProps { restaurant: Restaurant; } const Restaurant = (props: RestaurantProps) => ( <tr className="border-b transition-colors hover:bg-muted/50 data-[state=selected]:bg-muted"> <td className="p-4 align-middle [&:has([role=checkbox])]:pr-0"> {props.restaurant.name} </td> <td className="p-4 align-middle [&:has([role=checkbox])]:pr-0"> {props.restaurant.borough} </td> <td className="p-4 align-middle [&:has([role=checkbox])]:pr-0"> {props.restaurant.cuisine} </td> </tr> ); interface RestaurantListProps { endpoint: string; title: string; } export default function RestaurantList({ endpoint, title }: RestaurantListProps) { const [restaurants, setRestaurants] = useState<Restaurant[]>([]); const [loading, setLoading] = useState(true); useEffect(() => { async function getRestaurants() { try { const response = await fetch(endpoint); if (!response.ok) { const message = `An error occurred: ${response.statusText}`; console.error(message); return; } const restaurants = await response.json(); setRestaurants(restaurants); } catch (error) { console.error("Error fetching restaurants:", error); } finally { setLoading(false); } } getRestaurants(); }, [endpoint]); function restaurantList() { return restaurants.map((restaurant) => { return <Restaurant restaurant={restaurant} key={restaurant._id.toString()} />; }); } if (loading) { return <div className="p-4">Loading...</div>; } return ( <> <h3 className="text-lg font-semibold p-4">{title}</h3> <div className="border rounded-lg overflow-hidden"> <div className="relative w-full overflow-auto"> <table className="w-full caption-bottom text-sm"> <thead className="[&_tr]:border-b"> <tr className="border-b transition-colors hover:bg-muted/50 data-[state=selected]:bg-muted"> <th className="h-12 px-4 text-left align-middle font-medium text-muted-foreground [&:has([role=checkbox])]:pr-0"> Name </th> <th className="h-12 px-4 text-left align-middle font-medium text-muted-foreground [&:has([role=checkbox])]:pr-0"> Borough </th> <th className="h-12 px-4 text-left align-middle font-medium text-muted-foreground [&:has([role=checkbox])]:pr-0"> Cuisine </th> </tr> </thead> <tbody className="[&_tr:last-child]:border-0"> {restaurantList()} </tbody> </table> </div> </div> </> ); }
This component fetches and displays restaurant data from the API routes. It uses React hooks to manage state and fetch data when the component mounts.
Update the home page
Navigate to the app/page.tsx file and replace the contents
with the following code:
import RestaurantList from "@/components/RestaurantList"; export default function Home() { return ( <main className="container mx-auto p-4"> <RestaurantList endpoint="/api/restaurants" title="All Restaurants" /> </main> ); }
This file renders the home page, which displays all restaurants from the database.
Create the browse page
In the app directory, create a new directory called browse.
Add a new file named page.tsx to this directory and paste the
following code:
import RestaurantList from "@/components/RestaurantList"; export default function Browse() { return ( <main className="container mx-auto p-4"> <RestaurantList endpoint="/api/browse" title='Filtered Restaurants (Queens, containing "Moon")' /> </main> ); }
This file renders the browse page, which displays filtered restaurants based on the query criteria.
Update the layout
Navigate to the app/layout.tsx file and replace the contents
with the following code:
import "./globals.css"; import Navbar from "@/components/Navbar"; import { Metadata } from "next"; export const metadata: Metadata = { title: "MongoDB Next.js App", description: "A Next.js application with MongoDB integration", }; export default function RootLayout({ children }: { children: React.ReactNode }) { return ( <html lang="en"> <body> <Navbar /> {children} </body> </html> ); }
This file defines the root layout for your application, which includes the navigation bar and wraps all pages.
Run Your Application
Finally, follow the steps in this section to run your application and view the rendered restaurant data.
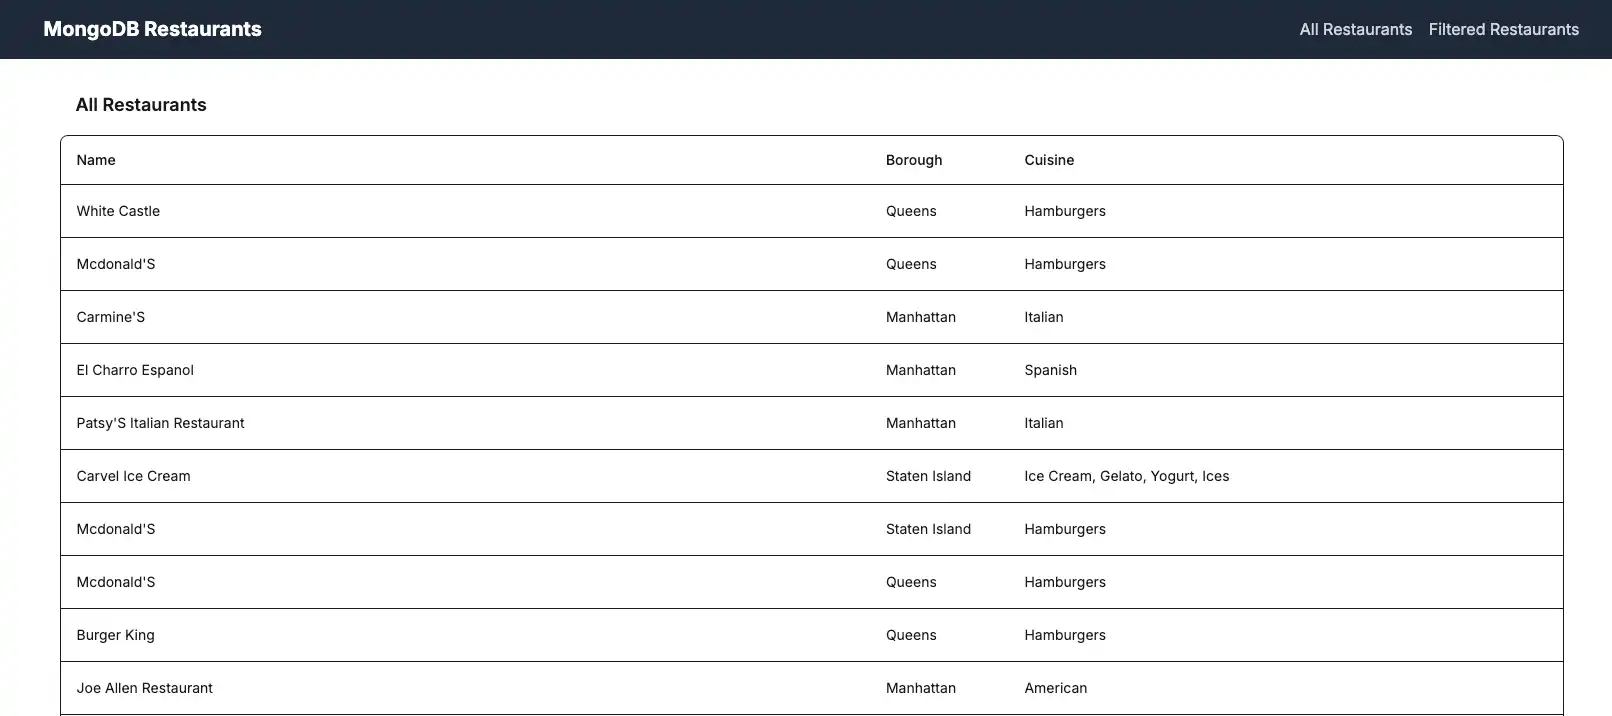
Open the application site
Open the http://localhost:3000/ URL. The initial
landing page displays a list of all restaurants in the sample_restaurants.restaurants
collection:

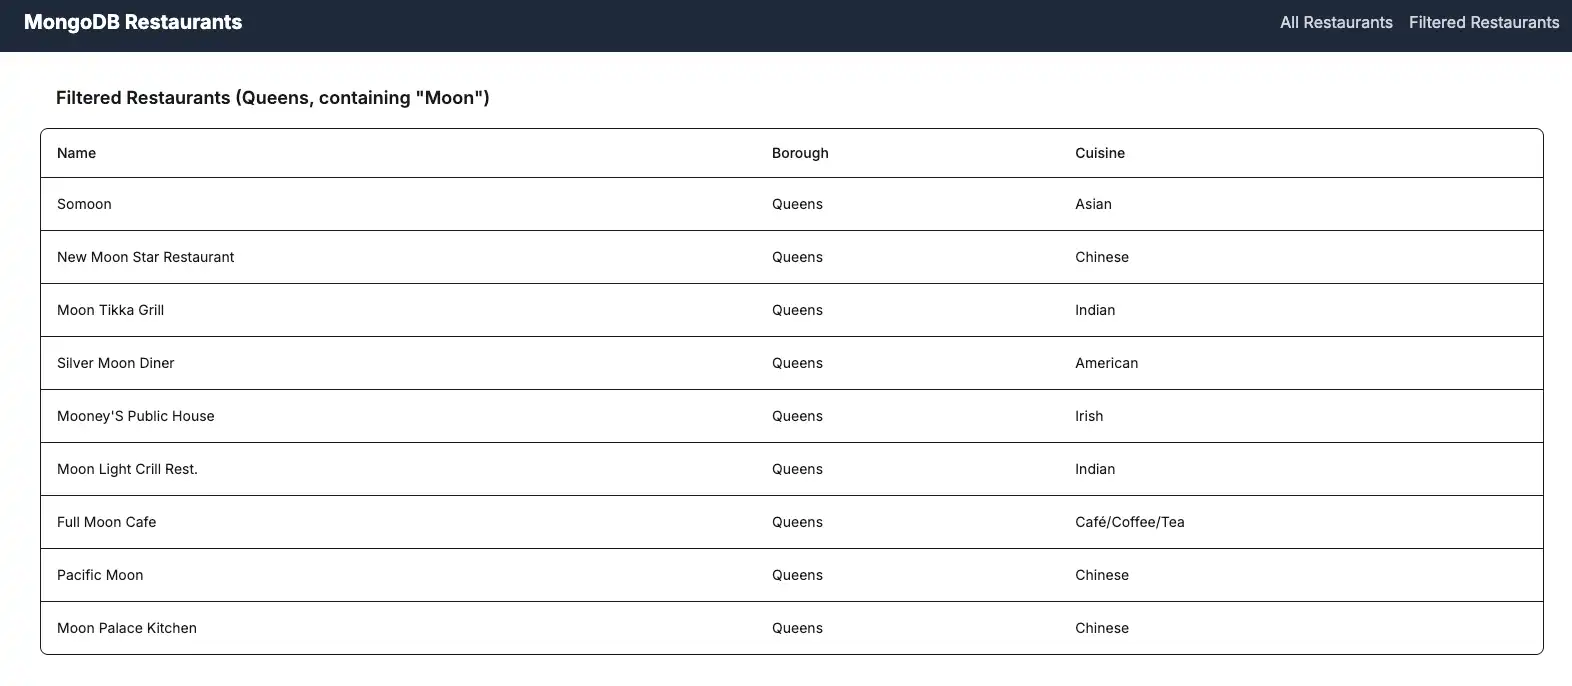
Click the Filtered Restaurants link in the navigation bar
to view the restaurants that match the name and borough field query:

Congratulations on completing the Quick Start tutorial!
After you complete these steps, you have a Next.js web application that connects to your MongoDB deployment, runs queries on sample restaurant data, and renders the results on a locally hosted website.
Additional Resources
To learn more about Next.js and MongoDB, view the following resources:
Node.js driver documentation
Next.js documentation
Next.js API Routes documentation