This tutorial demonstrates how to connect to MongoDB Connector for BI using Spotfire Cloud.
Prerequisites
- Create a 64-bit system Data Source Name (DSN).
Connect from Spotfire Cloud
Add Data Connection
From the File menu, select the Add Data Tables item.
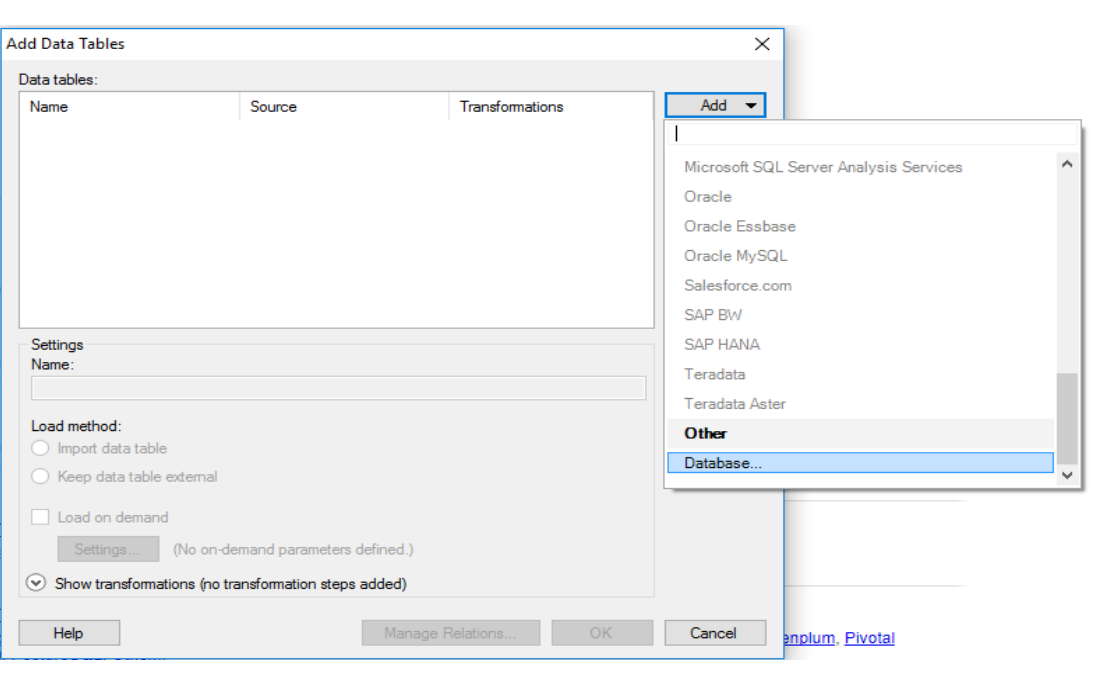
In the Add Data Tables dialog, click the Add dropdown menu in the upper right corner. Select Database at the bottom of the menu.
 click to enlarge
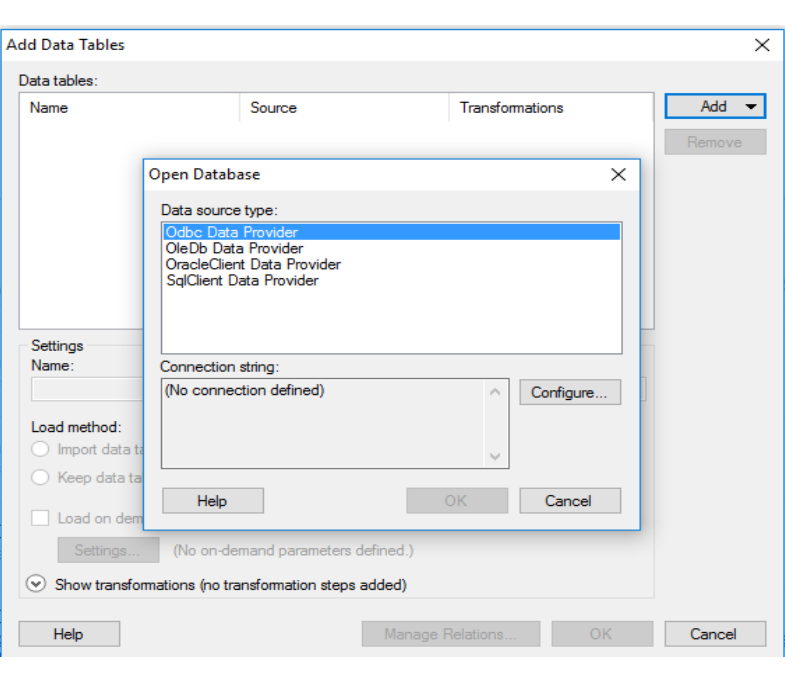
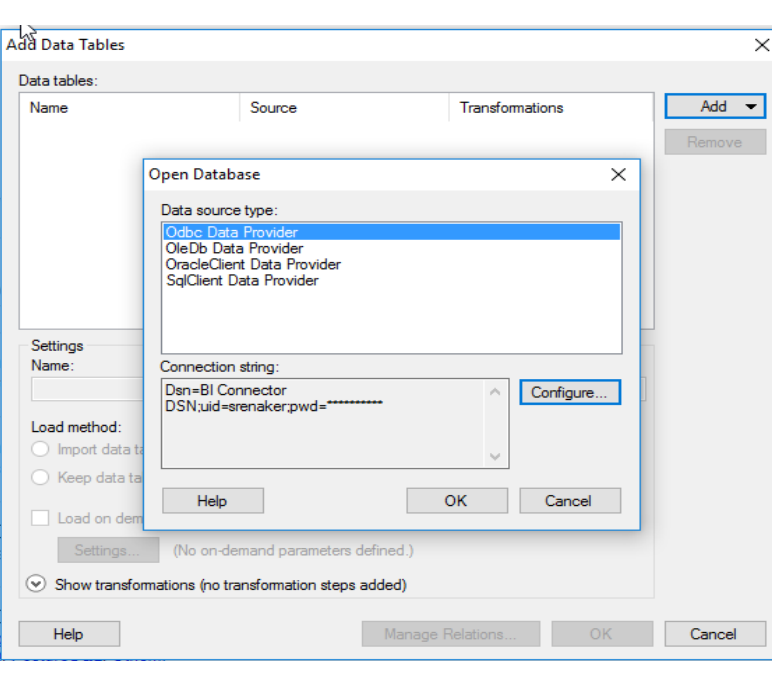
In the Open Database dialog, select Odbc Data Provider, then click Configure.
 click to enlarge
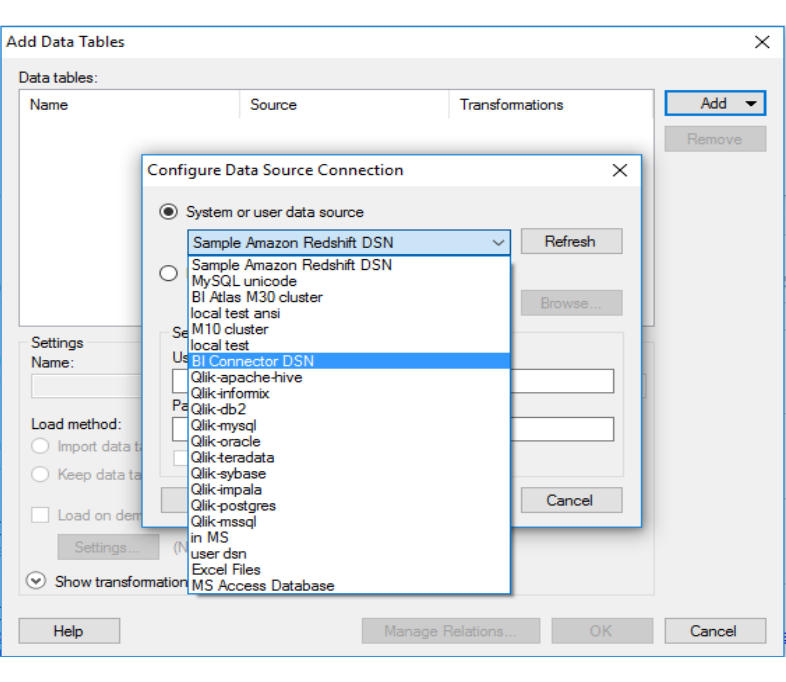
In the Configure Data Source Connection dialog, select your DSN from the dropdown menu labelled System or user data source.
 click to enlarge
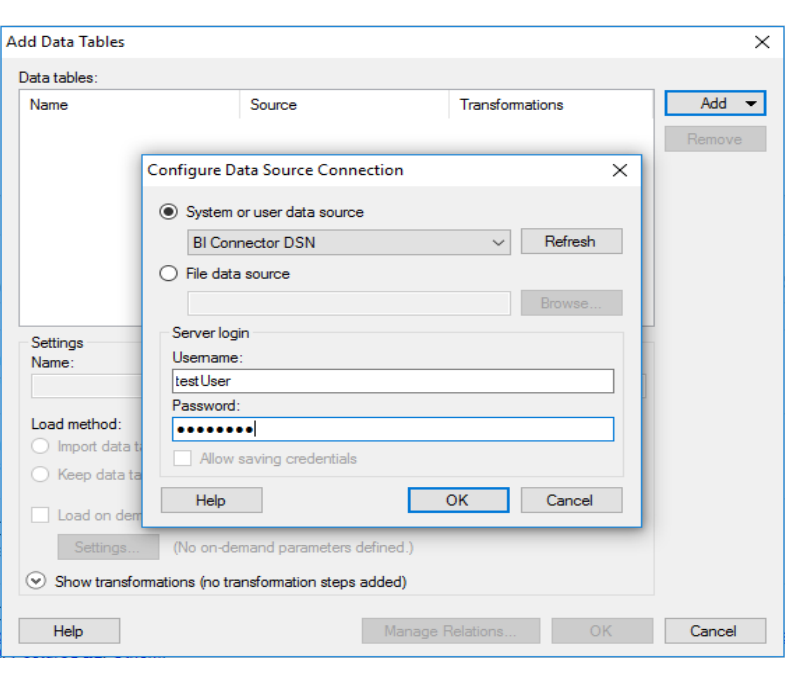
Fill in your MongoDB username and password and click OK.
 click to enlarge
The Open Database dialog should now display a connection string for your DSN. Click OK.
 click to enlarge
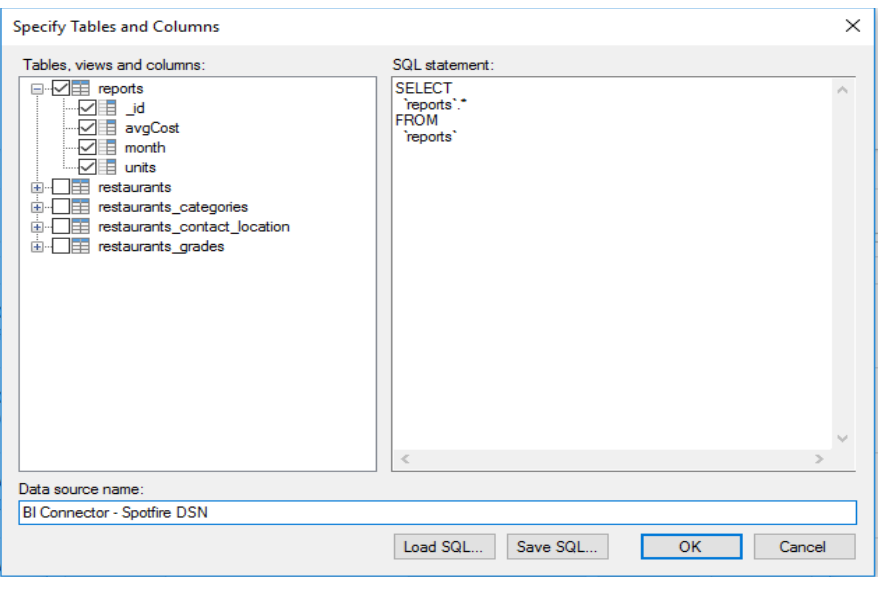
Specify Tables and Columns
Select the data you would like to work with from the available fields.
 click to enlarge
Give this data connection a name in the Data source name text box.
Note
The name you use here is only for the Spotfire application's use. It does not change the name of your ODBC System DSN.
Click OK.
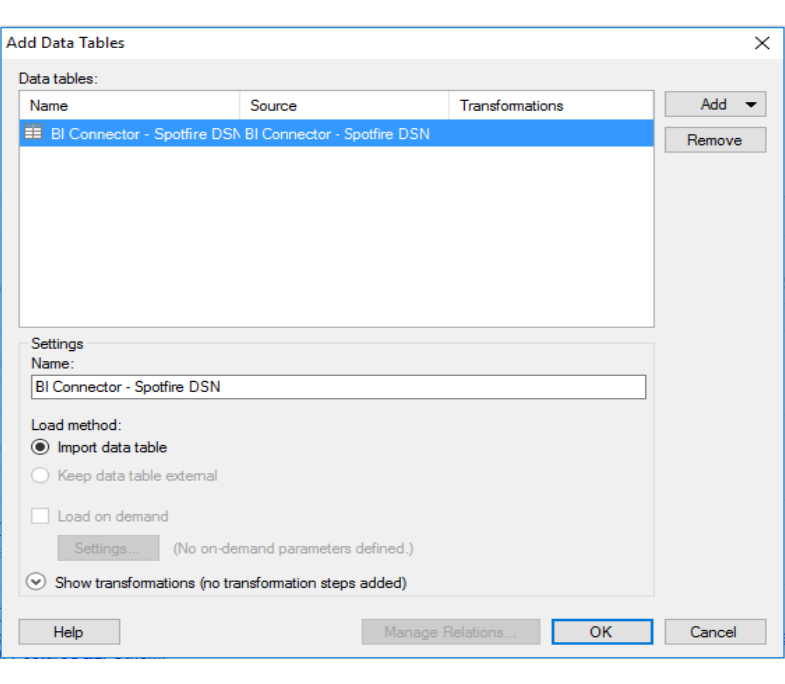
The Add Data Tables dialog should now list your connection as ready for import.
 click to enlarge
Click OK.
You are now ready to add visualizations and analyze your data.