本页包含快速将Realm集成到使用 LiveData 的示例Android应用程序中的说明。此示例应用程序允许用户使用按钮递增计数器。
先决条件
本快速指南使用Sync在客户端之间同步数据更改。 开始之前,请确保您已:
注意
在不同步的情况下使用 LiveData
要在不使用 Sync 的情况下使用此快速入门,请禁用 SDK 中的同步功能。 为此,您可以从应用级build.gradle文件中删除以下行:
realm { syncEnabled = true }
删除这些行后,重新同步 Gradle 配置,以在仅离线状态下重新加载 Java SDK。 从 CounterModel文件中删除与导入和使用同步配置、用户登录名和分区值相关的行,以便在不使用同步的情况下使用 Java SDK。
克隆 LiveData 快速入门存储库
To get started, copy the example repo into your local environment.
我们已经整理了一个 Android 应用程序,其中包含您所需的大部分代码。 您可以直接从 GitHub 克隆客户端应用程序存储库:
git clone https://github.com/mongodb-university/realm-android-livedata.git
存储库包含两个分支: final和start 。 final分支是应用程序的完成版本,在您完成本教程后,它应该是这样的。 要演练本教程,请查看start分支:
git checkout start
导入依赖项
克隆存储库后,您需要添加运行 Java SDK 和 Android LiveData 所需的依赖项。 首先将 Java SDK 依赖项添加到项目级别build.gradle文件的buildscript.dependencies区块中:
buildscript { ext.kotlin_version = "1.4.10" repositories { google() jcenter() } dependencies { classpath "com.android.tools.build:gradle:4.0.2" classpath "org.jetbrains.kotlin:kotlin-gradle-plugin:$kotlin_version" classpath "io.realm:realm-gradle-plugin:10.2.0" } }
您还必须将 Android LiveData 依赖项添加到应用程序级build.gradle文件的dependencies区块中:
dependencies { implementation fileTree(dir: "libs", include: ["*.jar"]) implementation "org.jetbrains.kotlin:kotlin-stdlib:$kotlin_version" implementation 'androidx.core:core-ktx:1.3.2' implementation 'androidx.appcompat:appcompat:1.2.0' implementation 'com.google.android.material:material:1.2.1' implementation 'androidx.constraintlayout:constraintlayout:2.0.4' implementation 'androidx.navigation:navigation-fragment-ktx:2.3.1' implementation 'androidx.navigation:navigation-ui-ktx:2.3.1' implementation "androidx.lifecycle:lifecycle-livedata-ktx:2.2.0" testImplementation 'junit:junit:4.12' androidTestImplementation 'androidx.test.ext:junit:1.1.2' androidTestImplementation 'androidx.test.espresso:espresso-core:3.3.0' }
接下来,通过在应用程序级build.gradle文件中创建以下顶级区块来启用 SDK 中的同步:
realm { syncEnabled = true }
然后,通过在应用程序级build.gradle文件的android区块中创建以下区块来启用 DataBinding:
android { compileSdkVersion 30 buildToolsVersion "30.0.2" defaultConfig { applicationId "com.mongodb.realm.livedataquickstart" minSdkVersion 16 targetSdkVersion 30 versionCode 1 versionName "1.0" testInstrumentationRunner "androidx.test.runner.AndroidJUnitRunner" } buildFeatures { dataBinding true } buildTypes { release { minifyEnabled false proguardFiles getDefaultProguardFile('proguard-android-optimize.txt'), 'proguard-rules.pro' } } compileOptions { sourceCompatibility JavaVersion.VERSION_1_8 targetCompatibility JavaVersion.VERSION_1_8 } kotlinOptions { jvmTarget = '1.8' } }
最后,单击“同步”按钮或在应用程序菜单中选择 Build > Rebuild Project ,以使用这些更改重新配置 Gradle 配置并获取依赖项。
LiveRealmObject
所有依赖项都就位后,是时候为 Realm 对象创建一个与 LiveData 兼容的接口了。 为此,我们必须处理一些事件:
onActive()方法使观察者能够通过添加变更侦听器来订阅对底层 Realm 对象的变更。override fun onActive() { super.onActive() val obj = value if (obj != null && RealmObject.isValid(obj)) { RealmObject.addChangeListener(obj, listener) } } onInactive()方法使观察者能够通过删除变更侦听器来取消订阅对底层 Realm 对象的变更。override fun onInactive() { super.onInactive() val obj = value if (obj != null && RealmObject.isValid(obj)) { RealmObject.removeChangeListener(obj, listener) } } 发生更改时,
listener成员使用LiveData父类的setValue()方法将 Realm 对象的值传递给用户界面,除非该对象已被删除,在这种情况下,更改侦听器会传递null不是传递对无效的已删除对象的引用。private val listener = RealmObjectChangeListener<T> { obj, objectChangeSet -> if (!objectChangeSet!!.isDeleted) { setValue(obj) } else { // Because invalidated objects are unsafe to set in LiveData, pass null instead. setValue(null) } }
提示
将 LiveData 与 RealmResults 结合使用
This example only uses LiveData to display RealmObjects in the UI. For a sample implementation displaying RealmResults, see LiveRealmResults.
在 ViewModel 中实例化 LiveData
此应用程序将其所有逻辑和核心数据存储在名为CounterModel的 ViewModel 中。 应用程序运行时,会创建一个CounterModel实例,该实例将一直使用到应用程序关闭为止。 该实例包含显示在应用程序用户界面上的 LiveData。要创建 LiveData 实例,我们需要访问存储在 Realm 中的Counter对象并将其传递给LiveRealmObject构造函数。 为此,请执行以下操作:
使用您的应用程序 ID连接到您的应用。
对用户进行身份验证。
使用 Sync 连接到特定 Realm。
在该 Realm 中查询是否有
Counter,如果尚未在此 Realm 中创建,则插入新的Counter。使用
Counter实例实例化LiveRealmObject,并将其存储在CounterModel的counter成员中。
以下代码片段实现了此行为:
init { val appID = "YOUR APP ID HERE" // TODO: replace this with your App ID // 1. connect to the MongoDB Realm app backend val app = App( AppConfiguration.Builder(appID) .build() ) // 2. authenticate a user app.loginAsync(Credentials.anonymous()) { if(it.isSuccess) { Log.v("QUICKSTART", "Successfully logged in anonymously.") // 3. connect to a realm with Realm Sync val user: User? = app.currentUser() val partitionValue = "example partition" val config = SyncConfiguration.Builder(user!!, partitionValue) // because this application only reads/writes small amounts of data, it's OK to read/write from the UI thread .allowWritesOnUiThread(true) .allowQueriesOnUiThread(true) .build() // open the realm realm = Realm.getInstance(config) // 4. Query the realm for a Counter, creating a new Counter if one doesn't already exist // access all counters stored in this realm val counterQuery = realm!!.where<Counter>() val counters = counterQuery.findAll() // if we haven't created the one counter for this app before (as on first launch), create it now if (counters.size == 0) { realm?.executeTransaction { transactionRealm -> val counter = Counter() transactionRealm.insert(counter) } } // 5. Instantiate a LiveRealmObject using the Counter and store it in a member variable // the counters query is life, so we can just grab the 0th index to get a guaranteed counter this._counter.postValue(counters[0]!!) } else { Log.e("QUICKSTART", "Failed to log in anonymously. Error: ${it.error.message}") } } }
重要
不要在用户界面线程上读取或写入
用户界面读取和写入的计算量很大,因此 SDK 默认禁用用户界面线程上的读取和写入。为简单起见,此示例使用allowWritesOnUiThread()和allowQueriesOnUiThread()配置生成器方法启用用户界面线程读取和写入。 在生产应用程序中,您几乎应该始终使用异步方法将读取和写入推迟到背景线程。
将 ViewModel 连接到用户界面
To display the data stored in the CounterModel on the application UI, we'll need to access the CounterModel singleton using the viewModels() method when the application creates CounterFragment. Once we've instantiated the model, we can use the Android Data Binding library to display the model's data in UI elements.
要在应用程序创建CounterFragment时访问CounterModel单例,请将以下代码放在CounterFragment的onCreateView()方法中:
val model: CounterModel by viewModels()
接下来,在用户界面中为计数器片段设置数据绑定钩子:
<?xml version="1.0" encoding="utf-8"?> <layout> <data> <variable name="counterModel" type="com.mongodb.realm.livedataquickstart.model.CounterModel" /> </data> <androidx.constraintlayout.widget.ConstraintLayout xmlns:android="http://schemas.android.com/apk/res/android" xmlns:app="http://schemas.android.com/apk/res-auto" xmlns:tools="http://schemas.android.com/tools" android:layout_width="match_parent" android:layout_height="match_parent" tools:context=".CounterFragment"> <TextView android:id="@+id/textview" android:layout_width="wrap_content" android:layout_height="wrap_content" android:text="@{counterModel.counter.value.get().toString()}" android:textSize="58pt" app:layout_constraintBottom_toTopOf="@id/button" app:layout_constraintEnd_toEndOf="parent" app:layout_constraintStart_toStartOf="parent" app:layout_constraintTop_toTopOf="parent" /> <Button android:id="@+id/button" android:layout_width="wrap_content" android:layout_height="wrap_content" android:text="@string/add" app:layout_constraintBottom_toBottomOf="parent" app:layout_constraintEnd_toEndOf="parent" app:layout_constraintStart_toStartOf="parent" app:layout_constraintTop_toBottomOf="@id/textview" /> </androidx.constraintlayout.widget.ConstraintLayout> </layout>
最后,将模型连接到绑定,以便用户界面可以显示计数器,并在按下按钮时使用CounterFragment的onCreateView()方法中的以下代码迭代计数器:
val binding = CounterFragmentBinding.inflate(inflater, container, false).apply { lifecycleOwner = viewLifecycleOwner counterModel = model } binding.root.button.setOnClickListener { Log.v("QUICKSTART", "Clicked increment button. Current value: ${model.counter.value?.value?.get()}") model.incrementCounter() } return binding.root
运行应用程序
现在您应该能够运行示例应用程序。 您应该会看到如下所示的界面:

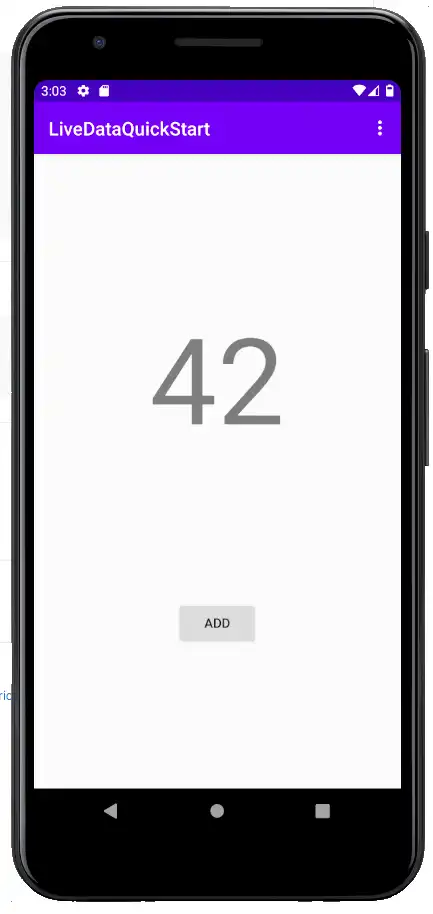
单击“ADD”(添加)按钮后,计数器的值应加一。 通过 Sync,您可以查看应用日志以了解各个增量事件。 Android LiveData 具有生命周期感知功能,因此旋转屏幕或通过清除设备 RAM 来释放应用程序的状态应该不会影响应用程序状态,应用程序状态应该会无缝恢复,并在恢复时使用存储在模型单例和封装的 LiveData 实例中的状态自动重新订阅事件。
总结
使用
LiveRealmObject和LiveRealmResults类作为模板,在 Android LiveData 中封装实时 Realm 数据。使用 ViewModel 将底层数据与显示该数据的用户界面元素分开。
DataBinding 允许您声明模型数据和 UI 元素之间的关系,而无需在“活动”或“片段”中显式设置值。
反馈
您觉得本快速入门指南有帮助吗? 请通过页面右侧的反馈表告知我们!