本页包含快速将Realm集成到使用 LiveData 的示例Android应用程序中的说明。此示例应用程序允许用户使用按钮递增计数器。
先决条件
本快速指南使用Sync在客户端之间同步数据更改。 开始之前,请确保您已:
注意
在不同步的情况下使用 LiveData
要在不使用 Sync 的情况下使用此快速入门,请禁用 SDK 中的同步功能。 为此,您可以从应用级build.gradle文件中删除以下行:
realm { syncEnabled = true }
删除这些行后,重新同步 Gradle 配置,以在仅离线状态下重新加载 Java SDK。 从 CounterModel文件中删除与导入和使用同步配置、用户登录名和分区值相关的行,以便在不使用同步的情况下使用 Java SDK。
克隆 LiveData 快速入门存储库
我们已经整理了一个 Android 应用程序,其中包含您所需的大部分代码。 您可以直接从 GitHub 克隆客户端应用程序存储库:
git clone https://github.com/mongodb-university/realm-android-livedata.git
存储库包含两个分支: final和start 。 final分支是应用程序的完成版本,在您完成本教程后,它应该是这样的。 要演练本教程,请查看start分支:
git checkout start
导入依赖项
克隆存储库后,您需要添加运行 Java SDK 和 Android LiveData 所需的依赖项。 首先将 Java SDK 依赖项添加到项目级别build.gradle文件的buildscript.dependencies区块中:
buildscript { ext.kotlin_version = "1.4.10" repositories { google() jcenter() } dependencies { classpath "com.android.tools.build:gradle:4.0.2" classpath "org.jetbrains.kotlin:kotlin-gradle-plugin:$kotlin_version" classpath "io.realm:realm-gradle-plugin:10.2.0" } }
您还必须将 Android LiveData 依赖项添加到应用程序级build.gradle文件的dependencies区块中:
dependencies { implementation fileTree(dir: "libs", include: ["*.jar"]) implementation "org.jetbrains.kotlin:kotlin-stdlib:$kotlin_version" implementation 'androidx.core:core-ktx:1.3.2' implementation 'androidx.appcompat:appcompat:1.2.0' implementation 'com.google.android.material:material:1.2.1' implementation 'androidx.constraintlayout:constraintlayout:2.0.4' implementation 'androidx.navigation:navigation-fragment-ktx:2.3.1' implementation 'androidx.navigation:navigation-ui-ktx:2.3.1' implementation "androidx.lifecycle:lifecycle-livedata-ktx:2.2.0" testImplementation 'junit:junit:4.12' androidTestImplementation 'androidx.test.ext:junit:1.1.2' androidTestImplementation 'androidx.test.espresso:espresso-core:3.3.0' }
接下来,通过在应用程序级build.gradle文件中创建以下顶级区块来启用 SDK 中的同步:
realm { syncEnabled = true }
然后,通过在应用程序级build.gradle文件的android区块中创建以下区块来启用 DataBinding:
android { compileSdkVersion 30 buildToolsVersion "30.0.2" defaultConfig { applicationId "com.mongodb.realm.livedataquickstart" minSdkVersion 16 targetSdkVersion 30 versionCode 1 versionName "1.0" testInstrumentationRunner "androidx.test.runner.AndroidJUnitRunner" } buildFeatures { dataBinding true } buildTypes { release { minifyEnabled false proguardFiles getDefaultProguardFile('proguard-android-optimize.txt'), 'proguard-rules.pro' } } compileOptions { sourceCompatibility JavaVersion.VERSION_1_8 targetCompatibility JavaVersion.VERSION_1_8 } kotlinOptions { jvmTarget = '1.8' } }
最后,单击“同步”按钮或在应用程序菜单中选择 Build > Rebuild Project ,以使用这些更改重新配置 Gradle 配置并获取依赖项。
LiveRealmObject
所有依赖项都就位后,是时候为 Realm 对象创建一个与 LiveData 兼容的接口了。 为此,我们必须处理一些事件:
onActive()方法使观察者能够通过添加变更侦听器来订阅对底层 Realm 对象的变更。override fun onActive() { super.onActive() val obj = value if (obj != null && RealmObject.isValid(obj)) { RealmObject.addChangeListener(obj, listener) } } onInactive()方法使观察者能够通过删除变更侦听器来取消订阅对底层 Realm 对象的变更。override fun onInactive() { super.onInactive() val obj = value if (obj != null && RealmObject.isValid(obj)) { RealmObject.removeChangeListener(obj, listener) } } 发生更改时,
listener成员使用LiveData父类的setValue()方法将 Realm 对象的值传递给用户界面,除非该对象已被删除,在这种情况下,更改侦听器会传递null不是传递对无效的已删除对象的引用。private val listener = RealmObjectChangeListener<T> { obj, objectChangeSet -> if (!objectChangeSet!!.isDeleted) { setValue(obj) } else { // Because invalidated objects are unsafe to set in LiveData, pass null instead. setValue(null) } }
提示
将 LiveData 与 RealmResults 结合使用
此示例仅使用 LiveData 在用户界面中显示RealmObjects 。有关显示RealmResults 的示例实施,请参阅 LiveRealmResults。
在 ViewModel 中实例化 LiveData
此应用程序将其所有逻辑和核心数据存储在名为CounterModel的 ViewModel 中。 应用程序运行时,会创建一个CounterModel实例,该实例将一直使用到应用程序关闭为止。 该实例包含显示在应用程序用户界面上的 LiveData。要创建 LiveData 实例,我们需要访问存储在 Realm 中的Counter对象并将其传递给LiveRealmObject构造函数。 为此,请执行以下操作:
使用您的应用程序 ID连接到您的应用。
对用户进行身份验证。
使用 Sync 连接到特定 Realm。
在该 Realm 中查询是否有
Counter,如果尚未在此 Realm 中创建,则插入新的Counter。使用
Counter实例实例化LiveRealmObject,并将其存储在CounterModel的counter成员中。
以下代码片段实现了此行为:
init { val appID = "YOUR APP ID HERE" // TODO: replace this with your App ID // 1. connect to the MongoDB Realm app backend val app = App( AppConfiguration.Builder(appID) .build() ) // 2. authenticate a user app.loginAsync(Credentials.anonymous()) { if(it.isSuccess) { Log.v("QUICKSTART", "Successfully logged in anonymously.") // 3. connect to a realm with Realm Sync val user: User? = app.currentUser() val partitionValue = "example partition" val config = SyncConfiguration.Builder(user!!, partitionValue) // because this application only reads/writes small amounts of data, it's OK to read/write from the UI thread .allowWritesOnUiThread(true) .allowQueriesOnUiThread(true) .build() // open the realm realm = Realm.getInstance(config) // 4. Query the realm for a Counter, creating a new Counter if one doesn't already exist // access all counters stored in this realm val counterQuery = realm!!.where<Counter>() val counters = counterQuery.findAll() // if we haven't created the one counter for this app before (as on first launch), create it now if (counters.size == 0) { realm?.executeTransaction { transactionRealm -> val counter = Counter() transactionRealm.insert(counter) } } // 5. Instantiate a LiveRealmObject using the Counter and store it in a member variable // the counters query is life, so we can just grab the 0th index to get a guaranteed counter this._counter.postValue(counters[0]!!) } else { Log.e("QUICKSTART", "Failed to log in anonymously. Error: ${it.error.message}") } } }
重要
不要在用户界面线程上读取或写入
用户界面读取和写入的计算量很大,因此 SDK 默认禁用用户界面线程上的读取和写入。为简单起见,此示例使用allowWritesOnUiThread()和allowQueriesOnUiThread()配置生成器方法启用用户界面线程读取和写入。 在生产应用程序中,您几乎应该始终使用异步方法将读取和写入推迟到背景线程。
将 ViewModel 连接到用户界面
要在应用程序用户界面上显示存储在CounterModel 中的数据,我们需要在应用程序创建CounterModel CounterFragment时使用 viewModels() 方法访问权限 单例。实例化模型后,就可以使用 Android 数据绑定库在用户界面元素中显示模型的数据。
要在应用程序创建CounterFragment时访问CounterModel单例,请将以下代码放在CounterFragment的onCreateView()方法中:
val model: CounterModel by viewModels()
接下来,在用户界面中为计数器片段设置数据绑定钩子:
<?xml version="1.0" encoding="utf-8"?> <layout> <data> <variable name="counterModel" type="com.mongodb.realm.livedataquickstart.model.CounterModel" /> </data> <androidx.constraintlayout.widget.ConstraintLayout xmlns:android="http://schemas.android.com/apk/res/android" xmlns:app="http://schemas.android.com/apk/res-auto" xmlns:tools="http://schemas.android.com/tools" android:layout_width="match_parent" android:layout_height="match_parent" tools:context=".CounterFragment"> <TextView android:id="@+id/textview" android:layout_width="wrap_content" android:layout_height="wrap_content" android:text="@{counterModel.counter.value.get().toString()}" android:textSize="58pt" app:layout_constraintBottom_toTopOf="@id/button" app:layout_constraintEnd_toEndOf="parent" app:layout_constraintStart_toStartOf="parent" app:layout_constraintTop_toTopOf="parent" /> <Button android:id="@+id/button" android:layout_width="wrap_content" android:layout_height="wrap_content" android:text="@string/add" app:layout_constraintBottom_toBottomOf="parent" app:layout_constraintEnd_toEndOf="parent" app:layout_constraintStart_toStartOf="parent" app:layout_constraintTop_toBottomOf="@id/textview" /> </androidx.constraintlayout.widget.ConstraintLayout> </layout>
最后,将模型连接到绑定,以便用户界面可以显示计数器,并在按下按钮时使用CounterFragment的onCreateView()方法中的以下代码迭代计数器:
val binding = CounterFragmentBinding.inflate(inflater, container, false).apply { lifecycleOwner = viewLifecycleOwner counterModel = model } binding.root.button.setOnClickListener { Log.v("QUICKSTART", "Clicked increment button. Current value: ${model.counter.value?.value?.get()}") model.incrementCounter() } return binding.root
运行应用程序
现在您应该能够运行示例应用程序。 您应该会看到如下所示的界面:

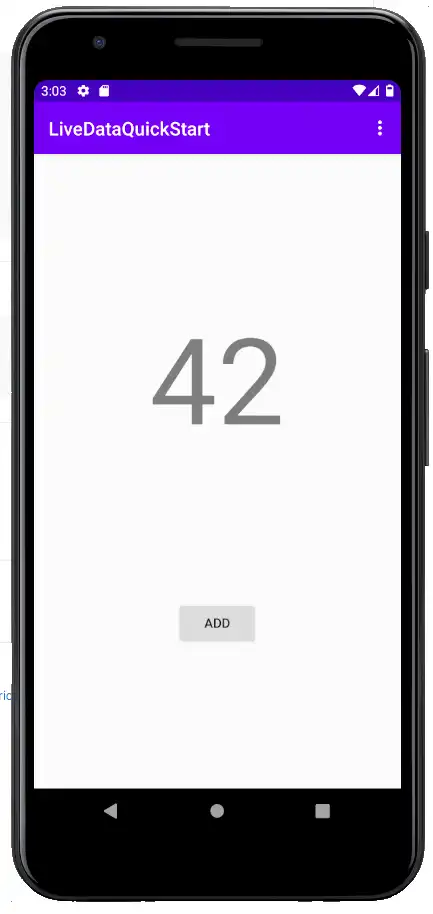
单击“ADD”(添加)按钮后,计数器的值应加一。 通过 Sync,您可以查看应用日志以了解各个增量事件。 Android LiveData 具有生命周期感知功能,因此旋转屏幕或通过清除设备 RAM 来释放应用程序的状态应该不会影响应用程序状态,应用程序状态应该会无缝恢复,并在恢复时使用存储在模型单例和封装的 LiveData 实例中的状态自动重新订阅事件。
总结
使用
LiveRealmObject和LiveRealmResults类作为模板,在 Android LiveData 中封装实时 Realm 数据。使用 ViewModel 将底层数据与显示该数据的用户界面元素分开。
DataBinding 允许您声明模型数据和 UI 元素之间的关系,而无需在“活动”或“片段”中显式设置值。
反馈
您觉得本快速入门指南有帮助吗? 请通过页面右侧的反馈表告知我们!