Setting up the project
(Feel free to code along or to download the full code from the GitHub repo.)
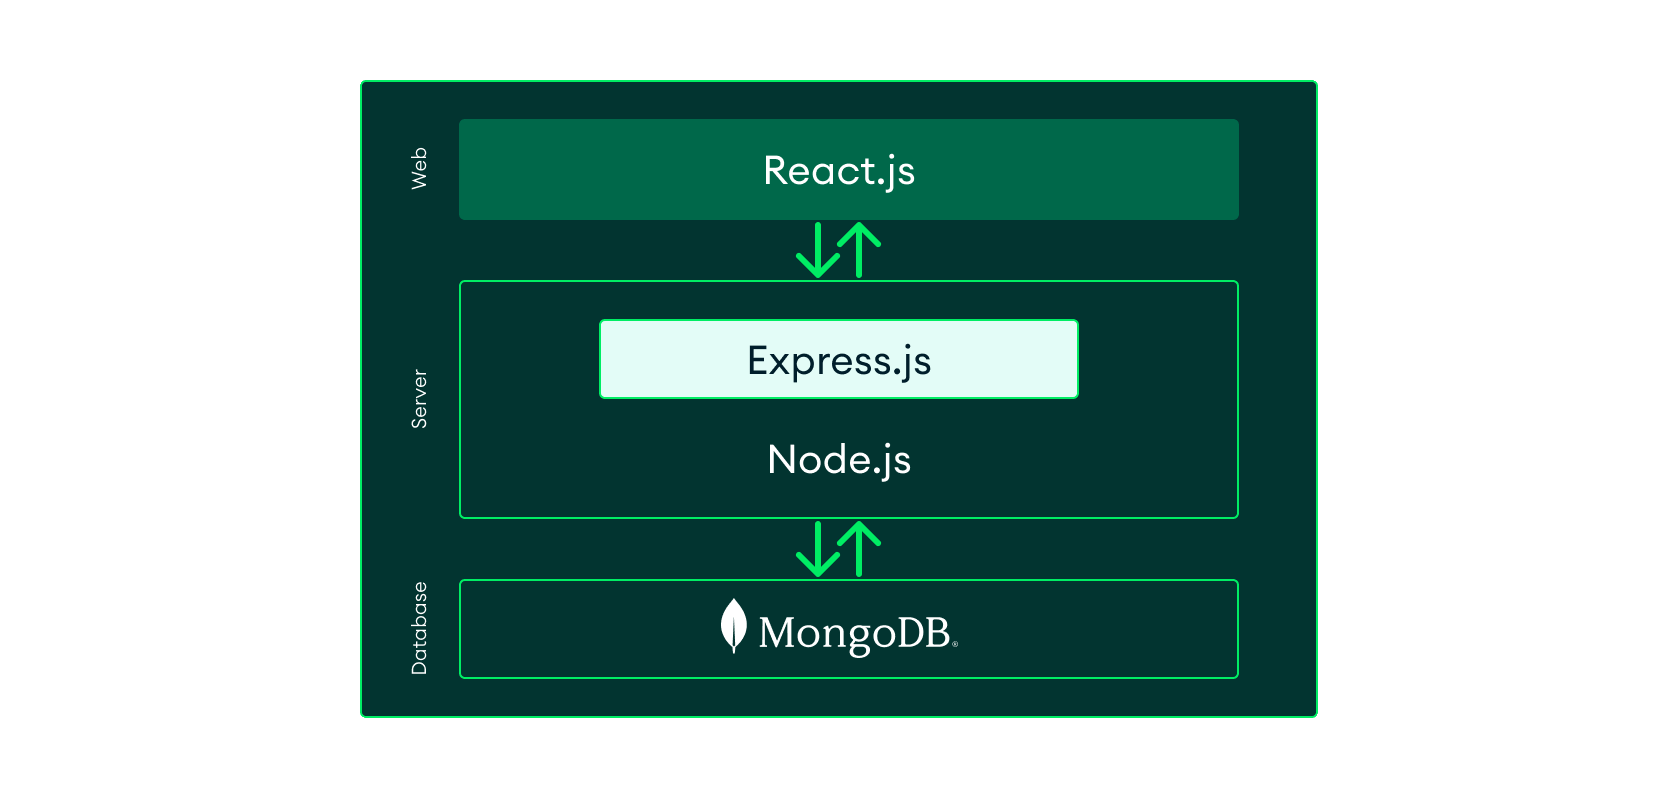
MERN lets us create full-stack solutions. So, to leverage its full potential, we will be creating a MERN stack project. For this project, we will create both a back end and a front end. The front end will be implemented with React and the back end will be implemented with MongoDB, Node.js, and Express. We will call the front end client and the back end server.
Let’s start by creating an empty directory: mern. This folder will contain our client and server folders.
Next, create a folder for the back end and name it server. Then, we will initialize the package.json file using npm init.
In order to use ECMAScript Modules, the officially supported standard format to package JavaScript code for reuse, we’ll add a line to the package.json file.
We will also install the dependencies.
The command above installs three different packages:
- mongodb — the MongoDB database driver that allows your Node.js applications to connect to the database and work with data
- express — the web framework for Node.js (it will make our lives easier)
- cors — a Node.js package that allows cross-origin resource sharing
We can check out installed dependencies in the package.json file. It should list the packages along with their versions.
After we have ensured that dependencies were installed successfully, we create a file called server.js with the following code:
mern/server/server.js
Here, we are importing express and cors to be used. const port = process.env.PORT will access the port variable from the config.env we’ll create next.
Connecting to MongoDB Atlas
It’s time to connect our server to the database. We will use MongoDB Atlas as the database. MongoDB Atlas is a cloud-based database service that provides robust data security and reliability. MongoDB Atlas provides a free tier cluster that never expires and lets you access a subset of Atlas features and functionality.
Follow the Get Started with Atlas guide to create an account, deploy your first cluster, and locate your cluster’s connection string.
Now that you have the connection string, go back to the server directory and create a config.env file. There, assign the connection string to a new ATLAS_URI variable. Once finished, your file should look similar to the one below. Replace < username >, < password >, < clusterName >, and < projectId > with your database username, password, cluster name, and project ID.
mern/server/config.env
Create a folder under the server directory named db and inside it, a file named connection.js. There we can add the following code to connect to our database:
mern/server/db/connection.js
Server API endpoints
Database done. Server done. Now, it's time for the API endpoints. Let's start by creating a routes folder and adding record.js in it. Navigate back to your “server” directory and create the new directory and file:
The routes/record.js file will also have the following lines of code in it:
mern/server/routes/record.js
If you run the application at this point, you will get the following message in your terminal as the connection establishes. Notice that we are using the built-in environment variable functionality of the latest versions of Node.js.
That’s it for the back end. Now, we will start working on the front end.
Setting up the React application
For the front end, we’ll use Vite, a modern way to create a React application. In a new terminal within the mern directory, let’s set this up:
There are some additional dependencies that will be used in our project. We’ll start with Tailwind CSS.
Next, we’ll edit the content field in the tailwind.config.js file.
In the src/index.css file, we need to add the Tailwind directives and delete everything else.
Lastly, we’ll install react-router-dom.
Tailwind is a utility-first CSS framework that allows you to add CSS styles by utilizing predefined class names. And React Router adds client-side page routing to React!
Setting up the React router
Inside src/main.jsx, we’ll add the following code:
mern/client/src/main.jsx
We have set up our application page routes in the router variable and used RouterProvider to keep our UI in sync with the URL. RouterProvider helps with seamless transitions while switching between components. Basically, it will only reload or refresh the component that needs to be changed instead of refreshing or reloading the entire page. Though React Router is not a necessity, it is important if you want your app to be responsive.
Creating components
Next, let’s create the components we defined in our routes. Create a components folder inside the src folder. For each component we create, we will add a new .js file inside the components folder. In this case, we will add Navbar.jsx, RecordList.jsx, and ModifyRecord.jsx.
The snapshots below show what each file would look like.
Navbar.jsx
In the navbar.js component, we will create a navigation bar that will link us to the required components using the following code.
mern/client/src/components/Navbar.jsx
RecordList.jsx
The following code will serve as a viewing component for our records. It will fetch all the records in our database through a GET method.
mern/client/src/components/RecordList.jsx
Record.jsx
The following code will serve as a form component to create or update records. This component will either submit a create command or an update command to our server.
mern/client/src/components/Record.jsx*
Now, we add the following to the src/App.jsx file.
mern/client/src/App.jsx
This is our main layout component. Our Navbar will always be at the top of every page and the Outlet will accept the children components we defined in our routes in the main.jsx file earlier.
Connecting the front end to the back end
We have completed the process of creating components. We also connected our React app to the back end using fetch, which provides cleaner and easier ways to handle http requests. In Record.jsx, we appended the following code to the onSubmit(e) block. When either a POST or PATCH request is sent to the URL, fetch will either add a new record to the database or update an existing record in the database.
We also placed the following block of code to Record.jsx beneath the constructor block in order to load an existing record, if it exists.
Finally, RecordList.jsx. RecordList.jsx fetches the records from the database, so we will be using fetch's GET method to retrieve records from the database. To achieve this, we added the following lines of code above the RecordList() function in RecordList.jsx.
After closing everything, to start the app, follow the steps below:
- Ensure that the server app is still running. If it’s not, start it by executing the following command in the server directory:
- In a new terminal, go to the client directory and run the command:
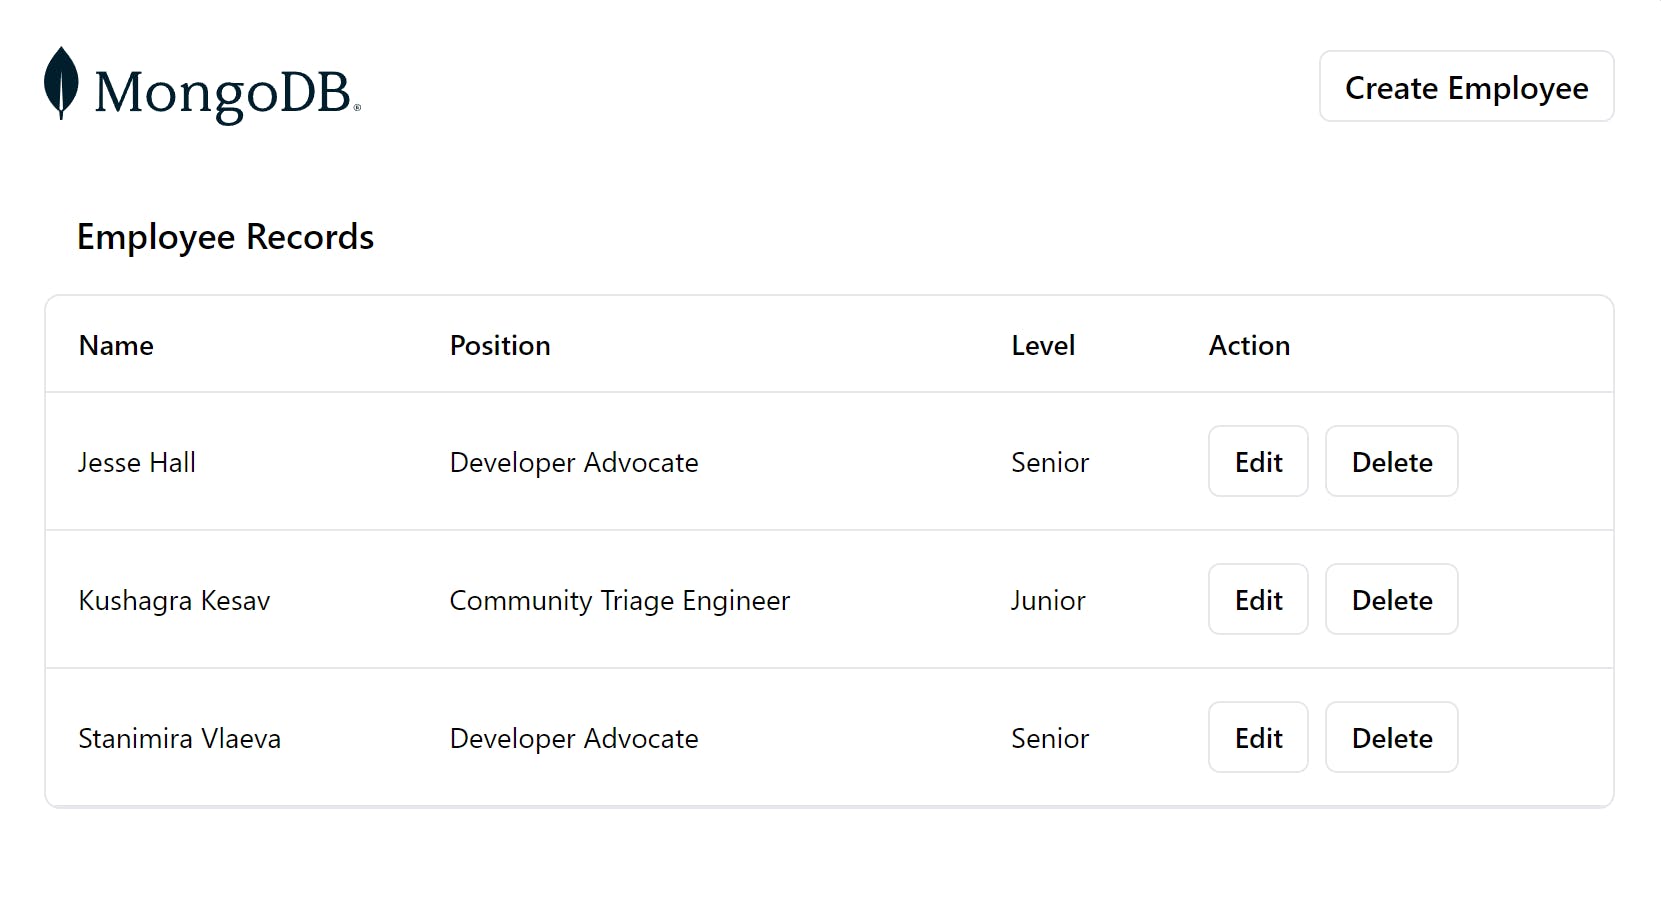
This is what the landing page of the record component will look like after we’ve added records for “Jesse Hall,” “Kushagra Kesav,” and “Stanimira Vlaeva” via the “Create Employee” button.
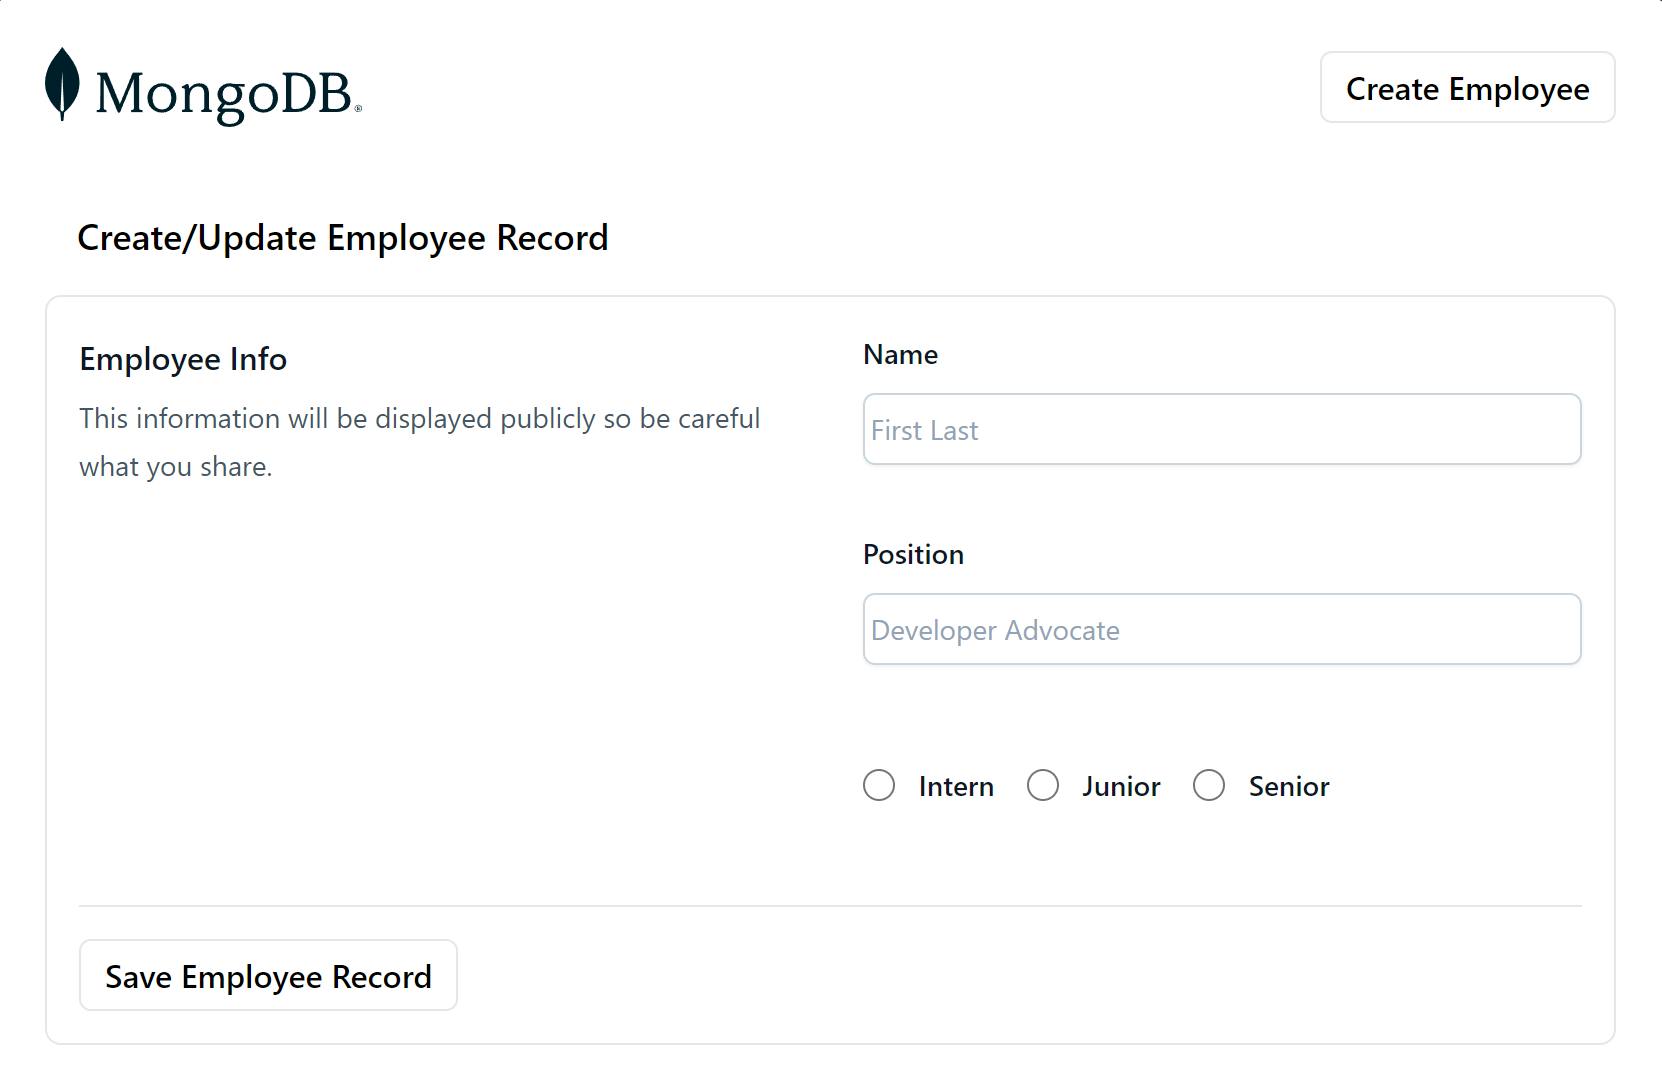
This is what the screen that lets you add an employee will look like:
Congratulations on building your first MERN application. For more ideas and advanced concepts, visit our Developer Center, and if you have any questions, post them in our community forums.