This guide shows you how to create an application that uses the MongoDB Go Driver to connect to a MongoDB Atlas cluster. If you prefer to connect to MongoDB using a different driver or programming language, see our list of official MongoDB drivers.
The Go driver lets you connect to and communicate with MongoDB clusters from a Go application.
MongoDB Atlas is a fully-managed cloud database service that hosts your data on MongoDB clusters. In this guide, we show you how to get started with your own free (no credit card required) cluster.
Follow the steps below to connect your Go application with a MongoDB Atlas cluster.
Set Up Your Project
Create a MongoDB Cluster
Set up a Free Tier Cluster in Atlas
You can create a free tier MongoDB deployment on MongoDB Atlas to store and manage your data. MongoDB Altas hosts and manages your MongoDB database in the cloud.
Create a free tier cluster.
Complete the MongoDB Get Started guide to set up a new Atlas account, create a free tier MongoDB cluster, load datasets, and interact with the data.
After completing these steps, you have a new MongoDB cluster deployed in Atlas, a new database user, and sample datasets loaded into your cluster.
Connect to Your Cluster
You can connect to your MongoDB deployment by providing a connection URI, also called a connection string, which instructs the driver on how to connect to a MongoDB deployment and how to behave while connected.
The connection string includes the hostname or IP address and port of your deployment, the authentication mechanism, user credentials when applicable, and connection options.
Retrieve your MongoDB Atlas connection string.
To retrieve your connection string for the deployment you created in the previous section, log in to your Atlas account and navigate to the Clusters page under the Database section. Click the Connect button for your new deployment.

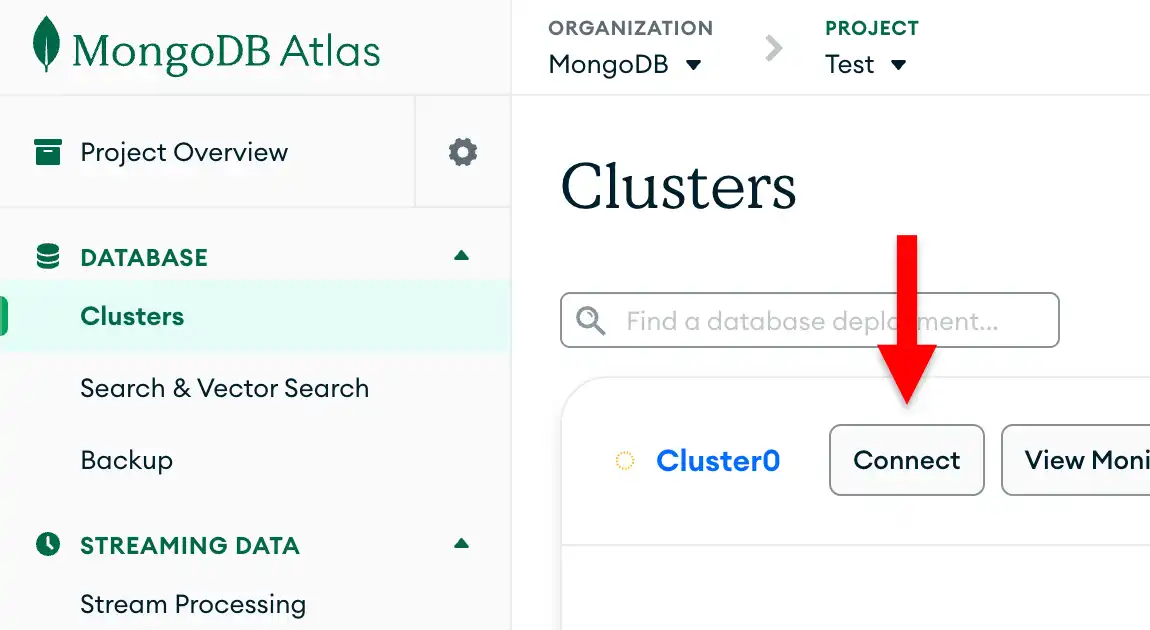
If you do not already have a database user configured, MongoDB will prompt you to create and configure a new user.
Click the Drivers button under Connect to your application and select "Go" from the Driver selection menu and the version that best matches the version you installed from the Version selection menu.
Ensure the View full code sample option is deselected to view only the connection string.

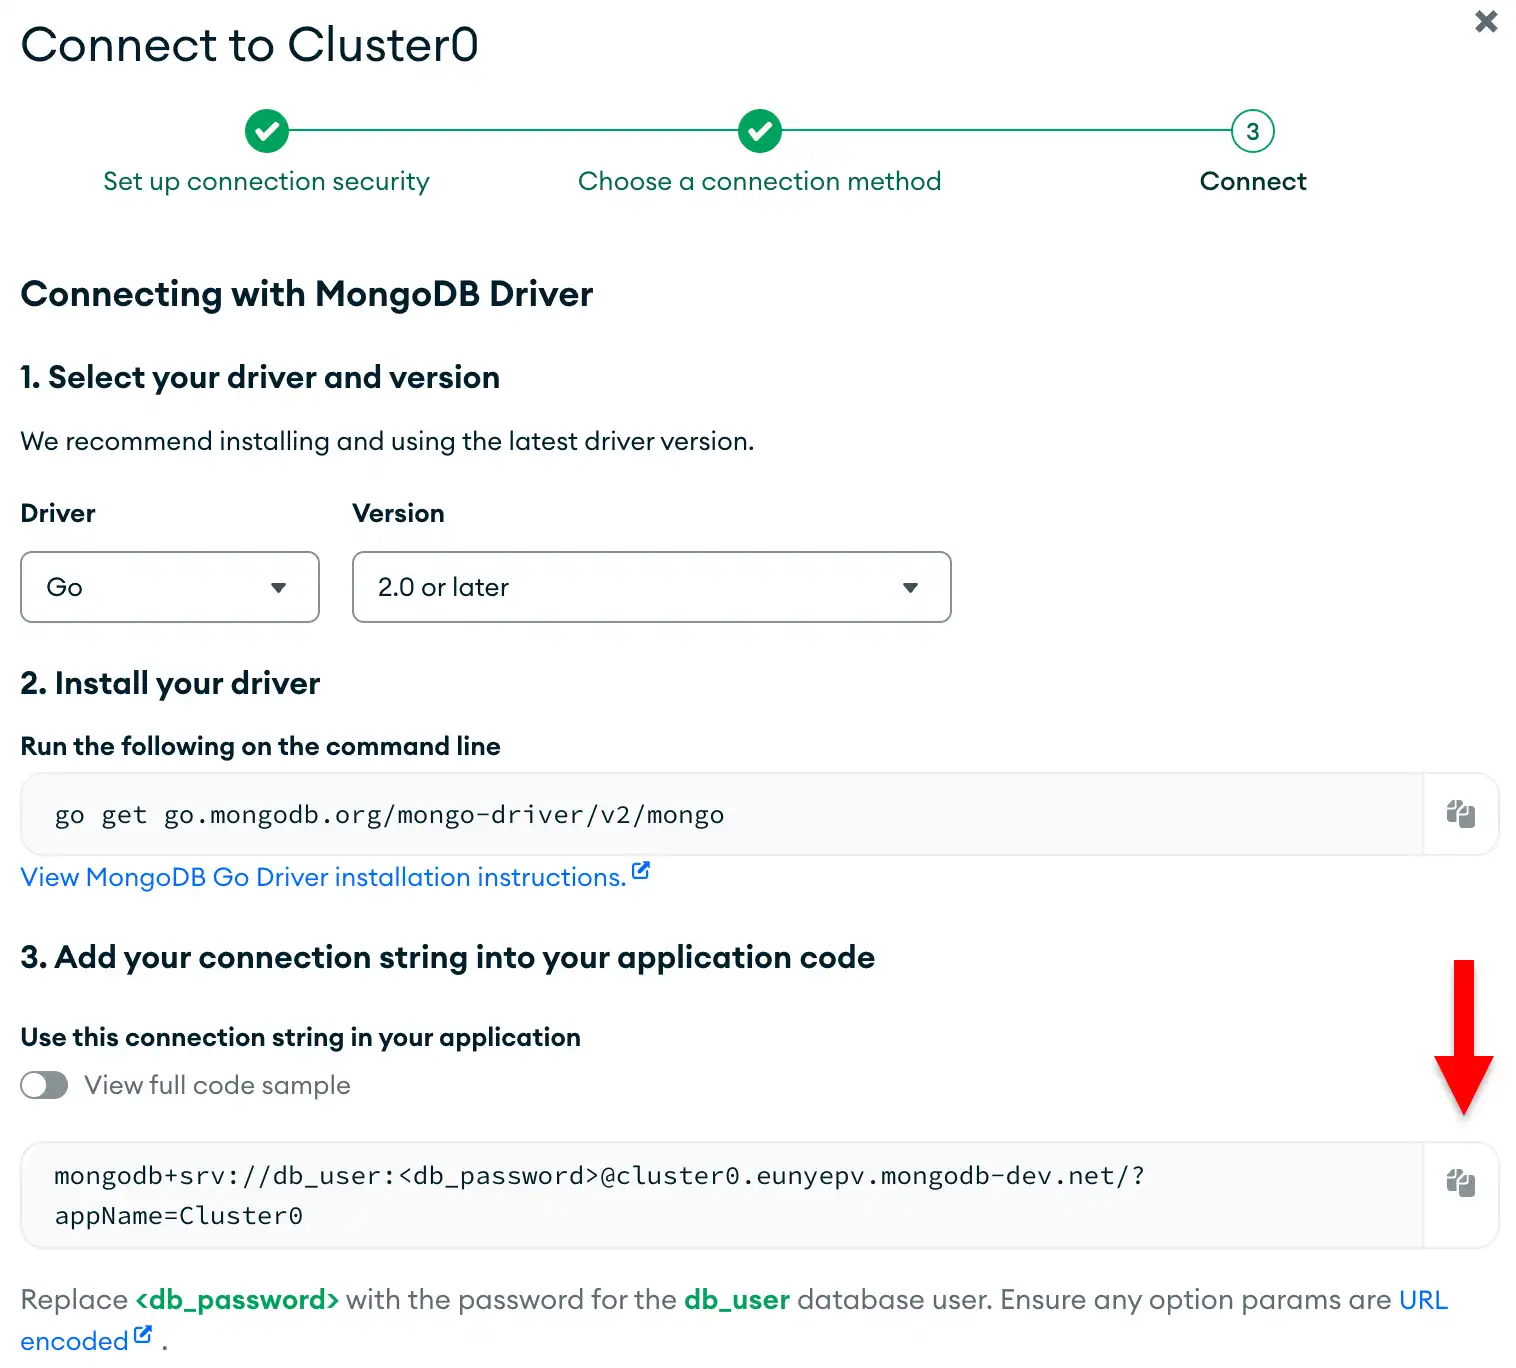
Update the password placeholder.
Paste this connection string into a file in your preferred text editor
and replace the <db_password> placeholder with your database user's
password. The connection string is already populated with your database
user's username.
Save this file to a safe location for use in the next step.
After completing these steps, you have a connection string that corresponds your Atlas cluster.
To learn more about connecting to Atlas by using the MongoDB Go Driver and applying connection options, see the Atlas driver connection guide.
Query Your MongoDB Cluster from Your Application
Add your connection string.
In your terminal, run the following command to create an environment
variable called MONGODB_URI and set your Atlas connection string as
its value:
export MONGODB_URI='<your atlas connection string>'
Note
Make sure to replace the <db_password> section of the connection
string with the password you created for your user that has
atlasAdmin permissions.
Create your Go application.
Copy and paste the following code into your main.go file. This code
runs a query on your sample dataset in MongoDB Atlas.
package main import ( "context" "encoding/json" "fmt" "log" "os" "go.mongodb.org/mongo-driver/v2/bson" "go.mongodb.org/mongo-driver/v2/mongo" "go.mongodb.org/mongo-driver/v2/mongo/options" ) func main() { uri := os.Getenv("MONGODB_URI") docs := "www.mongodb.com/docs/drivers/go/current/" if uri == "" { log.Fatal("Set your 'MONGODB_URI' environment variable. " + "See: " + docs + "usage-examples/#environment-variable") } client, err := mongo.Connect(options.Client(). ApplyURI(uri)) if err != nil { panic(err) } defer func() { if err := client.Disconnect(context.TODO()); err != nil { panic(err) } }() coll := client.Database("sample_mflix").Collection("movies") title := "Back to the Future" var result bson.M err = coll.FindOne(context.TODO(), bson.D{{"title", title}}). Decode(&result) if err == mongo.ErrNoDocuments { fmt.Printf("No document was found with the title %s\n", title) return } if err != nil { panic(err) } jsonData, err := json.MarshalIndent(result, "", " ") if err != nil { panic(err) } fmt.Printf("%s\n", jsonData) }
Run your application.
Run the sample code with the following command from your command line:
go run main.go
When you run main.go, it outputs the details of the movie from
the sample dataset, which resembles the following:
{ "_id": "573a1398f29313caabce9682", ... "title": "Back to the Future", ... }
Tip
If you receive no output or an error, check whether you properly set up your environment variable and ensure you have loaded the sample datasets into your cluster.
After you complete these steps, you have a working application that uses the MongoDB Go Driver to connect to your MongoDB cluster, runs a query on the sample data, and prints out the result.
Next Steps
Learn how to read and modify data using the MongoDB Go Driver in the CRUD Operations section.