이 페이지에는 LiveData 를 사용하는 예시 Android 애플리케이션 에 Realm 빠르게 통합하는 방법에 대한 지침이 포함되어 있습니다. 이 예시 애플리케이션 사용하면 사용자가 버튼을 사용하여 카운터를 증가시킬 수 있습니다.
전제 조건
이 빠른 시작 가이드 에서는 동기화 를 사용하여 클라이언트 간의 데이터 변경 사항을 동기화합니다. 시작하기 전에 다음 사항이 있는지 확인하세요.
참고
동기화 없이 LiveData 사용
동기화 없이 이 퀵스타트를 사용하려면 SDK에서 동기화 기능을 비활성화하세요. 앱 수준 build.gradle 파일에서 다음 줄을 제거하면 됩니다.
realm { syncEnabled = true }
줄을 제거한 후 Gradle 구성을 다시 동기화하여 Java SDK를 오프라인 전용 상태로 다시 로드합니다. 동기화 없이 Java SDK를 사용하려면 CounterModel 파일에서 동기화 구성, 사용자 로그인, 파티션 값 가져오기 및 사용과 관련된 줄을 제거하세요.
LiveData 빠른 시작 리포지토리 복제
시작하려면 예시 리포지토리를 로컬 환경에 복사합니다.
필요한 대부분의 코드가 포함된 Android 애플리케이션을 이미 구성했습니다. GitHub에서 직접 클라이언트 애플리케이션 리포지토리를 복제할 수 있습니다.
git clone https://github.com/mongodb-university/realm-android-livedata.git
리포지토리에는 final 및 start 의 두 가지 브랜치가 포함되어 있습니다. final 브랜치는 사용자가 이 튜토리얼을 완료 한 후 처리해야 하는 앱의 완성된 버전입니다. 이 튜토리얼을 진행하려면 start 브랜치를 확인하세요.
git checkout start
종속성 가져오기
이제 리포지토리를 복제했으므로 Java SDK 및 Android LiveData를 실행하는 데 필요한 종속성을 추가해야 합니다. 프로젝트 레벨 build.gradle 파일의 buildscript.dependencies 블록에 Java SDK 종속성을 추가하는 것으로 시작합니다.
buildscript { ext.kotlin_version = "1.4.10" repositories { google() jcenter() } dependencies { classpath "com.android.tools.build:gradle:4.0.2" classpath "org.jetbrains.kotlin:kotlin-gradle-plugin:$kotlin_version" classpath "io.realm:realm-gradle-plugin:10.2.0" } }
또한 앱 수준 build.gradle 파일의 dependencies 블록에 Android LiveData 종속성을 추가해야 합니다.
dependencies { implementation fileTree(dir: "libs", include: ["*.jar"]) implementation "org.jetbrains.kotlin:kotlin-stdlib:$kotlin_version" implementation 'androidx.core:core-ktx:1.3.2' implementation 'androidx.appcompat:appcompat:1.2.0' implementation 'com.google.android.material:material:1.2.1' implementation 'androidx.constraintlayout:constraintlayout:2.0.4' implementation 'androidx.navigation:navigation-fragment-ktx:2.3.1' implementation 'androidx.navigation:navigation-ui-ktx:2.3.1' implementation "androidx.lifecycle:lifecycle-livedata-ktx:2.2.0" testImplementation 'junit:junit:4.12' androidTestImplementation 'androidx.test.ext:junit:1.1.2' androidTestImplementation 'androidx.test.espresso:espresso-core:3.3.0' }
그런 다음, 앱 수준 build.gradle 파일에 다음과 같은 최상위 블록을 생성하여 SDK에서 동기화를 활성화합니다.
realm { syncEnabled = true }
그런 다음 앱 수준 build.gradle 파일의 android 블록에 다음 블록을 만들어 DataBinding을 활성화합니다.
android { compileSdkVersion 30 buildToolsVersion "30.0.2" defaultConfig { applicationId "com.mongodb.realm.livedataquickstart" minSdkVersion 16 targetSdkVersion 30 versionCode 1 versionName "1.0" testInstrumentationRunner "androidx.test.runner.AndroidJUnitRunner" } buildFeatures { dataBinding true } buildTypes { release { minifyEnabled false proguardFiles getDefaultProguardFile('proguard-android-optimize.txt'), 'proguard-rules.pro' } } compileOptions { sourceCompatibility JavaVersion.VERSION_1_8 targetCompatibility JavaVersion.VERSION_1_8 } kotlinOptions { jvmTarget = '1.8' } }
마지막으로 '동기화' 버튼을 클릭하거나 애플리케이션 메뉴에서 Build > Rebuild Project 를 선택하여 이러한 변경 사항으로 Gradle 구성을 재구성하고 종속성을 가져옵니다.
LiveRealmObject
With all of the dependencies in place, it's time to create a LiveData-compatible interface for our Realm objects. 이렇게 하려면 몇 가지 이벤트를 처리해야 합니다.
onActive()메서드를 사용하면 관찰자가 변경 리스너를 추가하여 기본 Realm 객체에 대한 변경 사항을 구독할 수 있습니다.override fun onActive() { super.onActive() val obj = value if (obj != null && RealmObject.isValid(obj)) { RealmObject.addChangeListener(obj, listener) } } onInactive()메서드를 사용하면 관찰자가 변경 리스너를 제거하여 기본 Realm 객체에 대한 변경 사항에 대한 구독을 취소할 수 있습니다.override fun onInactive() { super.onInactive() val obj = value if (obj != null && RealmObject.isValid(obj)) { RealmObject.removeChangeListener(obj, listener) } } 변경이 발생하면
listener멤버는LiveData상위 클래스의nullsetValue()메서드를 사용하여 Realm 객체가 삭제되지 않는 한 Realm 객체의 값을 UI에 전달하며, 변경 리스너는 다음 값을 전달합니다. 을 사용하여 유효하지 않게 삭제된 객체에 대한 참조를 전달하는 대신private val listener = RealmObjectChangeListener<T> { obj, objectChangeSet -> if (!objectChangeSet!!.isDeleted) { setValue(obj) } else { // Because invalidated objects are unsafe to set in LiveData, pass null instead. setValue(null) } }
팁
RealmResults와 함께 LiveData 사용
이 예시 LiveData만 사용하여 RealmObjects UI 에 를 표시합니다. 를 표시하는 샘플 구현 RealmResults LiveRealmResults를 참조하세요.
ViewModel에서 LiveData 인스턴스화하기
이 애플리케이션은 모든 로직과 핵심 데이터를 CounterModel 이라는 ViewModel 내에 저장합니다. 애플리케이션이 실행되면 애플리케이션이 닫힐 때까지 사용되는 CounterModel 인스턴스가 생성됩니다. 해당 인스턴스에는 애플리케이션의 UI에 표시되는 LiveData가 포함되어 있습니다. LiveData의 인스턴스를 생성하려면 Realm에 저장된 Counter 객체에 액세스하여 이를 LiveRealmObject 생성자에 전달해야 합니다. 이를 위해 다음을 수행합니다.
앱 ID 를 사용하여 앱에 연결합니다.
사용자를 인증합니다.
동기화를 사용하여 특정 영역에 연결합니다.
Counter에 대한 영역을 쿼리하고, 이 영역에 아직 생성되지 않은 경우 새Counter를 삽입합니다.Counter인스턴스를 사용하여LiveRealmObject를 인스턴스화하고CounterModel의counter멤버에 저장합니다.
다음 코드 스니펫은 이 동작을 구현합니다:
init { val appID = "YOUR APP ID HERE" // TODO: replace this with your App ID // 1. connect to the MongoDB Realm app backend val app = App( AppConfiguration.Builder(appID) .build() ) // 2. authenticate a user app.loginAsync(Credentials.anonymous()) { if(it.isSuccess) { Log.v("QUICKSTART", "Successfully logged in anonymously.") // 3. connect to a realm with Realm Sync val user: User? = app.currentUser() val partitionValue = "example partition" val config = SyncConfiguration.Builder(user!!, partitionValue) // because this application only reads/writes small amounts of data, it's OK to read/write from the UI thread .allowWritesOnUiThread(true) .allowQueriesOnUiThread(true) .build() // open the realm realm = Realm.getInstance(config) // 4. Query the realm for a Counter, creating a new Counter if one doesn't already exist // access all counters stored in this realm val counterQuery = realm!!.where<Counter>() val counters = counterQuery.findAll() // if we haven't created the one counter for this app before (as on first launch), create it now if (counters.size == 0) { realm?.executeTransaction { transactionRealm -> val counter = Counter() transactionRealm.insert(counter) } } // 5. Instantiate a LiveRealmObject using the Counter and store it in a member variable // the counters query is life, so we can just grab the 0th index to get a guaranteed counter this._counter.postValue(counters[0]!!) } else { Log.e("QUICKSTART", "Failed to log in anonymously. Error: ${it.error.message}") } } }
중요
UI 스레드에서 읽기 또는 쓰기 안 함
데이터베이스 읽기 및 쓰기는 계산 비용이 많이 들기 때문에 SDK는 기본적으로 UI 스레드에서 읽기 및 쓰기를 비활성화합니다. 간단하게 설명하기 위해 이 예시에서는 allowWritesOnUiThread() 및 allowQueriesOnUiThread() 구성 빌더 메서드를 사용하여 UI 스레드 읽기 및 쓰기를 활성화합니다. 프로덕션 애플리케이션에서는 거의 항상 비동기 메서드를 사용하여 백그라운드 스레드에 대한 읽기 및 쓰기를 연기해야 합니다.
ViewModel을 UI에 연결하기
에 저장된 데이터를 CounterModel 애플리케이션 UI 에 표시하려면 CounterModel 애플리케이션 을 생성할 때 viewModels() 메서드를 사용하여 싱글톤 CounterFragment 액세스 해야 합니다. 모델을 인스턴스화한 후에는 Android 데이터 바인딩 라이브러리를 사용하여 모델의 데이터를 UI 요소에 표시할 수 있습니다.
애플리케이션이 CounterFragment 을 생성할 때 CounterModel 싱글톤에 액세스하려면 CounterFragment 의 onCreateView() 메서드에 다음 코드를 배치합니다.
val model: CounterModel by viewModels()
다음으로, UI에서 카운터 프래그먼트에 대한 데이터 바인딩 후크를 설정합니다.
<?xml version="1.0" encoding="utf-8"?> <layout> <data> <variable name="counterModel" type="com.mongodb.realm.livedataquickstart.model.CounterModel" /> </data> <androidx.constraintlayout.widget.ConstraintLayout xmlns:android="http://schemas.android.com/apk/res/android" xmlns:app="http://schemas.android.com/apk/res-auto" xmlns:tools="http://schemas.android.com/tools" android:layout_width="match_parent" android:layout_height="match_parent" tools:context=".CounterFragment"> <TextView android:id="@+id/textview" android:layout_width="wrap_content" android:layout_height="wrap_content" android:text="@{counterModel.counter.value.get().toString()}" android:textSize="58pt" app:layout_constraintBottom_toTopOf="@id/button" app:layout_constraintEnd_toEndOf="parent" app:layout_constraintStart_toStartOf="parent" app:layout_constraintTop_toTopOf="parent" /> <Button android:id="@+id/button" android:layout_width="wrap_content" android:layout_height="wrap_content" android:text="@string/add" app:layout_constraintBottom_toBottomOf="parent" app:layout_constraintEnd_toEndOf="parent" app:layout_constraintStart_toStartOf="parent" app:layout_constraintTop_toBottomOf="@id/textview" /> </androidx.constraintlayout.widget.ConstraintLayout> </layout>
마지막으로 모델을 바인딩에 연결하여 UI에서 카운터를 표시하고 CounterFragment 의 onCreateView() 메서드에서 다음 코드를 사용하여 버튼을 누를 때 카운터를 반복합니다.
val binding = CounterFragmentBinding.inflate(inflater, container, false).apply { lifecycleOwner = viewLifecycleOwner counterModel = model } binding.root.button.setOnClickListener { Log.v("QUICKSTART", "Clicked increment button. Current value: ${model.counter.value?.value?.get()}") model.incrementCounter() } return binding.root
애플리케이션 실행
이제 샘플 애플리케이션을 실행할 수 있습니다. You should see an interface that looks something like this:

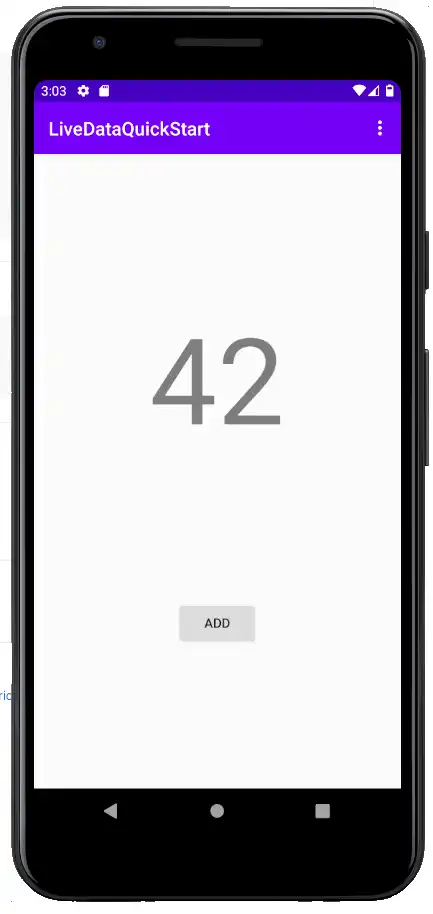
'추가' 버튼을 클릭하면 카운터 값에 1이 추가됩니다. 동기화를 사용하면 앱 로그를 확인하여 개별 증분 이벤트를 확인할 수 있습니다. Android LiveData는 수명 주기를 인식하므로 화면을 회전하거나 기기의 RAM을 비워 애플리케이션 상태를 해제해도 애플리케이션 상태에 영향을 주지 않아야 하며, 애플리케이션 상태는 원활하게 재개되고 재개 시 모델 싱글톤에 저장된 상태를 사용하여 이벤트를 자동으로 자동으로 다시 구독해야 합니다. 캡슐화된 LiveData 인스턴스.
요약
Android LiveData에 라이브 Realm 데이터를 캡슐화하기 위한 템플릿으로
LiveRealmObject및LiveRealmResults클래스를 사용합니다.ViewModel을 사용하여 해당 데이터를 표시하는 UI 요소에서 기본 데이터를 분리합니다.
DataBinding을 사용하면 활동 또는 프래그먼트에서 명시적으로 값을 설정하지 않고도 모델 데이터와 UI 요소 간의 관계를 선언할 수 있습니다.
피드백
이 빠른 시작 가이드가 도움이 되었나요? 페이지 오른쪽에 있는 피드백 양식을 통해 알려주세요!