Esta página contiene instrucciones para integrar rápidamente Realm en una aplicación de Android de ejemplo que utiliza Datos en vivoEsta aplicación de ejemplo permite a un usuario incrementar un contador usando un botón.
Requisitos previos
Esta guía de inicio rápido utiliza Sync para sincronizar los cambios de datos entre clientes. Antes de comenzar, asegúrese de tener:
Nota
Using LiveData without Sync
To use this quick start without Sync, disable the sync features in the SDK. You can do this by removing the following lines from your app-level build.gradle file:
realm { syncEnabled = true }
Después de eliminar las líneas, vuelva a sincronizar la configuración de Gradle para volver a cargar el SDK de Java en modo sin conexión. Elimine las líneas relacionadas con la importación y el uso de la configuración de sincronización, el inicio de sesión de usuario y los valores de partición de CounterModel archivo para utilizar el SDK de Java sin sincronización.
Clone the LiveData Quick Start Repository
To get started, copy the example repo into your local environment.
We've already put together an Android application that has most of the code you'll need. You can clone the client application repository directly from GitHub:
git clone https://github.com/mongodb-university/realm-android-livedata.git
El repositorio contiene dos ramas: final y start. La rama final es una versión terminada de la aplicación como debe verse después de que completes este tutorial. Para seguir este tutorial, por favor revisa la rama start:
git checkout start
Import Dependencies
Now that you've cloned the repo, you need to add the dependencies you'll need to run the Java SDK and Android LiveData. Begin by adding the Java SDK dependency to the buildscript.dependencies block of your project level build.gradle file:
buildscript { ext.kotlin_version = "1.4.10" repositories { google() jcenter() } dependencies { classpath "com.android.tools.build:gradle:4.0.2" classpath "org.jetbrains.kotlin:kotlin-gradle-plugin:$kotlin_version" classpath "io.realm:realm-gradle-plugin:10.2.0" } }
You'll also have to add the Android LiveData Dependency to the dependencies block of your app level build.gradle file:
dependencies { implementation fileTree(dir: "libs", include: ["*.jar"]) implementation "org.jetbrains.kotlin:kotlin-stdlib:$kotlin_version" implementation 'androidx.core:core-ktx:1.3.2' implementation 'androidx.appcompat:appcompat:1.2.0' implementation 'com.google.android.material:material:1.2.1' implementation 'androidx.constraintlayout:constraintlayout:2.0.4' implementation 'androidx.navigation:navigation-fragment-ktx:2.3.1' implementation 'androidx.navigation:navigation-ui-ktx:2.3.1' implementation "androidx.lifecycle:lifecycle-livedata-ktx:2.2.0" testImplementation 'junit:junit:4.12' androidTestImplementation 'androidx.test.ext:junit:1.1.2' androidTestImplementation 'androidx.test.espresso:espresso-core:3.3.0' }
Next, enable Sync in the SDK by creating the following top-level block in your app level build.gradle file:
realm { syncEnabled = true }
Then, enable DataBinding by creating the following block in the android block of your app level build.gradle file:
android { compileSdkVersion 30 buildToolsVersion "30.0.2" defaultConfig { applicationId "com.mongodb.realm.livedataquickstart" minSdkVersion 16 targetSdkVersion 30 versionCode 1 versionName "1.0" testInstrumentationRunner "androidx.test.runner.AndroidJUnitRunner" } buildFeatures { dataBinding true } buildTypes { release { minifyEnabled false proguardFiles getDefaultProguardFile('proguard-android-optimize.txt'), 'proguard-rules.pro' } } compileOptions { sourceCompatibility JavaVersion.VERSION_1_8 targetCompatibility JavaVersion.VERSION_1_8 } kotlinOptions { jvmTarget = '1.8' } }
Por último, haga clic en el botón "Sincronizar" o seleccione Build > Rebuild Project en el menú de la aplicación para reconfigurar su configuración de Gradle con estos cambios y obtener las dependencias.
LiveRealmObject
Con todas las dependencias en su lugar, es hora de crear una interfaz compatible con LiveData para nuestros objetos Realm. Para hacerlo, deberemos gestionar algunos eventos:
The
onActive()method enables an observer to subscribe to changes to the underlying Realm object by adding a change listener.override fun onActive() { super.onActive() val obj = value if (obj != null && RealmObject.isValid(obj)) { RealmObject.addChangeListener(obj, listener) } } The
onInactive()method enables an observer to unsubscribe to changes to the underlying Realm object by removing the change listener.override fun onInactive() { super.onInactive() val obj = value if (obj != null && RealmObject.isValid(obj)) { RealmObject.removeChangeListener(obj, listener) } } When a change occurs, the
listenermember uses thesetValue()method of theLiveDataparent class to pass the Realm object's value to the UI unless the object was deleted, in which case the change listener passes a value ofnullinstead of passing along a reference to an invalid, deleted object.private val listener = RealmObjectChangeListener<T> { obj, objectChangeSet -> if (!objectChangeSet!!.isDeleted) { setValue(obj) } else { // Because invalidated objects are unsafe to set in LiveData, pass null instead. setValue(null) } }
Tip
Using LiveData with RealmResults
This example only uses LiveData to display RealmObjects in the UI. For a sample implementation displaying RealmResults, see LiveRealmResults.
Instantiating LiveData in the ViewModel
This application stores all of its logic and core data within a ViewModel called CounterModel. When the application runs, it creates an instance of CounterModel that is used until the application closes. That instance contains the LiveData that displays on the UI of the application. To create an instance of LiveData, we need to access a Counter object stored in a realm and pass it to the LiveRealmObject constructor. To accomplish this:
Connect to your App with your App ID.
Authenticate a user.
Connect to a specific realm using Sync.
Query the realm for a
Counter, inserting a newCounterif one hasn't already been created in this realm.Instantiate a
LiveRealmObjectusing theCounterinstance and store it in thecountermember ofCounterModel.
The following code snippet implements this behavior:
init { val appID = "YOUR APP ID HERE" // TODO: replace this with your App ID // 1. connect to the MongoDB Realm app backend val app = App( AppConfiguration.Builder(appID) .build() ) // 2. authenticate a user app.loginAsync(Credentials.anonymous()) { if(it.isSuccess) { Log.v("QUICKSTART", "Successfully logged in anonymously.") // 3. connect to a realm with Realm Sync val user: User? = app.currentUser() val partitionValue = "example partition" val config = SyncConfiguration.Builder(user!!, partitionValue) // because this application only reads/writes small amounts of data, it's OK to read/write from the UI thread .allowWritesOnUiThread(true) .allowQueriesOnUiThread(true) .build() // open the realm realm = Realm.getInstance(config) // 4. Query the realm for a Counter, creating a new Counter if one doesn't already exist // access all counters stored in this realm val counterQuery = realm!!.where<Counter>() val counters = counterQuery.findAll() // if we haven't created the one counter for this app before (as on first launch), create it now if (counters.size == 0) { realm?.executeTransaction { transactionRealm -> val counter = Counter() transactionRealm.insert(counter) } } // 5. Instantiate a LiveRealmObject using the Counter and store it in a member variable // the counters query is life, so we can just grab the 0th index to get a guaranteed counter this._counter.postValue(counters[0]!!) } else { Log.e("QUICKSTART", "Failed to log in anonymously. Error: ${it.error.message}") } } }
Importante
No leer ni guardar en el hilo de la interfaz de usuario
Database reads and writes are computationally expensive, so the SDK disables reads and writes by default on the UI thread. For simplicity, this example enables UI thread reads and writes with the allowWritesOnUiThread() and allowQueriesOnUiThread() config builder methods. In production applications, you should almost always defer reads and writes to a background thread using asynchronous methods.
Connecting the ViewModel to the UI
To display the data stored in the CounterModel on the application UI, we'll need to access the CounterModel singleton using the viewModels() method when the application creates CounterFragment. Once we've instantiated the model, we can use the Android Data Binding library to display the model's data in UI elements.
Para acceder al singleton CounterModel cuando la aplicación crea CounterFragment, coloca el siguiente código en el método onCreateView() de CounterFragment:
val model: CounterModel by viewModels()
A continuación, configure los hooks de Data Binding en la UI para el fragmento del contador:
<?xml version="1.0" encoding="utf-8"?> <layout> <data> <variable name="counterModel" type="com.mongodb.realm.livedataquickstart.model.CounterModel" /> </data> <androidx.constraintlayout.widget.ConstraintLayout xmlns:android="http://schemas.android.com/apk/res/android" xmlns:app="http://schemas.android.com/apk/res-auto" xmlns:tools="http://schemas.android.com/tools" android:layout_width="match_parent" android:layout_height="match_parent" tools:context=".CounterFragment"> <TextView android:id="@+id/textview" android:layout_width="wrap_content" android:layout_height="wrap_content" android:text="@{counterModel.counter.value.get().toString()}" android:textSize="58pt" app:layout_constraintBottom_toTopOf="@id/button" app:layout_constraintEnd_toEndOf="parent" app:layout_constraintStart_toStartOf="parent" app:layout_constraintTop_toTopOf="parent" /> <Button android:id="@+id/button" android:layout_width="wrap_content" android:layout_height="wrap_content" android:text="@string/add" app:layout_constraintBottom_toBottomOf="parent" app:layout_constraintEnd_toEndOf="parent" app:layout_constraintStart_toStartOf="parent" app:layout_constraintTop_toBottomOf="@id/textview" /> </androidx.constraintlayout.widget.ConstraintLayout> </layout>
Finally, connect the model to the binding so that the UI can display the counter and iterate the counter on button press with the following code in the onCreateView() method of CounterFragment:
val binding = CounterFragmentBinding.inflate(inflater, container, false).apply { lifecycleOwner = viewLifecycleOwner counterModel = model } binding.root.button.setOnClickListener { Log.v("QUICKSTART", "Clicked increment button. Current value: ${model.counter.value?.value?.get()}") model.incrementCounter() } return binding.root
Ejecutar la aplicación
Now you should be able to run the sample application. You should see an interface that looks something like this:

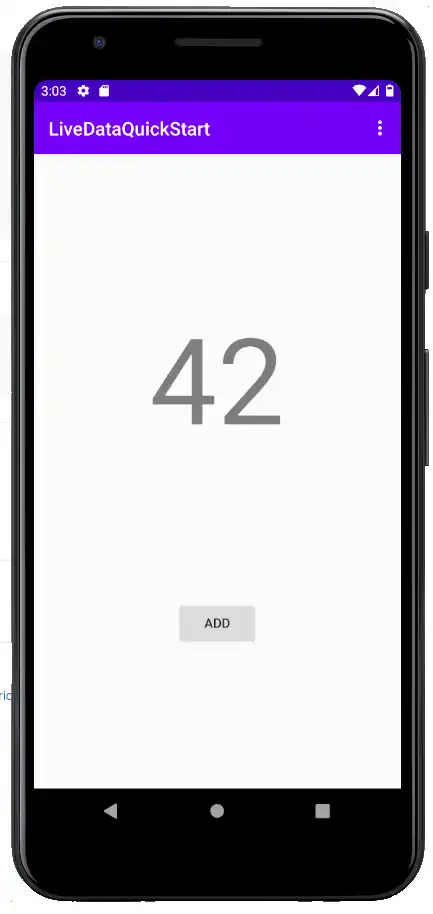
Clicking the "ADD" button should add one to the value of your counter. With Sync, you can view your App logs to see individual increment events. Android LiveData is lifecycle-aware, so rotating the screen or freeing the application's state by clearing your device's RAM should have no effect on the application state, which should seamlessly resume and automatically resubscribe to events on resume using the state stored in the model singleton and the encapsulated LiveData instance.
Resumen
Use the the
LiveRealmObjectandLiveRealmResultsclasses as a template for encapsulating live Realm data in Android LiveData.Use a ViewModel to separate underlying data from the UI elements that display that data.
DataBinding lets you declare relationships between model data and UI elements without explicitly setting values in an Activity or Fragment.
Comentarios
Did you find this quick start guide helpful? Please let us know with the feedback form on the right side of the page!