Mastering the Advanced Features of the Data API with Atlas CLI
Rate this tutorial
The MongoDB Atlas Data API allows you to easily access and manipulate your data stored in Atlas using standard HTTPS requests. To utilize the Data API, all you need is an HTTPS client (like curl or Postman) and a valid API key. In addition to the standard functionality, the Data API now also offers advanced security and permission options, such as:
- Support for various authentication methods, including JWT and email/password.
- Role-based access control, which allows you to configure rules for user roles to restrict read and write access through the API.
- IP Access List, which allows you to specify which IP addresses are permitted to make requests to the API.
The Atlas Data API also offers a great deal of flexibility and customization options. One of these features is the ability to create custom endpoints, which enable you to define additional routes for the API, giving you more control over the request method, URL, and logic. In this article, we will delve deeper into these capabilities and explore how they can be utilized. All this will be done using the new Atlas CLI, a command-line utility that makes it easier to automate Atlas cluster management.
If you want to learn more about how to get started with the Atlas Data API, I recommend reading Accessing Atlas Data in Postman with the Data API.
For this tutorial, we will need the following tools:
I have already set up an organization called
MongoDB Blog in the Atlas cloud, and I am currently using the Atlas command line interface (CLI) to display the name of the organization.I set a variable
ORG_ID with the Atlas organization id.I also created a project within the
MongoDB Blog organization. To create a project, you can use atlas project create, and provide it with the name of the project and the organization in which it should live. The project will be named data-api-blog .I will also deploy a MongoDB cluster within the project
data-api-blog on Google Cloud (free M0 trier). The cluster will be named data-api.After a few minutes, the cluster is ready. You can view existing clusters with the
atlas clusters list command.The next step is to load a sample data set. Wait a few minutes while the dataset is being loaded. I need this dataset to work on the query examples.
Good practice is also to add the IP address to the Atlas project access list
The App Services API allows for programmatic execution of administrative tasks outside of the App Services UI. This includes actions such as modifying authentication providers, creating rules, and defining functions. In this scenario, I will be using the App Services API to programmatically create and set up the Atlas Data API.
Using the
atlas organizations apiKeys with the Atlas CLI, you can create and manage your organization keys. To begin with, I will create an API key that will belong to the organization MongoDB Blog.Each request made to the App Services Admin API must include a valid and current authorization token from the MongoDB Cloud API, presented as a bearer token in the Authorization header. In order to get one, I need the
PublicKeyand PrivateKey returned by the previous command.NOTE
If you are using a Windows machine, you might have to manually create those two environment variables. Get the API key output by running the following command.
If you are using a Windows machine, you might have to manually create those two environment variables. Get the API key output by running the following command.
echo $API_KEY_OUTPUT
Then create the API key variables with the values from the output.
PUBLIC_KEY=<your public key>
PRIVATE_KEY=<your private key>Using those keys, I can obtain an access token.
Then, using the access token, I create a new application type
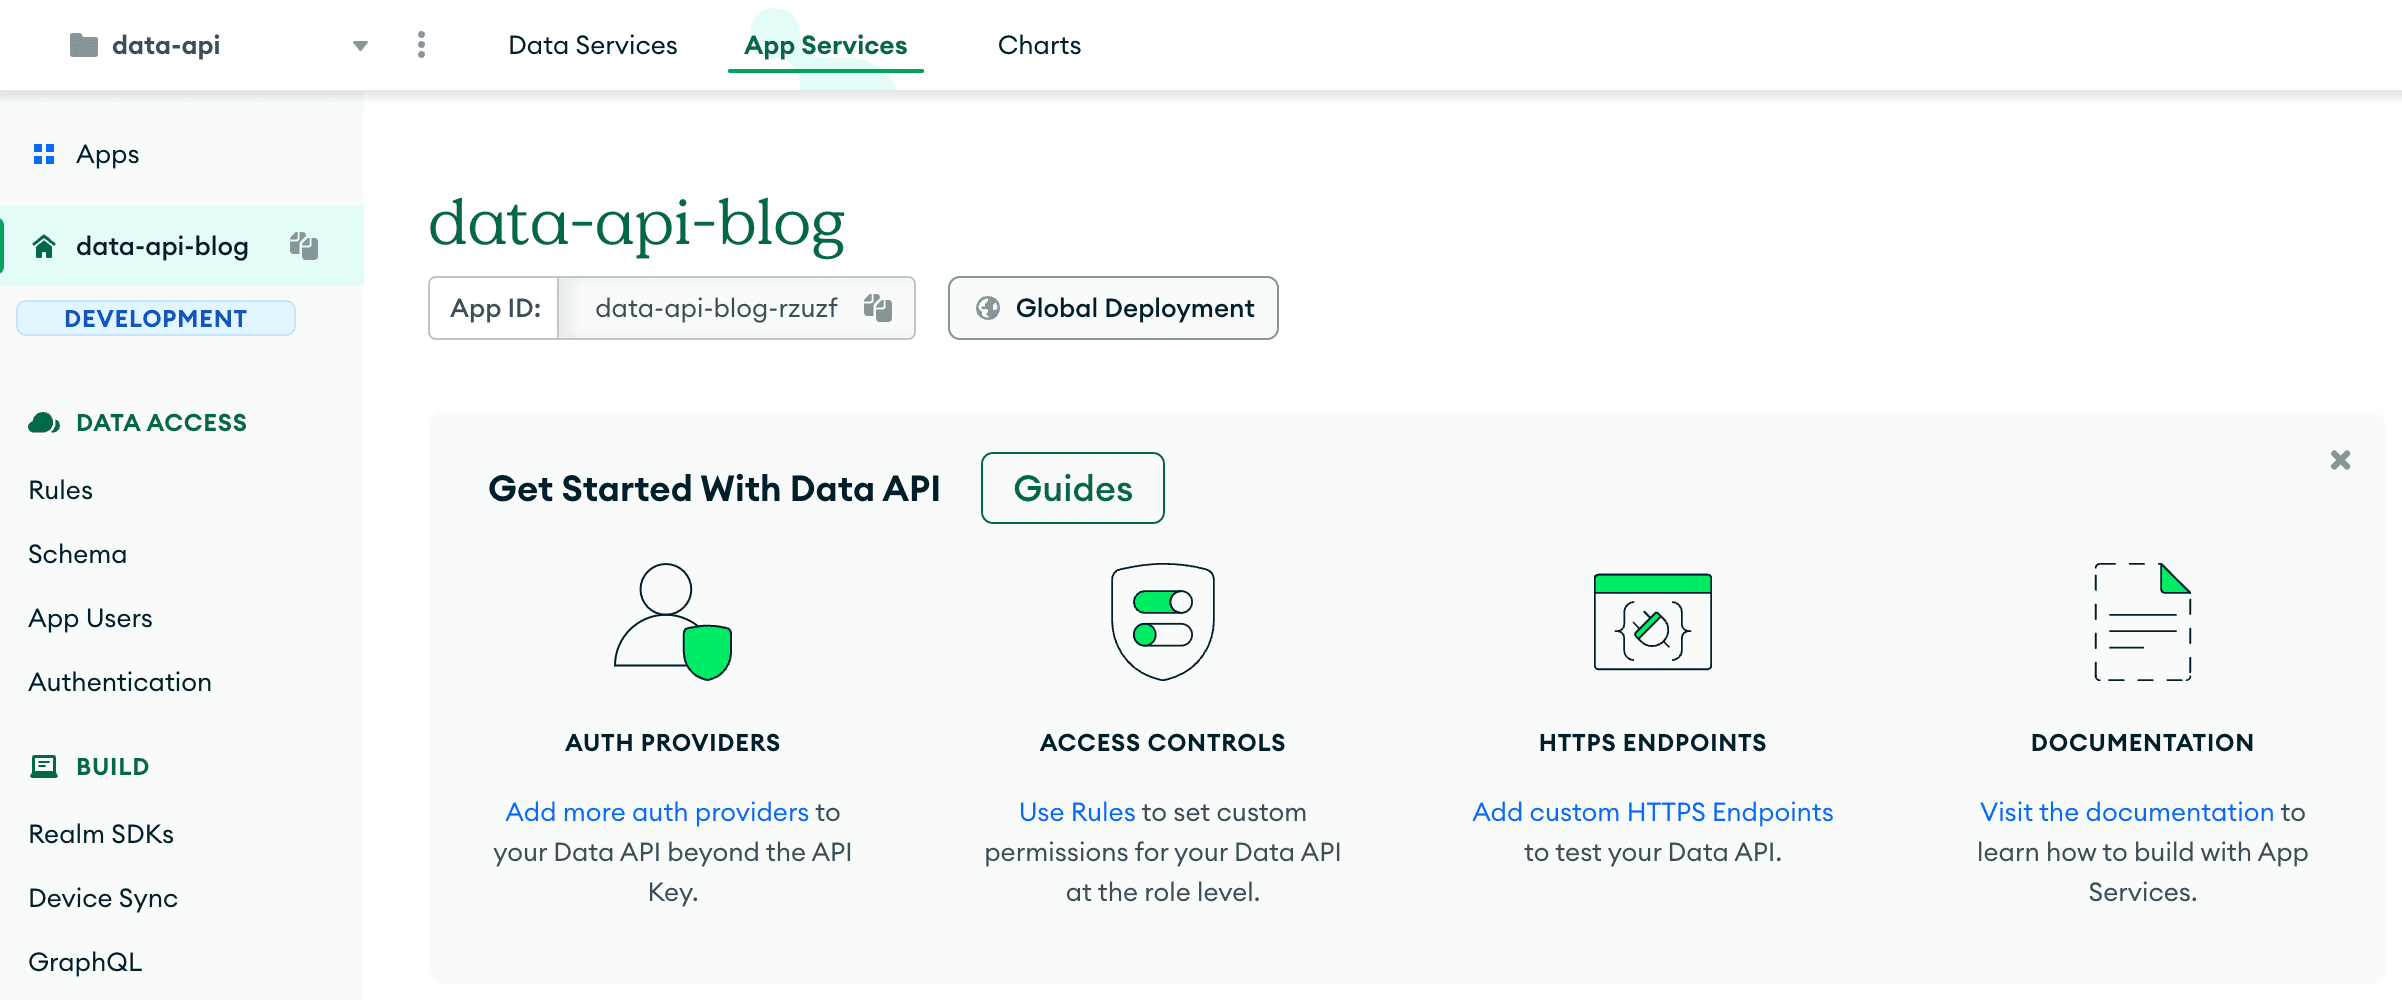
data-api in the Atlas Application Service. My application will be named data-api-blog.The application is visible now through Atlas UI, in the App Services tab.

I can also display our new application using the
realm clitool. The realm-cli command line utility is used to manage the App Services applications. In order to start using the realm cli tool, I have to log into the Atlas Application Services.Now, I can list my application with
realm-cli apps list, assign the id to the variable, and use it later. In this example, the Data API application has a unique id: data-api-blog-rzuzf. (The id of your app will be different.)By default, the Atlas Data API is disabled, I will now have to enable the Data API. It can be done through the Atlas UI, however, I want to show you how to do it using the command line.
Let's enhance the application by incorporating some unique settings and ensuring that it can be accessed from within the Atlas cluster. I will pull my data-api application on my local device.
Each component of an Atlas App Services app is fully defined and configured using organized JSON configuration files and JavaScript source code files. To get more information about app configuration, head to the docs. Below, I display the comprehensive directories tree.
|
I will modify the
data_api_config.jsonfile located in the http_endpoints directory. This file is responsible for enabling the Atlas Data API.I paste the document below into the
data_api_config.jsonfile. Note that to activate the Atlas Data API, I will set the disabledoption to false. I also set create_user_on_auth to true If your linked function is using application authentication and custom JWT authentication, the endpoint will create a new user with the passed-in JWT if that user has not been created yet.data-api-blog/http_endpoints/data_api_config.json
The Data API now supports new layers of configurable data permissioning and security, including new authentication methods, such as JWT authentication or email/password, and role-based access control, which allows for the configuration of rules for user roles that control read and write access through the API. Let's start by activating authentication using JWT tokens.
JWT (JSON Web Token) is a compact, URL-safe means of representing claims to be transferred between two parties. It is often used for authentication and authorization purposes.
- They are self-contained, meaning they contain all the necessary information about the user, reducing the need for additional requests to the server.
- They can be easily passed in HTTP headers, which makes them suitable for API authentication and authorization.
- They are signed, which ensures that the contents have not been tampered with.
- They are lightweight and can be easily encoded/decoded, making them efficient to transmit over the network.
A JWT key is a secret value used to sign and verify the authenticity of a JWT token. The key is typically a long string of characters or a file that is securely stored on the server. I will pick a random key and create a secret in my project using Realm CLI.
I list my secret.
Next, I enable the use of two Data API authentication providers: traditional API key and JWT tokens. JWT token auth needs a secret created in the step above. I declare the name of the newly created secret in the configuration file
providers.json located in the auth directory.I paste this content into
providers.json file. Note that I set the disabled option in both providers api-key and custom-token to false.auth/providers.json
For each cluster, we can set high-level access permissions (Read-Only, Read & Write, No Access) and also set custom role-based access-control (App Service Rules) to further control access to data (cluster, collection, document, or field level).
By default, all collections have no access, but I will create a custom role and allow read-only access to one of them. In this example, I will allow read-only access to the
routes collection in the sample_training database.In the
data_sources directory, I create directories with the name of the database and collection, along with a rules.json file, which will contain the rule definition.data_sources/data-api-blog/sample_training/routes/rules.json
It's time to deploy our settings and test them in the Atlas Data API. To deploy changes, I must push Data API configuration files to the Atlas server.
Going back to the 
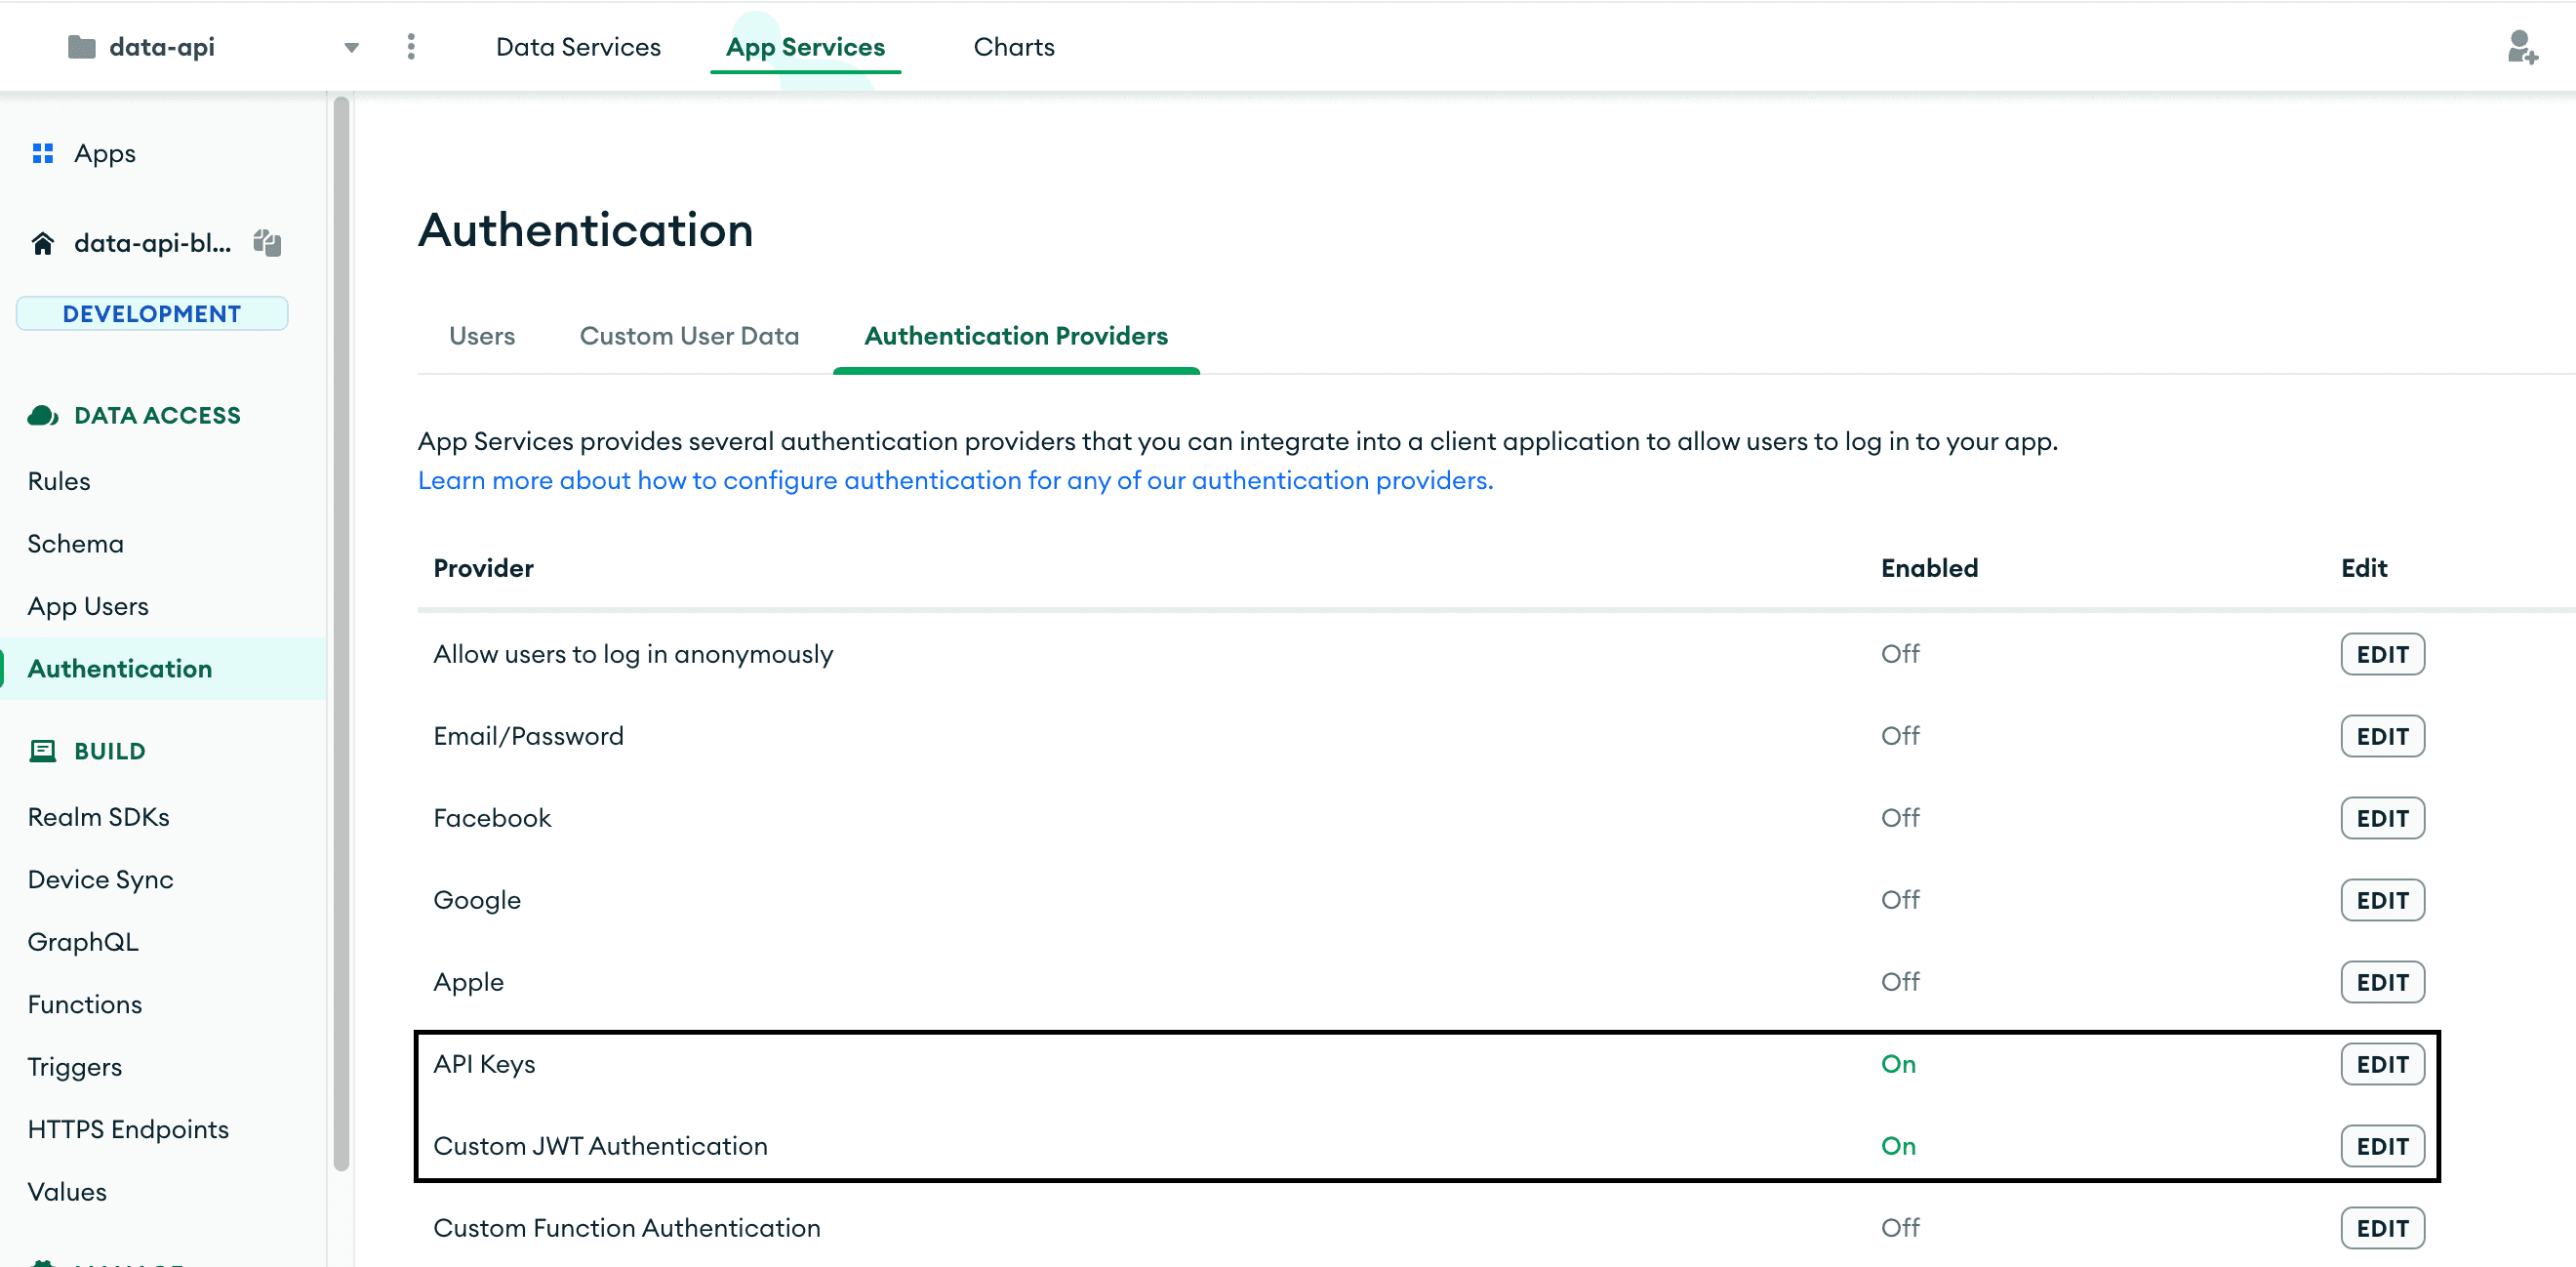
App Services tab, we can see that two authentication providers are now enabled.
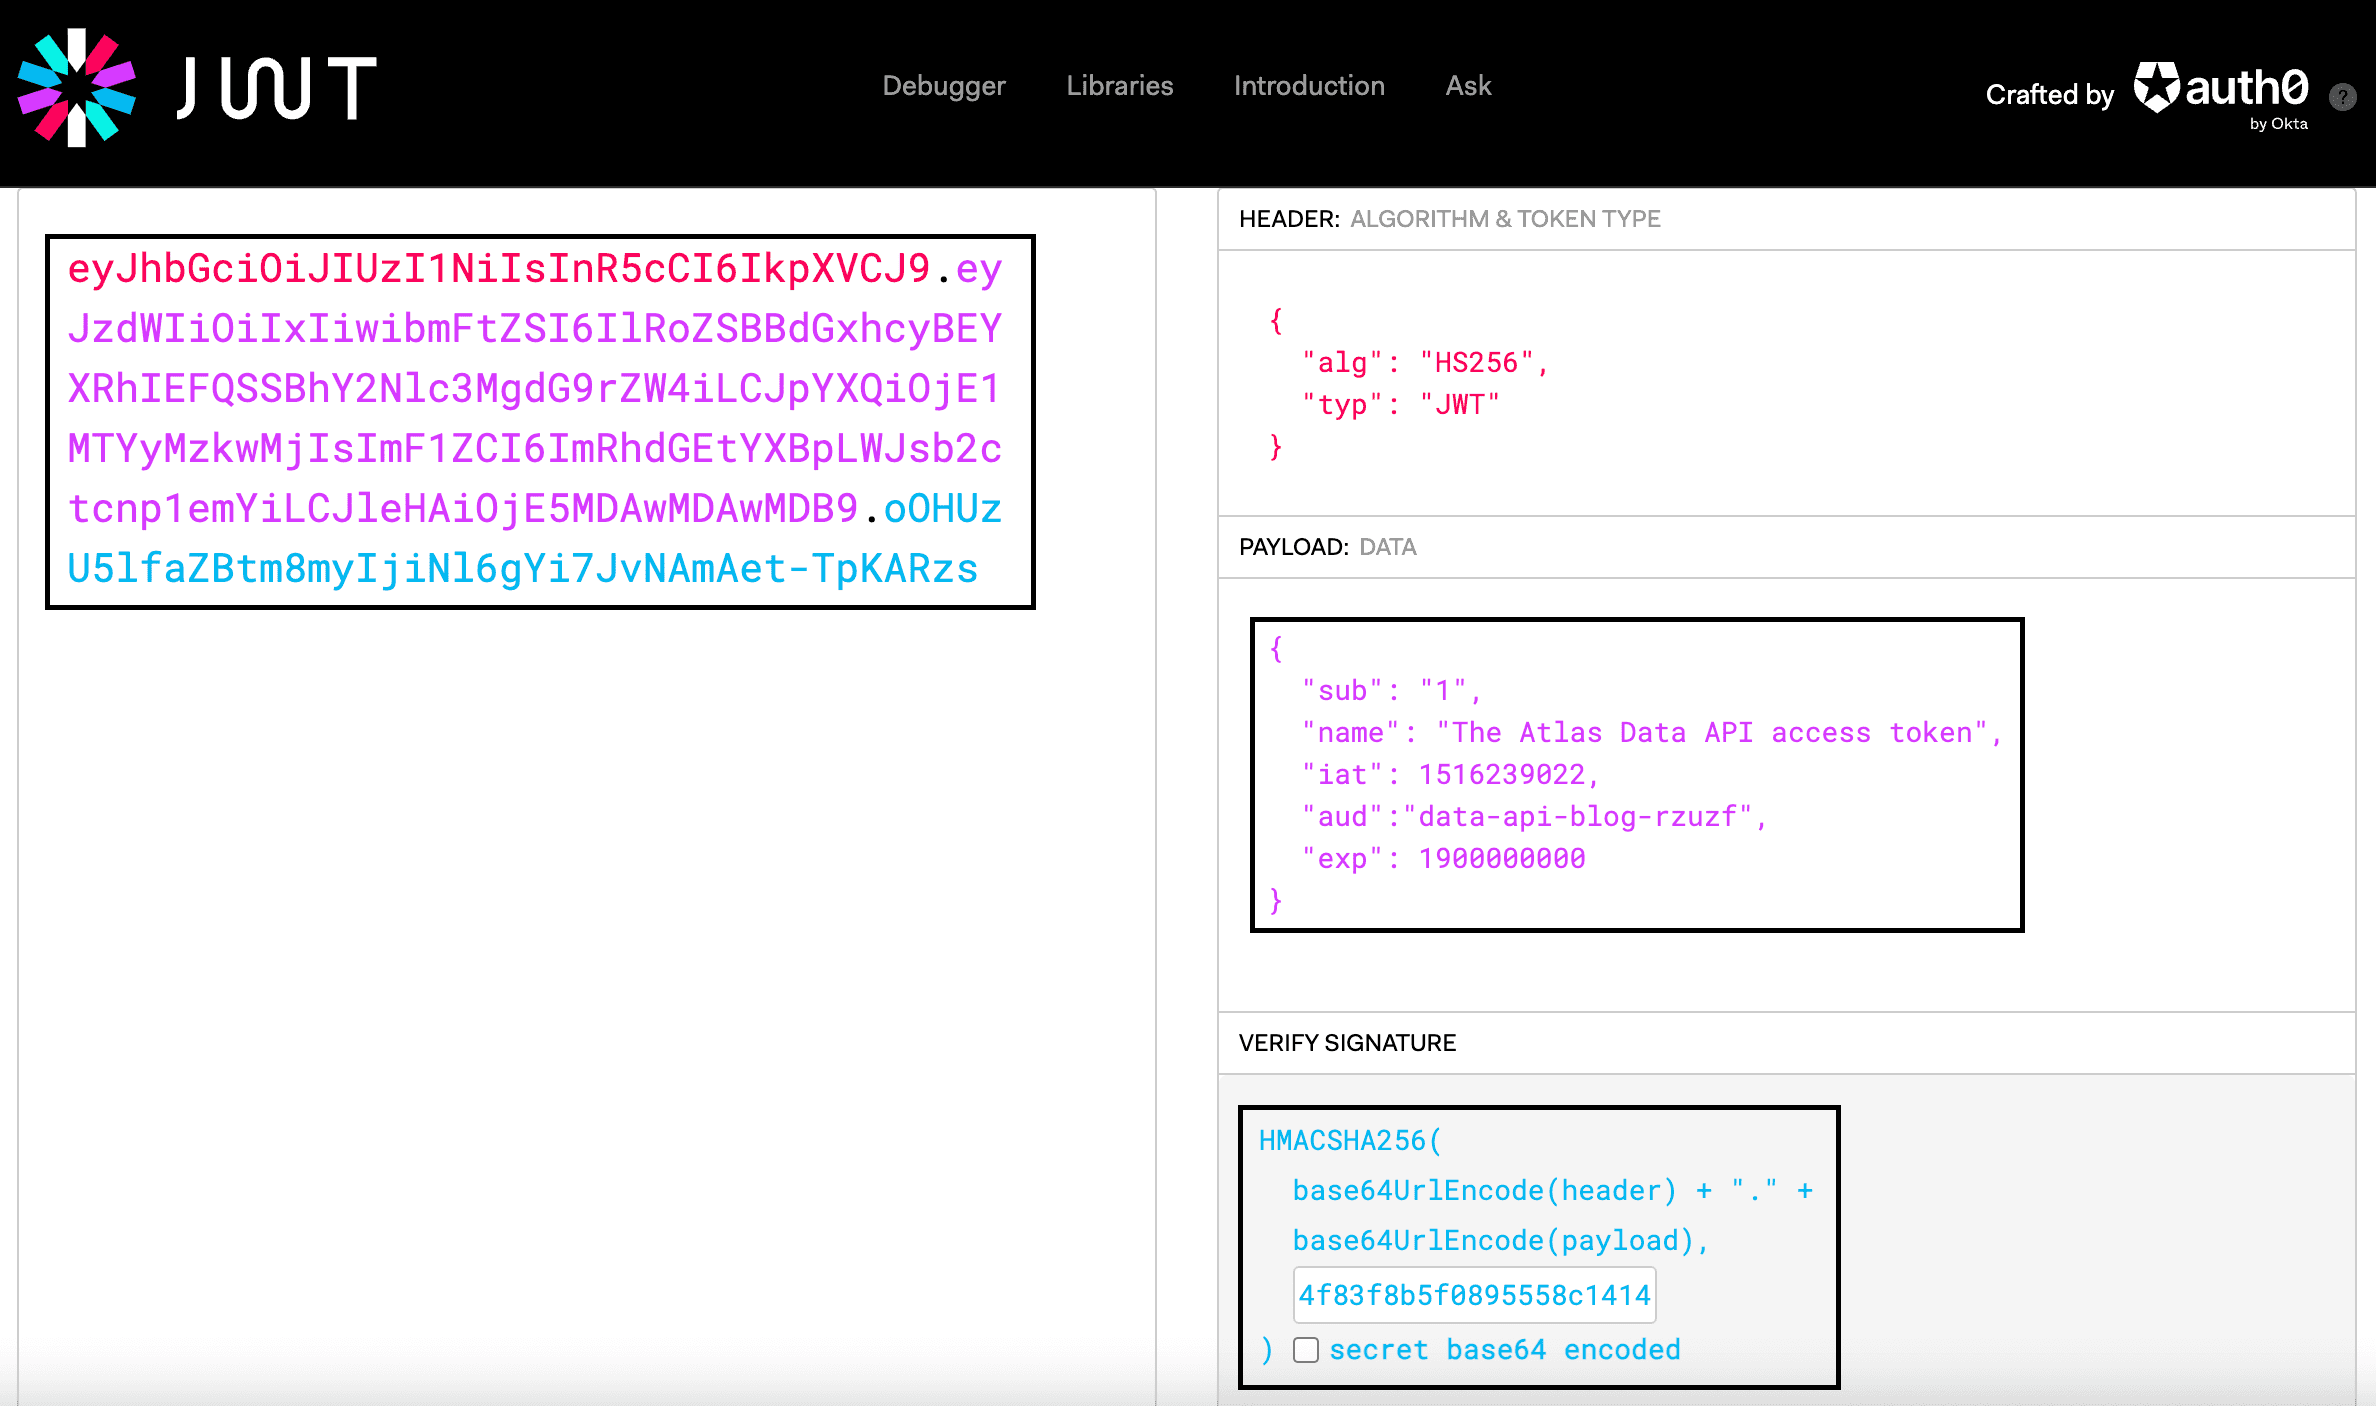
I will send a query to the MongoDB database now using the Data API interface. As the authentication method, I will choose the JWT token. I need to first generate an access token. I will do this using the website https://jwt.io. The audience (
aud) for this token will need to be the name of the Data API application. I can remind myself of the unique name of my Data API by printing the APP_IDenvironment variable. I will need this name when creating the token.In the
PAYLOADfield, I will place the following data. Note that I placed the name of my Data API in the aud field. It is the audience of the token. By default, App Services expects this value to be the unique app name of your app.The signature portion of the JWT token is the secret key generated in one of the previous steps. In this example, the key is
thisisalongsecretkeywith32pluscharacters . I will place this key in the VERIFY SIGNATURE field.It will look like the screenshot below. The token has been generated and is visible in the top left corner.

I copy the token and place it in the
JWTenvironment variable, and also create another variable called ENDPOINT with the Data API query endpoint. Now, finally, we can start making requests to the Atlas Data API. Since the access role was created for only one collection, my request will be related to it.WARNING
If you are getting an error message along the lines of the following:
If you are getting an error message along the lines of the following:
{"error":"invalid session: error finding user for endpoint","error_code":"InvalidSession","link":"..."}
Make sure that your JSON Web Token is valid. Verify that the audience (aud) matches your application id, that the expiry timestamp (exp) is in the future, and that the secret key used in the signature is the correct one.You can see that this retrieved a single document from the routes collection.
Limiting access to your API endpoint to only authorized servers is a simple yet effective way to secure your API. You can modify the list of allowed IP addresses by going to
App Settings in the left navigation menu and selecting the IP Access list tab in the settings area. By default, all IP addresses have access to your API endpoint (represented by 0.0.0.0). To enhance the security of your API, remove this entry and add entries for specific authorized servers. There's also a handy button to quickly add your current IP address for ease when developing using your API endpoint. You can also add your custom IP address with the help of realm cli. I'll show you how!I am displaying the current list of authorized IP addresses by running the
realm cli command.I want to restrict access to the Atlas Data API to only my IP address. Therefore, I am displaying my actual address and assigning the address into a variable
MY_IP.Next, I add this address to the IP access list, which belongs to my application, and delete
0.0.0.0/0 entry.The updated IP access list is visible in the Data API, App Services UI.

The Data API offers fundamental endpoint options for creating, reading, updating, and deleting, as well as for aggregating information.
Custom HTTPS endpoints can be created to establish specific API routes or webhooks that connect with outside services. These endpoints utilize a serverless function, written by you, to manage requests received at a specific URL and HTTP method. Communication with these endpoints is done via secure HTTPS requests, eliminating the need for installing databases or specific libraries. Requests can be made from any HTTP client.
I can configure the Data API custom HTTP endpoint for my app from the App Services UI or by deploying configuration files with Realm CLI. I will demonstrate a second method. My custom HTTP endpoint will aggregate, count, and sort all source airports from the collection
routes from sample_training database and return the top three results. I need to change the config.json file from the http_endpoint directory, but before I do that, I need to pull the latest version of my app.I name my custom HTTP endpoint
sumTopAirports . Therefore, I have to assign this name to the route key and function_name key's in the config.json file.data-api-blog/http_endpoints/config.json
I need to also write a custom function. Atlas Functions run standard ES6+ JavaScript functions that you export from individual files. I create a
.js file with the same name as the function in the functions directory or one of its subdirectories.I then place this code in a newly created file. This code exports a function that aggregates data from the Atlas cluster
data-api-blog, sample_training database, and collection routes. It groups, sorts, and limits the data to show the top three results, which are returned as an array.data-api-blog/functions/sumTopAirports.js
Next, I push my changes to the Atlas.
My custom HTTPS endpoint is now visible in the Atlas UI.

I can now query the
sumTopAirports custom HTTPS endpoint.Security is important when working with data because it ensures that confidential and sensitive information is kept safe and secure. Data breaches can have devastating consequences, from financial loss to reputational damage. Using the Atlas command line interface, you can easily extend the Atlas Data API with additional security features like JWT tokens, IP Access List, and custom role-based access-control. Additionally, you can use custom HTTPS functions to provide a secure, user-friendly, and powerful way for managing and accessing data. The Atlas platform provides a flexible and robust solution for data-driven applications, allowing users to easily access and manage data in a secure manner.
MongoDB Atlas Data API allows users to access their MongoDB Atlas data from any platform and programmatically interact with it. With the API, developers can easily build applications that access data stored in MongoDB Atlas databases. The API provides a simple and secure way to perform common database operations, such as retrieving and updating data, without having to write custom code. This makes it easier for developers to get started with MongoDB Atlas and provides a convenient way to integrate MongoDB data into existing applications.
If you want to learn more about all the capabilities of the Data API, check out our course over at MongoDB University. There are also multiple resources available on the Atlas CLI.
If you don't know how to start or you want to learn more, visit the MongoDB Developer Community forums!