100daysofcode - Day15
Hello friends  , a new day is here. Let’s wrap the 15th day from this amazing 100 day journey.

In yesterday’s post, we explored  how to install
  nodeJS, with the node package manager that helps us starting a
  project and install all the requirements to use and manipulate sass code.
In today’s post, we will start diving  in some amazing topics that show us clearly the power
  of sass and how this powerful extension to the normal css helps us write efficient code, reusable and non redundant one.

We will start by exploring the variables concept in Sass, how we can define a new variable, set a value for it and use it in the entire file.
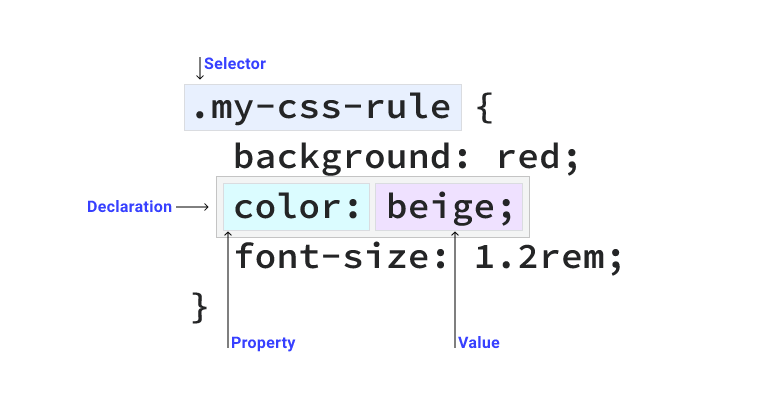
What are sass variables ? 
    // Here we are defining some color variables
    $color-primary: #c69963;
    $color-primary-dark: #b28451;
    $color-secondary: #101d2c;
    $color-grey-light-1: #f9f7f6;
    $color-grey-dark: #54483a;

    // And now some font variables gets defined
    $font-primary: "Nunito", sans-serif;
    $font-display: "Josefin Sans", sans-serif;

    // For example, here in the body rule instead of adding
    // the font family and color values again
    // we just call them using their names
    body {
     font-family: $font-primary;
     color: $color-grey-dark;
     font-weight: 300;
     line-height: 1.6;
    }
Example : 2 - Use a built in variable is Sass 
   /* import the math library using the @use syntax */
  @use "sass:math" as math;
  /* use the available variables in the math library for example */
  math.$pi  // Output: 3.1415926536
  math.$e; //  Output: 2.7182818285
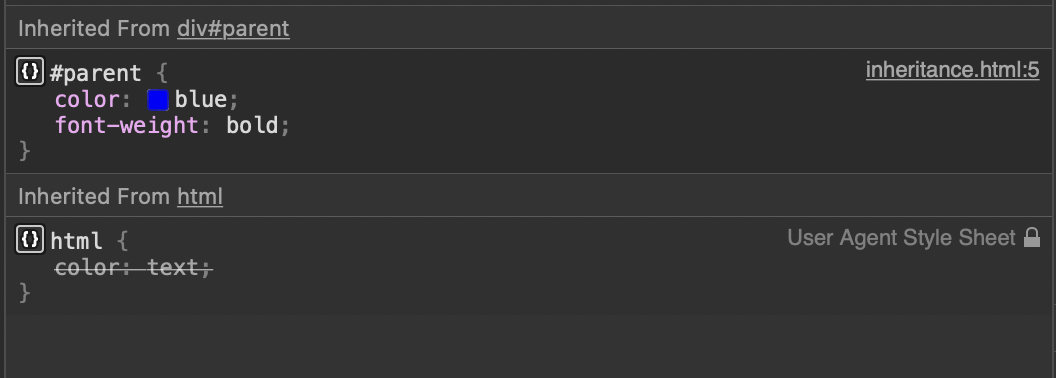
Variables Scope in Sass
    $global-variable: global value;

    .content {
     $local-variable: local value;
     global: $global-variable;
     local: $local-variable;
    }

    .sidebar {
     global: $global-variable;

     // This would fail, because $local-variable isn't in scope:
     // local: $local-variable;
    }
Variables shadowing in SASS ❏💭
  $variable: first global value;

  .content {
   $variable: second global value !global;
   value: $variable;
  }

  .sidebar {
   value: $variable;
  }
Variables functions in Sass
- In SASS the core library provides us with a couple of advanced functions for dealing with variables.
Example :
    @use "sass:map";

    $theme-colors: (

    "success": #28a745,

    "warning": #ffc107,

    );

    .alert {

    // Instead of $theme-color-#{warning}

    background-color: map.get($theme-colors, "warning");

    }
And now after a deep  dive in the variables concept in SASS. It’s time to make a gentle intro
  to mixins another amazing concept in SASS to be continued in our next posts.
Mixins in SASS
-
In Sass, a mixins allows us to define styles that can be reused in the entire  stylesheet. It allows developers to avoid the usage of non semantic classes like .float–right or .float-left.
-
To define a mixins, we use the @mixin at-rule followed by the name, where this name can be any sass identifier.
-
To include a mixins inside a context, we use the @include keyword followed by the name of the rule. 
Example :
    @mixin horizontal-list {

       li {
         display: inline-block;
         margin: {
           left: -4px;
           right: 3em;
         }
       }
     }
      nav ul {
       @include horizontal-list;
     }
Now we reached the post end. In tomorrow’s post we will dive more into mixins and then we will introduce the functions concept, to utilize more the power of this amazing technology. 

 and please feel free to reach out anytime when you need
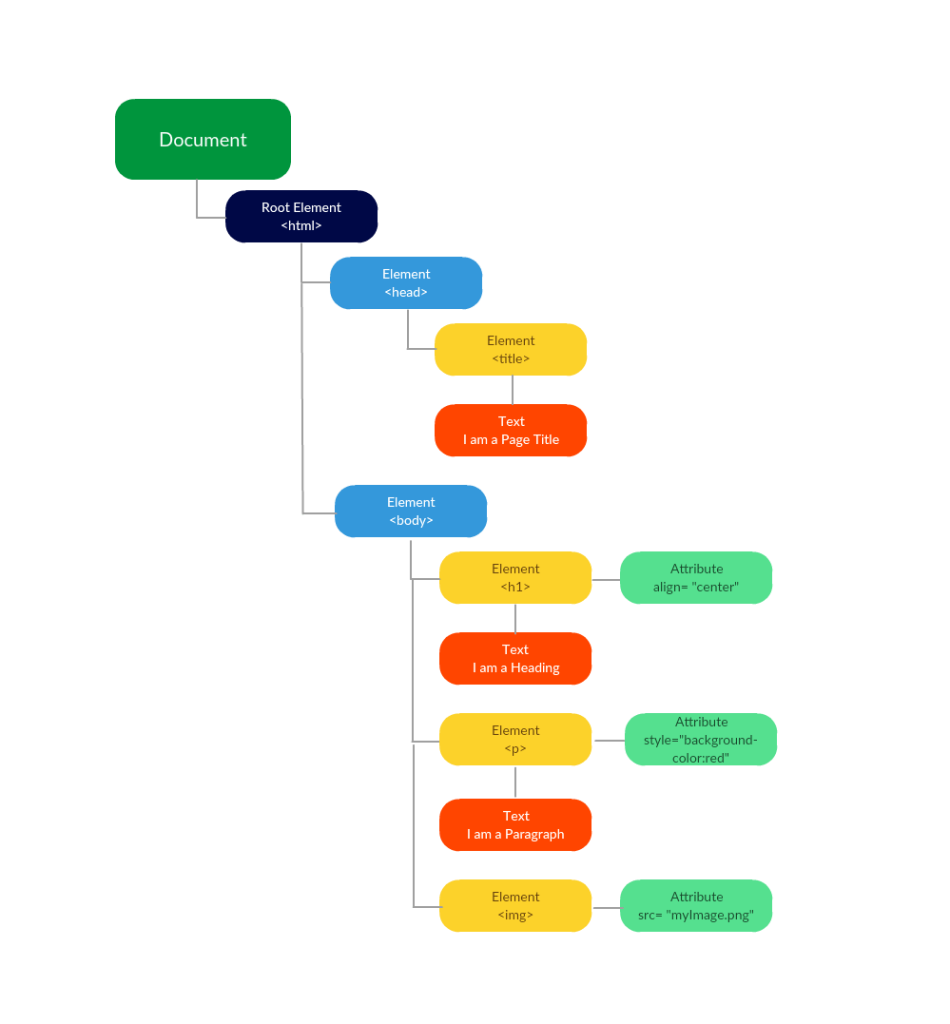
 some of the basic DOM methods that help, retrieving and selecting certain sections of the document starting with:


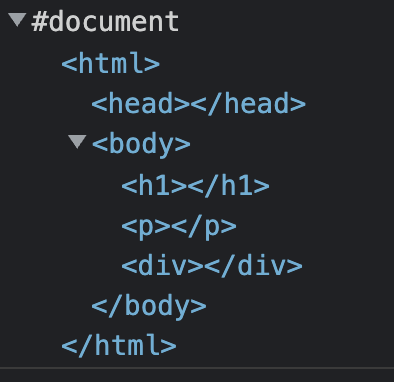
 , using the Node.firstChild property that returns the first child in the tree.
 of a certain element we can simply use the following property Element.parentNode, which return the parent of the targeted element as following:
 of a certain element, we have to use the basic properties of the Node.nextSibling that return the next sibling in the tree and the Node.previousSibling that return the previous one.
 event, that fires when the document view has been scrolled.
 event, that gets fired when the browser has lost access to the network and the value of Navigator.onLine switches to false
 event fires when the user rotates a wheel button on a pointing device
 , and move on to learn and discover CSS, and its role in building stunning Web interfaces


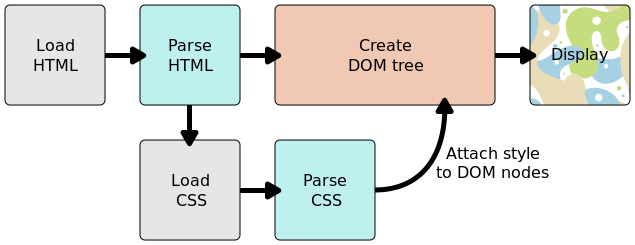


 . Today marks the 8th day / 100. And in today’s post, we will dive more in CSS and learn some amazing new things.
  what selectors are and how we can use them in our CSS document.


 , their types and how CSS deal with them to apply the corresponding value added to each property.
 , red
, red  , white
  , salmon:two_hearts:, royalblue:blue_heart:, lightgreen:green_heart:.


 : we should build the HTML layout, alongside with the CSS following a consistent structure for classes naming.
 .
. and productive one
  , with a gentle intro about the thinking and building phase. And now it’s time to resume
  our process and talk more about the 3 and the most important phase. The (Think Build Architect) 3rd parameter.
 /
/ arch we have 7 different folders for partial SCSS files and a single
  code of the project, including all standard styles, like the typographic rules, which they are used
  commonly throughout the project
 , like the styles of the navigation bar, the header, the footer
 …
…
 required in other pages and at the same time does not 🆇 require any style from other pages.
 , as it only required if we have some sections the contain alternate schemes
 files, mixins functions, SASS tools
  and any other config file
  , and this files are just helpers which don’t output when they get compiled
  party code and all external libraries:books:, like bootstrap, jQuery, tailwind …
 contains the required imports from all
 reading it and benefited from it. Stay tuned for my ⎘ next posts where we will learn together
  SASS and SCSS, via the node package manager and start exploring it in an interactive way
  .
. : yeah, in a sass mixin if the last variable end with 3 dots …, then all extra arguments to that mixin are passed to that argument as a list, and this argument is called the argument list.
 post which will talk about a new interesting topic in Sass which is the functions