Exploring Data with MongoDB Atlas, Databricks, and Google Cloud
May 11, 2021 | Updated: December 29, 2025
>> Announcement: Some features mentioned below will be deprecated on Sep. 30, 2025. Learn more.
MongoDB Atlas supports Google Cloud (GC), enabling you to easily spin up managed MongoDB clusters within GC in minutes. We’re excited to share that Databricks recently launched Databricks on GC, giving customers the freedom to move and analyze their data within GC and MongoDB Atlas. With the latest update to Databricks, it’s now easier to get started with a cloud-first approach on GC that leverages MongoDB Atlas with its flexible data model designed for modern applications and Databricks for more advanced analytics use cases.
The following tutorial illustrates how to use MongoDB Atlas on GC and Databricks. We’ll use sample sales data in MongoDB Atlas and calculate the rolling average using Databricks on GC. This tutorial covers the following:
-
How to read data from MongoDB Atlas on GC into Spark
-
How to run the MongoDB Connector for Spark as a library in Databricks
-
How to use the PySpark libraries to perform rolling averages of sales data
-
How to write these averages back to MongoDB so they are accessible to applications
Create Databricks Workspace
To provision a new Databricks workspace, you will need to have a GC project already created. If you do not already have a Databricks cluster deployed on GC, follow the online documentation to create one.
Note: It is important to follow the documentation, because there are a few key settings you will need to make in your GC project, such as enabling container.googleapis.com, storage.googleapis.com, and deploymentmanager.googleapis.com services and adjusting certain Google Cloud quotas before creating your Databricks cluster.
In this example we have already created the Google Cloud project mongodb-supplysales and are ready to go to the Google Marketplace and add Databricks to our project.
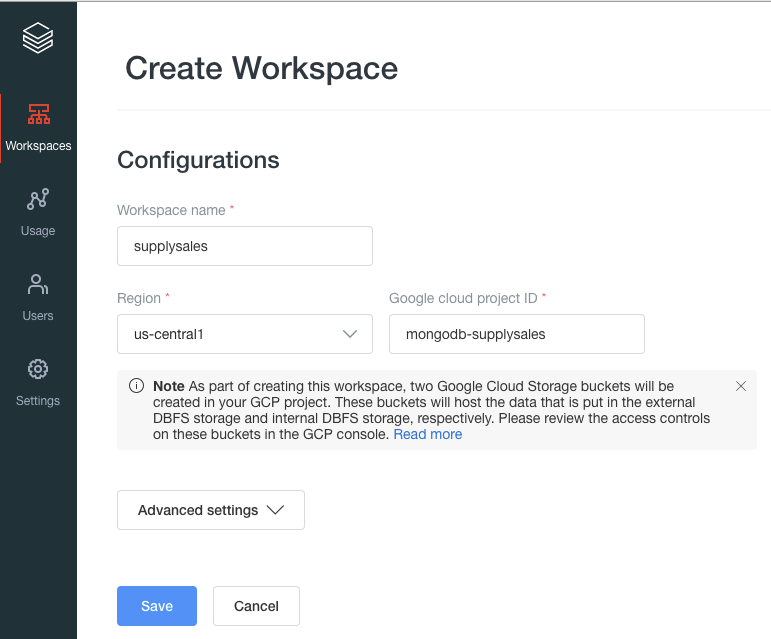
Within your Google project, click on “Marketplace” and enter “Databricks” in the search box.
Click on the resulting tile and follow the instructions.
Once your Databricks cluster is created, navigate to the Databricks cluster with the URL provided. Here you can create a new workspace.
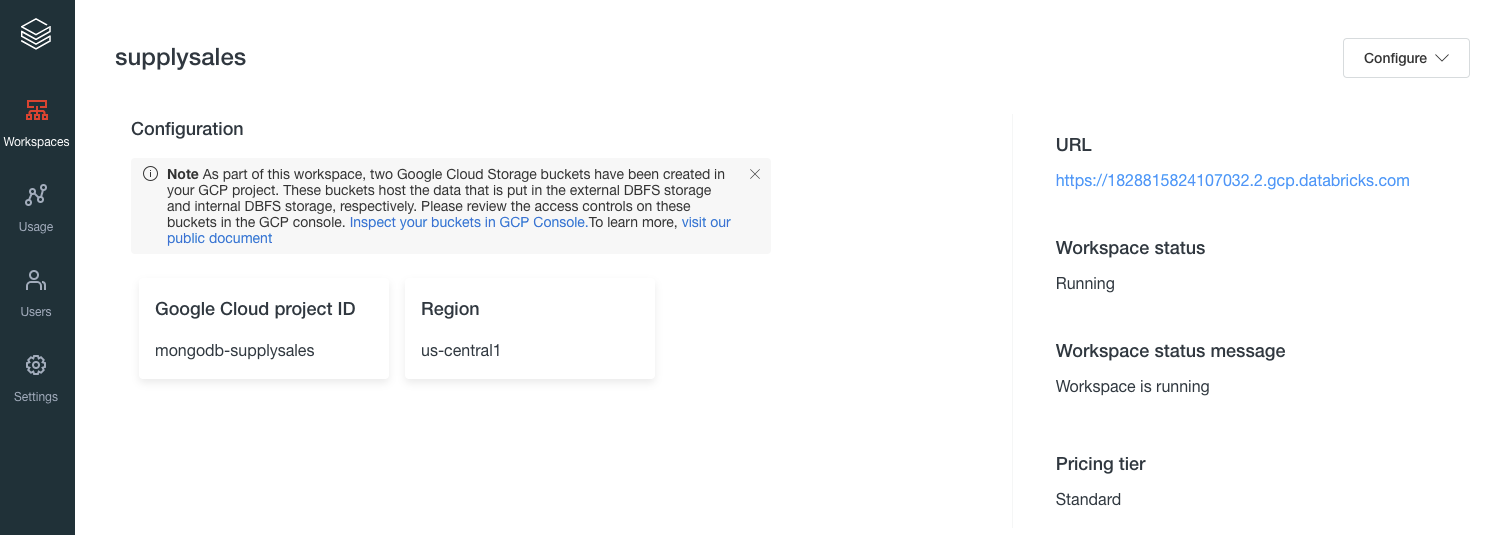
Once you’ve created your workspace, you will be able to launch it from the URL provided:
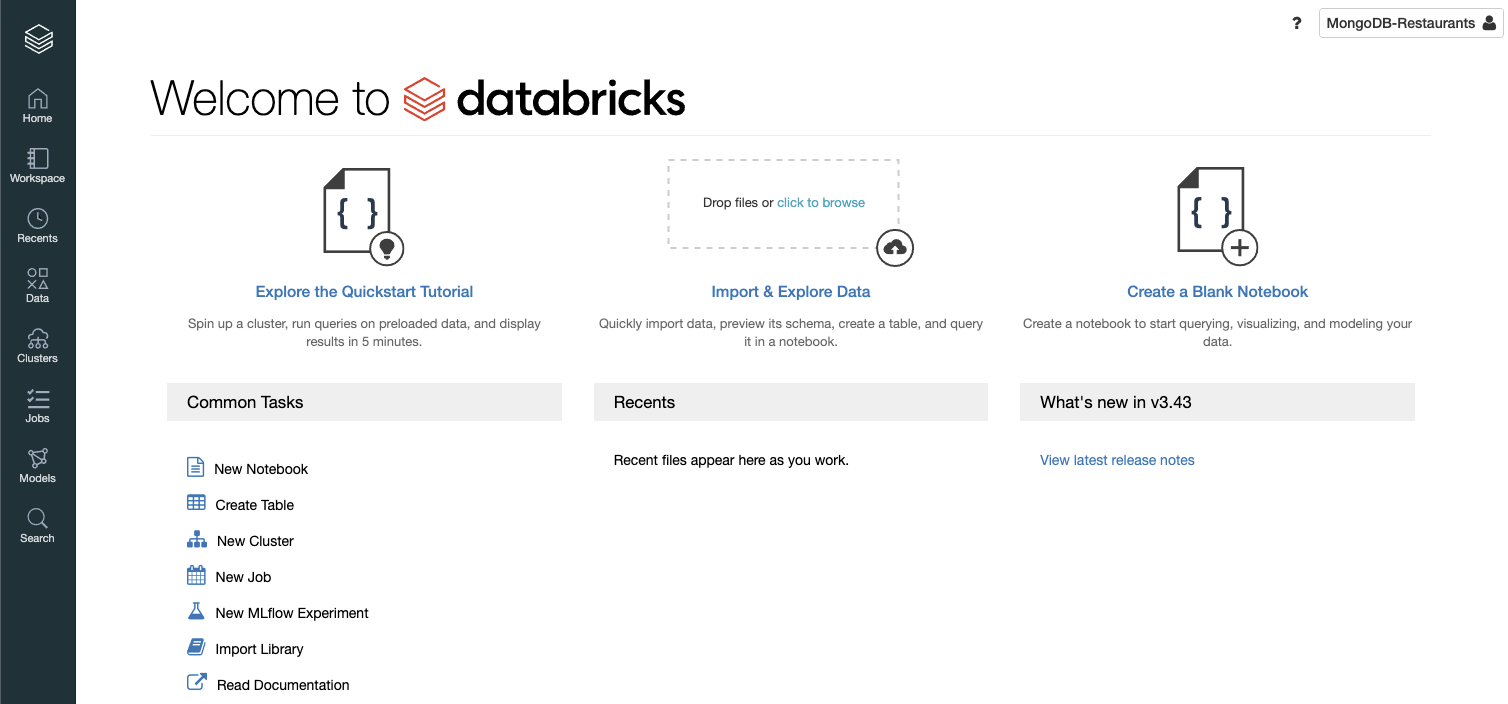
Logging into your workspace brings up the following welcome screen:
In this article, we will create a notebook to read data from MongoDB and use the PySpark libraries to perform the rolling average calculation. We can create our Databricks cluster by selecting the “+ Create Cluster” button from the Clusters menu.
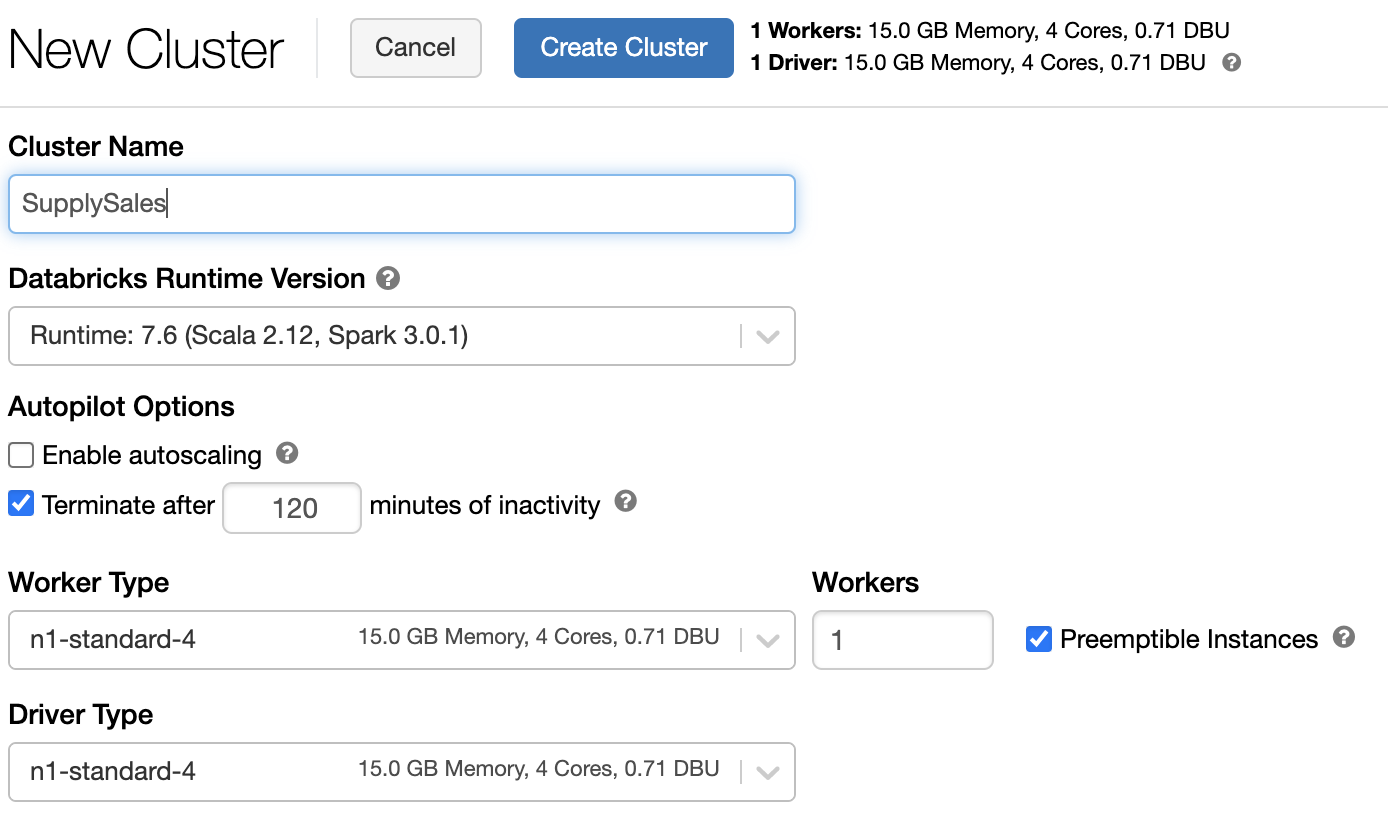
Note: For the purposes of this walkthrough we chose only one worker and preemptible instances; in a production environment you would want to include more workers and autoscaling.
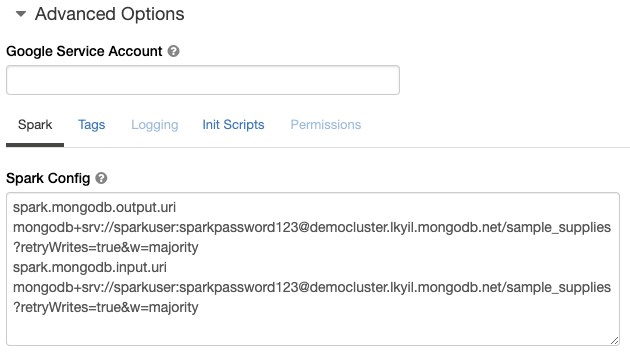
Before we create our cluster, we have the option under Advanced Options to provide Spark configuration variables. One of the common settings for Spark config is to define spark.mongodb.output.uri and spark.mongodb.input.uri. First we need to create the MongoDB Atlas cluster so we have a connection string to enter for these values. At this point, open a new browser tab and navigate to MongoDB Atlas.
Prepare a MongoDB Atlas Instance
Once in the MongoDB Atlas portal, you will need to do the following before you can use Atlas with Databricks:
-
Create your MongoDB Atlas cluster
-
Define user credentials for use in the Spark connector
-
Define network access
-
Add sample data (optional for this article)
Create Your MongoDB Atlas Cluster
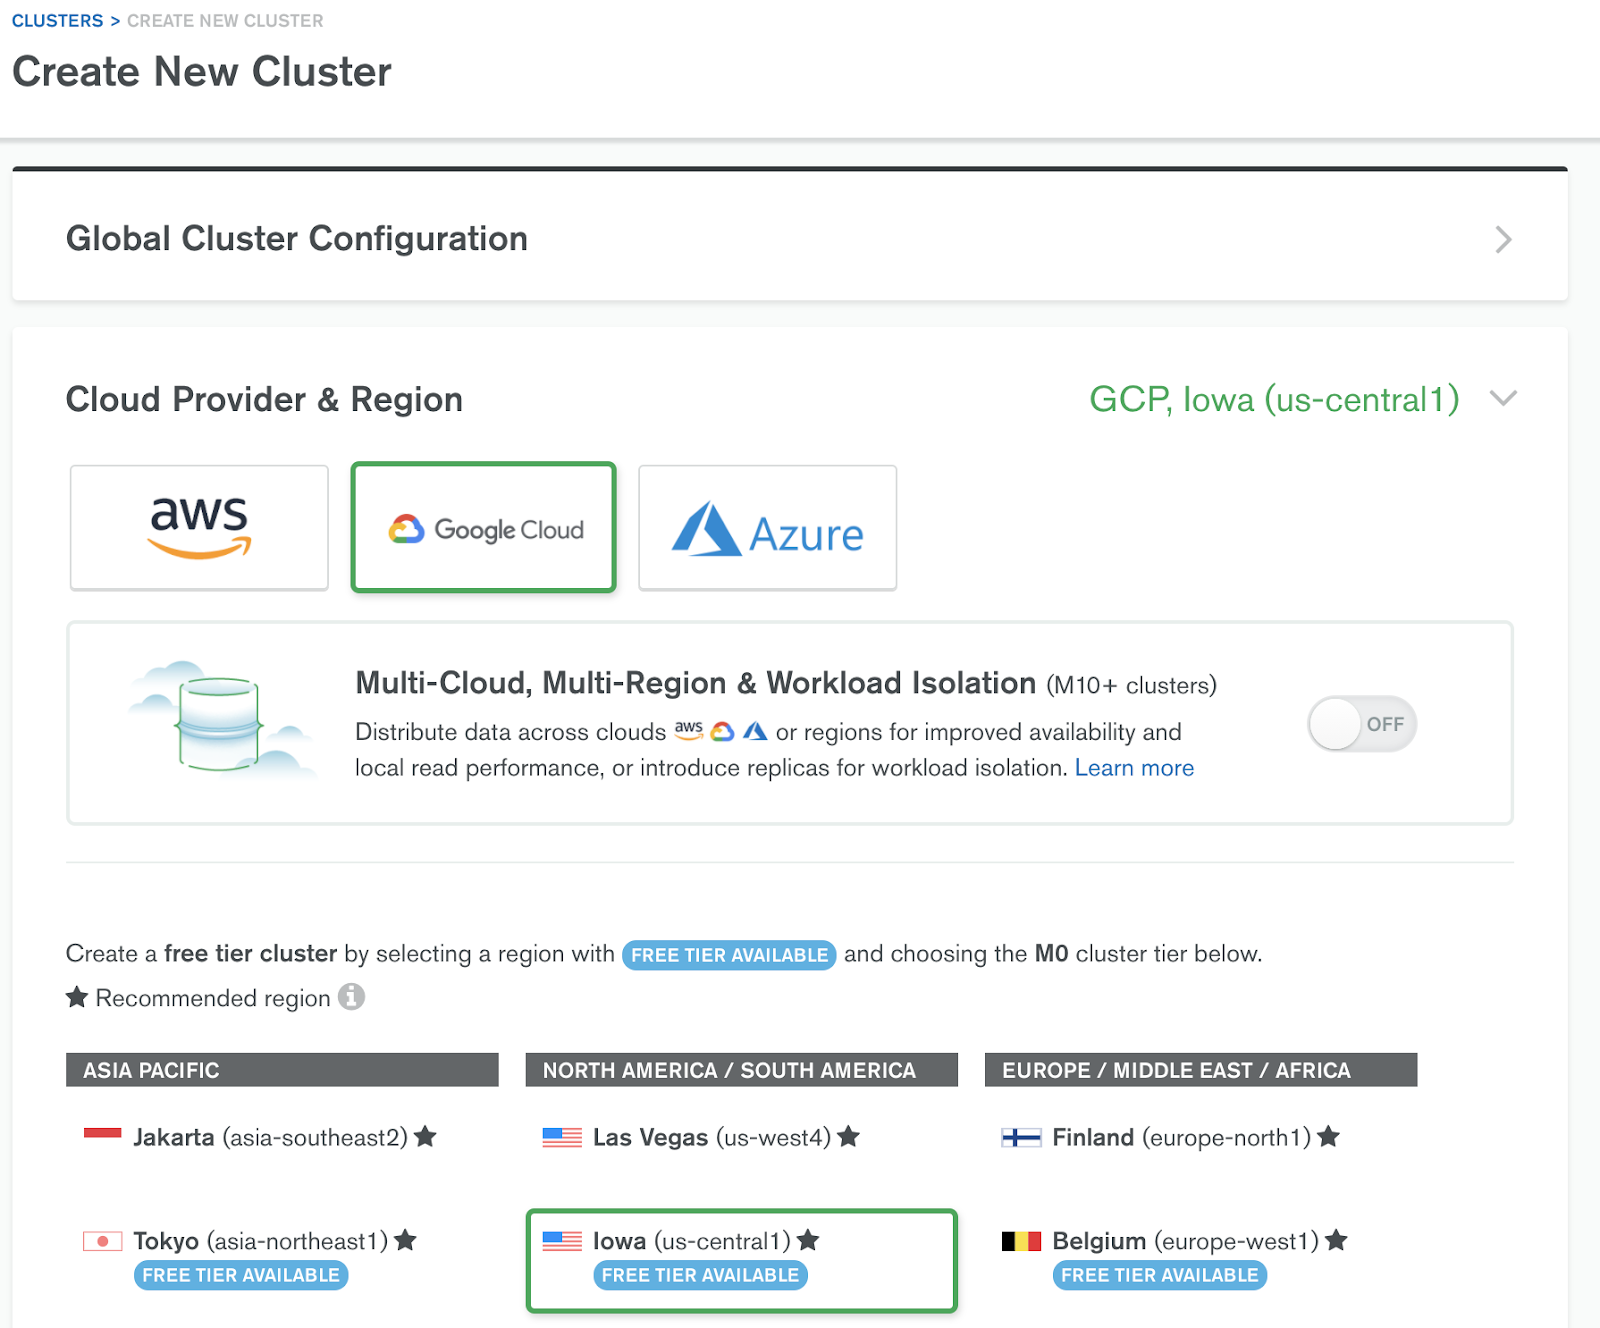
If you already have a MongoDB Atlas account, log in and create a new Atlas cluster. If you do not have an account, you can set up a free cluster at the following URL: https://www.mongodb.com/products/platform/cloud. Once your account is set up, you can create a new Atlas cluster by using the “+ New Cluster” dialog. MongoDB provides a free tier for Google Cloud.
Once you provide a cluster name and click on “create,” Atlas will take approximately five to seven minutes to create your Atlas cluster.
Define Database Access
By default there are no users created in an Atlas cluster. To create an identity for our Spark cluster to connect to MongoDB Atlas, launch the “Add New Database User” dialog from the Database Access menu item.
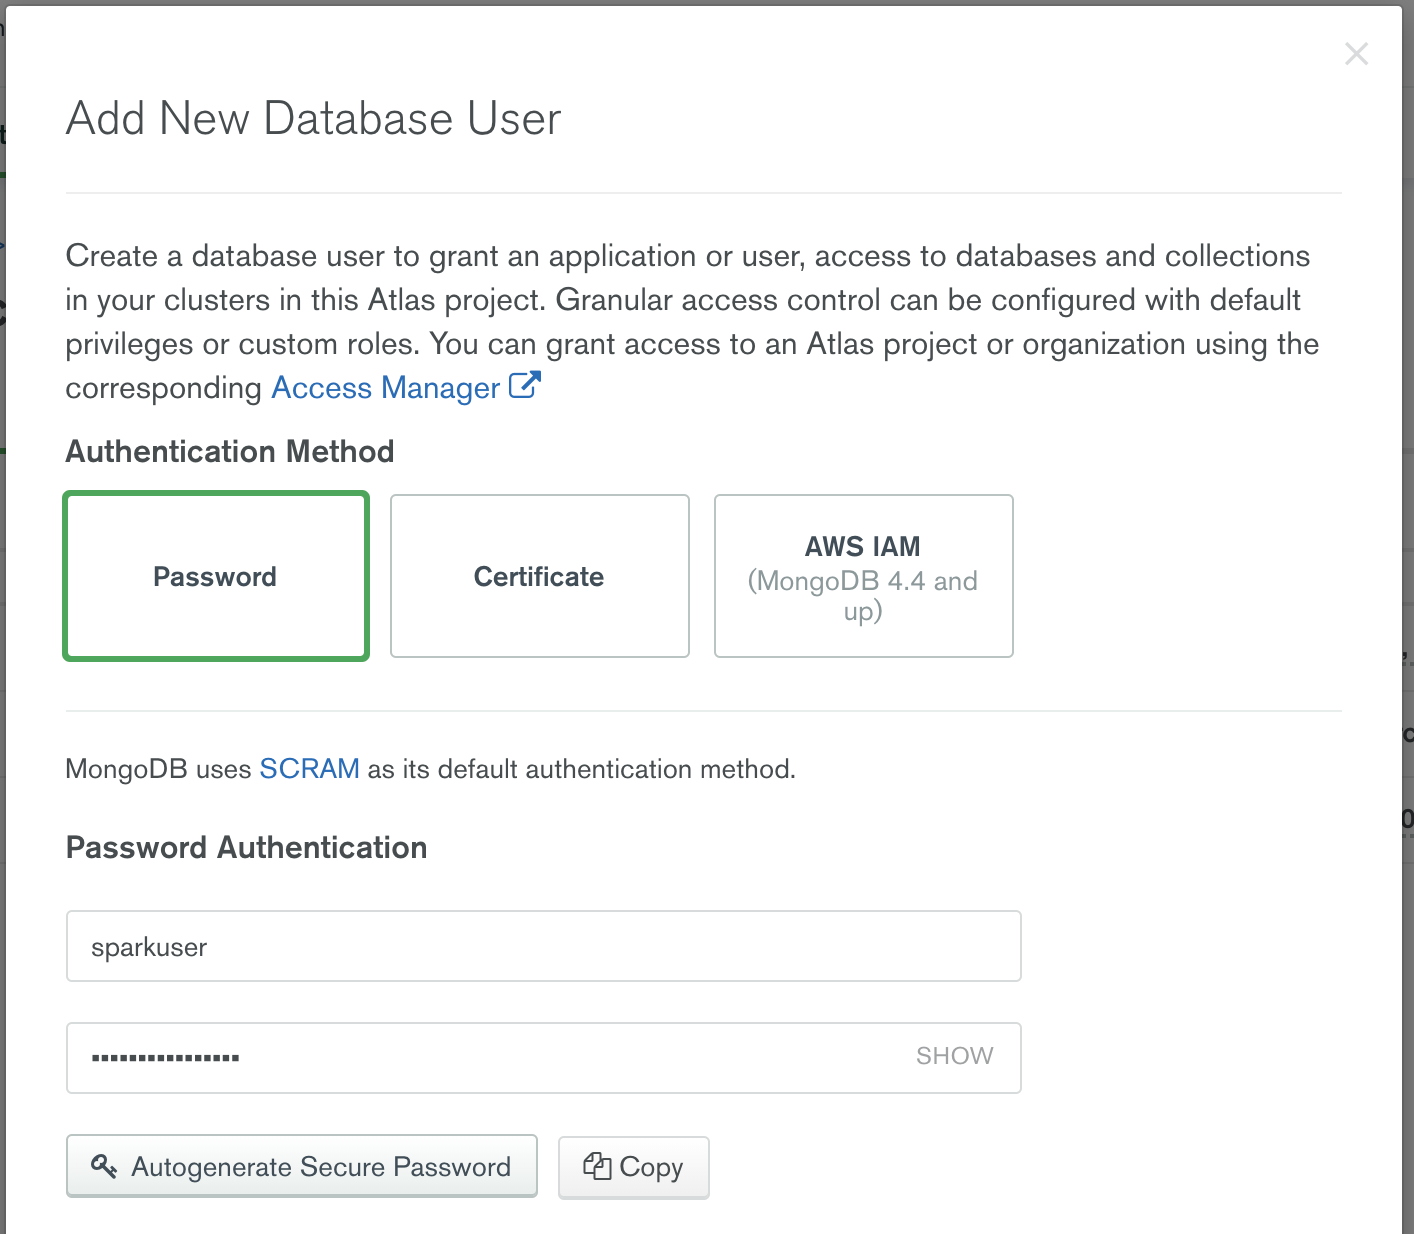
Notice that there are three options for authentication to MongoDB Atlas: Password, Certificate, and AWS IAM authentication. Select “Password,” and enter a username and password. Atlas provides granular access control: For example, you could restrict this user account to work only with a specific Atlas cluster or define the account as temporary and have Atlas expire within a specific time period.
Defining Network Access
MongoDB Atlas does not allow any connection from the internet by default. You need to include MongoDB Atlas as part of a VPC peering or AWS PrivateLink configuration. If you do not have that set up with your cloud provider, you need to specify from which IP addresses Atlas can accept incoming connections. You can do this via the “Add IP Address” dialog in the Network Access menu. In this article, we will add “0.0.0.0,” allowing access from anywhere, because we don’t know specifically which IP our Databricks cluster will be running on.
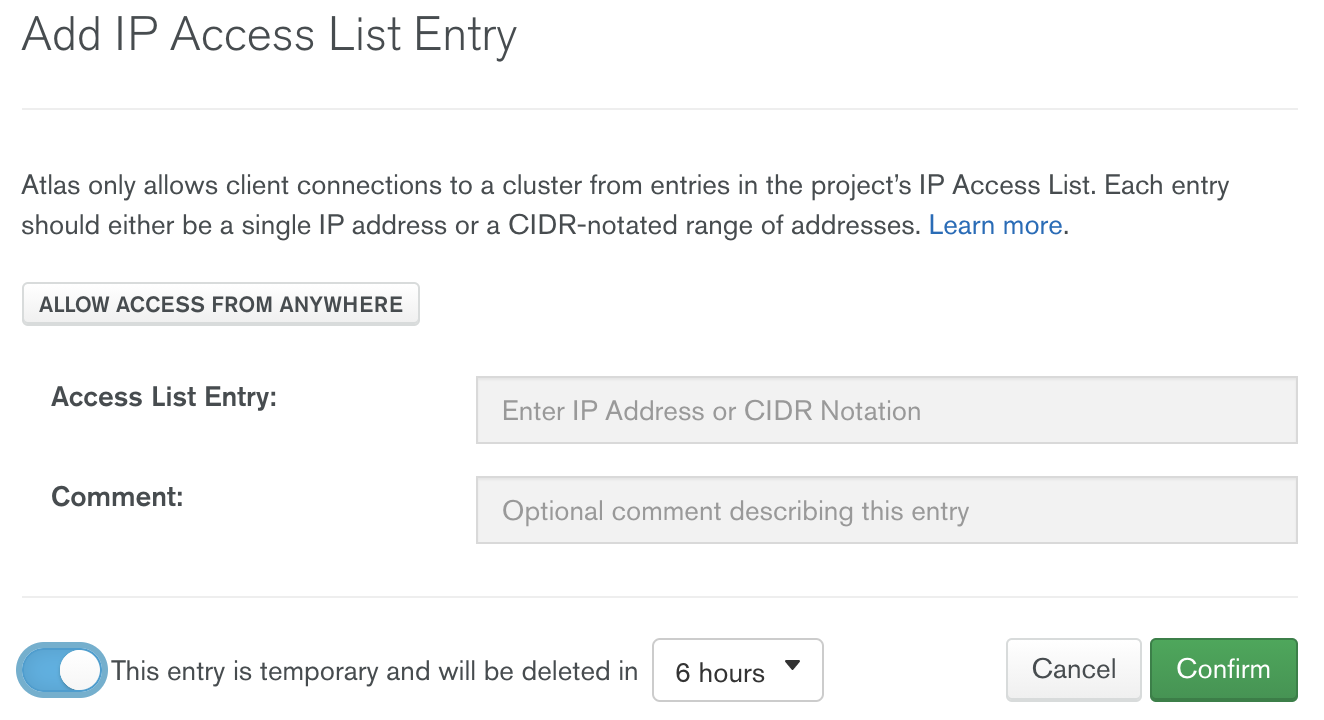
MongoDB Atlas can also make this IP access list temporary, which is great for situations where you need to allow access from anywhere.
Add Sample Data
Now that we have added our user account and allowed network access to our Atlas cluster, we need to add some sample data. Atlas provides several sample collections that are accessible from the menu item on the cluster.
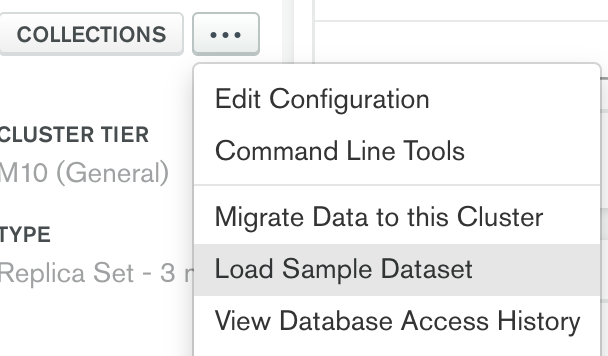
In this example, we will use the sales collection within the sample_supplies database.
Update Spark Configuration with Atlas Connection String
Copy the MongoDB Atlas connection string by clicking on the Connect button and selecting “Connect your application.”
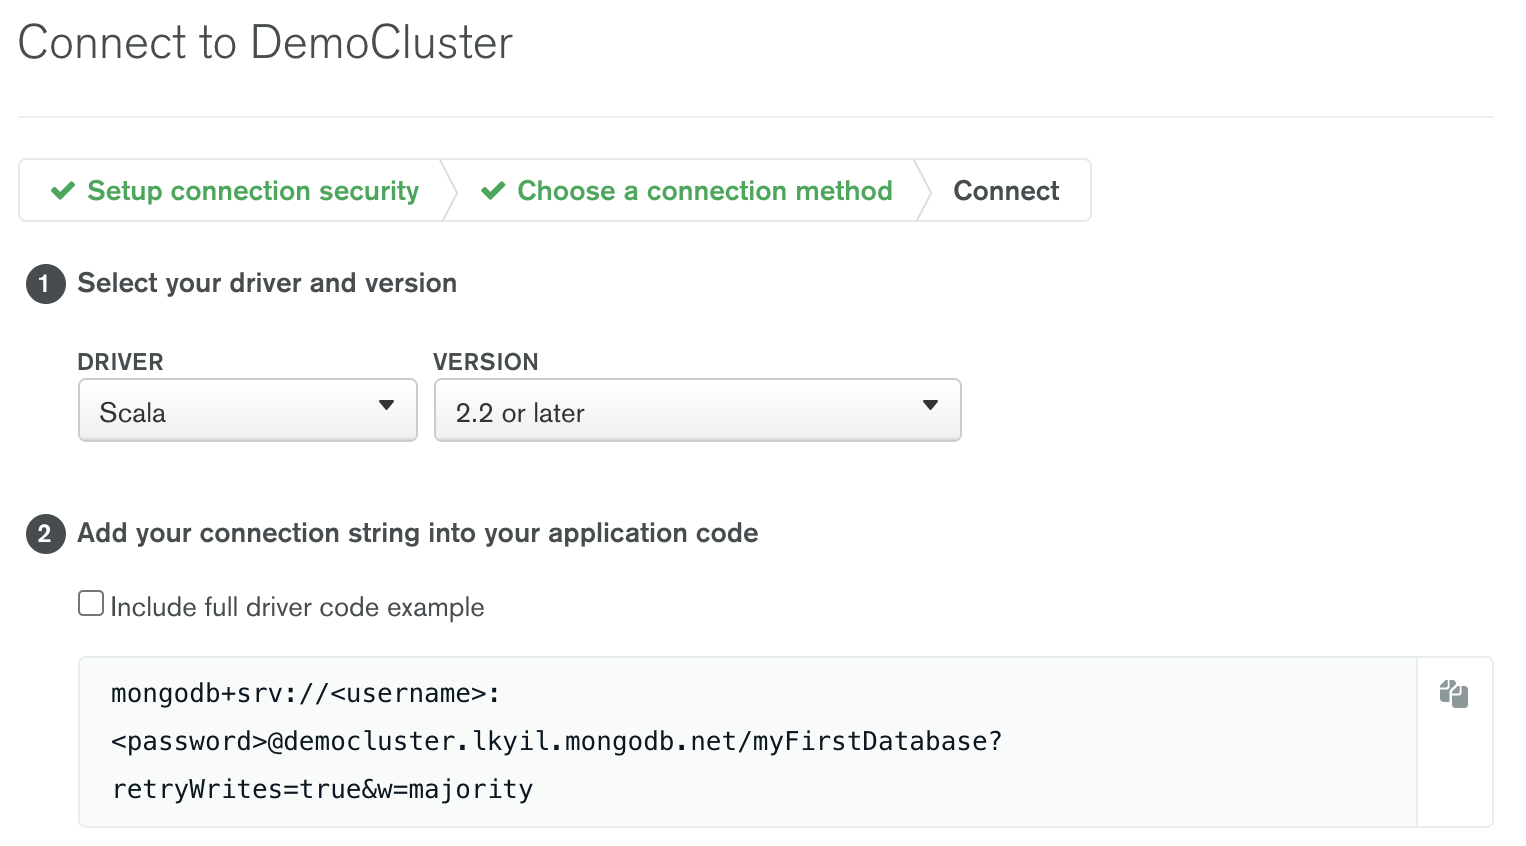
Copy the contents of the connection string and note the placeholders for username and password. You will have to change those to your own credentials.
Return to your Databricks workspace. Under Advanced Options in your Databricks workspace, paste the connection string for both the spark.mongodb.output.uri and spark.mongodb.input.uri variables. Note that you will need to update the credentials in the MongoDB Atlas connection string with those you defined previously. For simplicity in your PySpark code, change the default database in the connection string from MyFirstDatabase to sample_supplies. (This is optional, because you can always define the database name via Spark configuration options at runtime.)
Start the Databricks Cluster
Now that your Spark config is set, start the cluster.
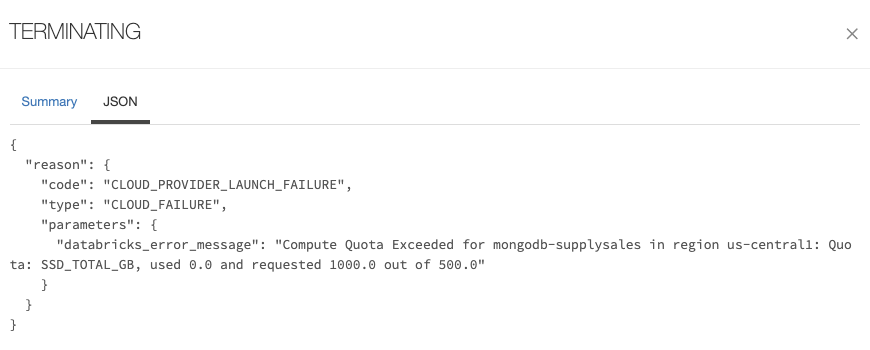
Note: If the cluster fails to start, check the event log and view the JSON tab. This is an example error message you will receive if you forgot to increase the SSD storage quota:
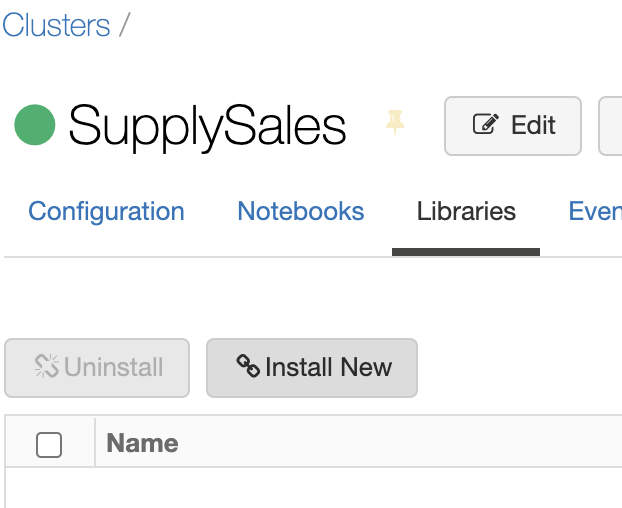
Add MongoDB Spark Connector
Once the cluster is up and running, click on “Install New” from the Libraries menu.
Here we have a variety of ways to create a library, including uploading a JAR file or downloading the Spark connector from Maven. In this example, we will use Maven and specify org.mongodb.spark:mongo-spark-connector_2.12:3.0.1 as the coordinates.
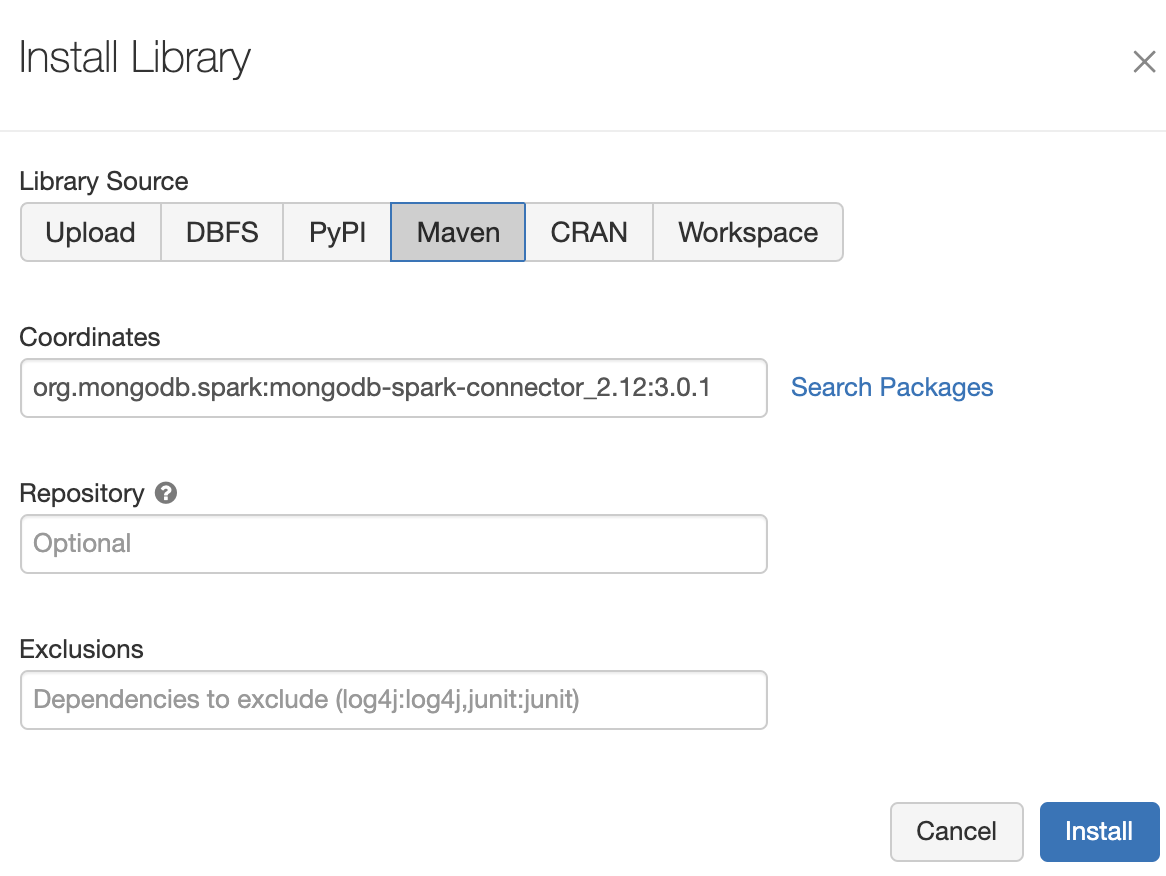
Click on “Install” to add our MongoDB Spark Connector library to the cluster.
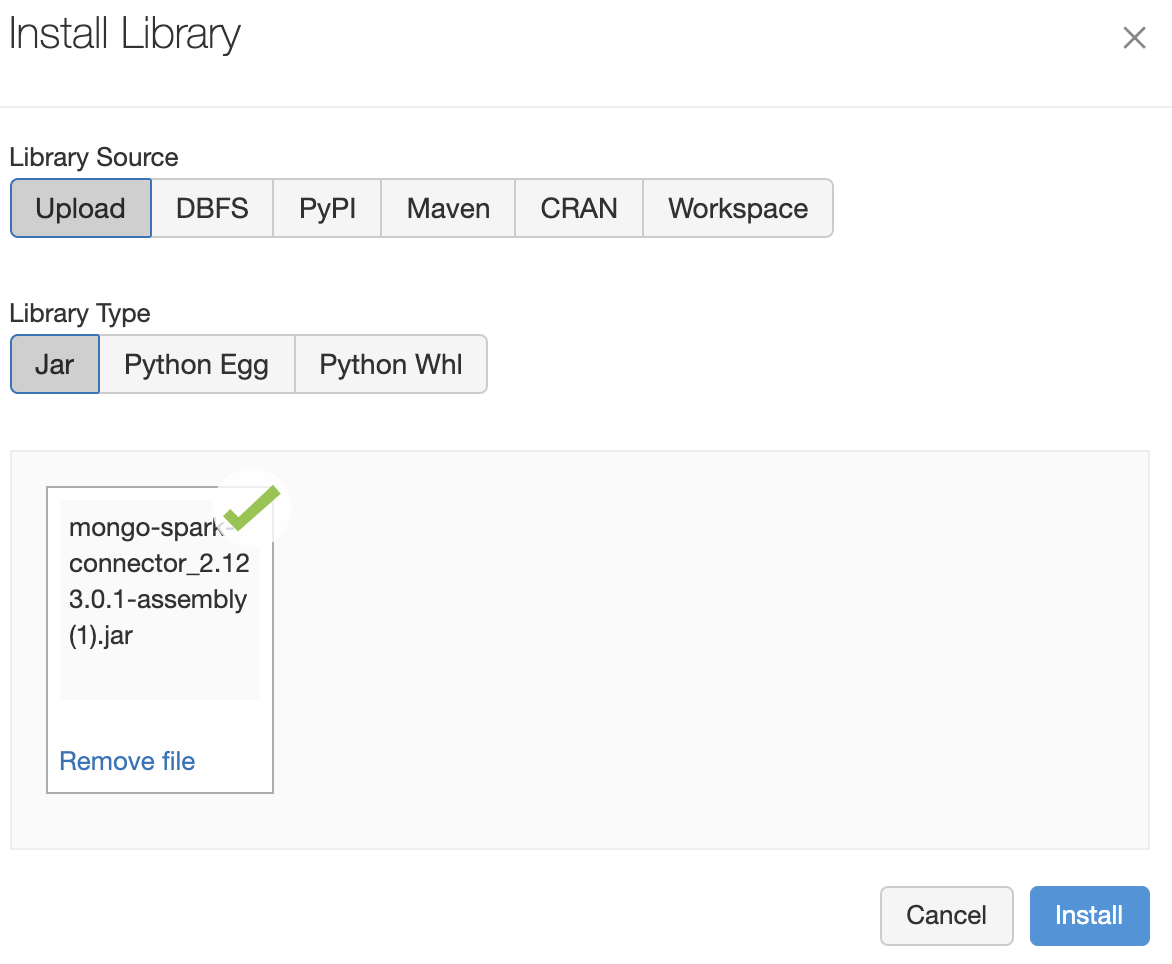
Note: If you get the error message “Maven libraries are only supported on Databricks Runtime version 7.3 LTS, and versions >= 8.1,” you can download the MongoDB Spark Connector JAR file from https://repo1.maven.org/maven2/org/mongodb/spark/mongo-spark-connector_2.12/3.0.1/ and then upload it to Databricks by using the Upload menu option.
Create a New Notebook
Click on the Databricks home icon from the menu and select “Create a blank notebook.”
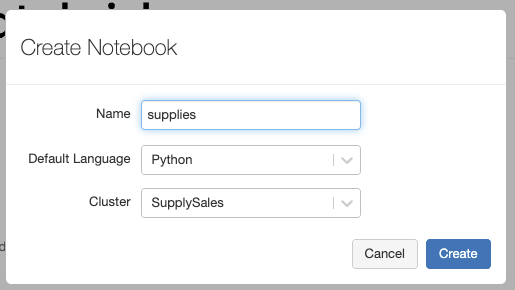
Attach this new notebook to the cluster you created in the previous step.
Because we defined our MongoDB connection string as part of the Spark conf cluster configuration, your notebook already has the MongoDB Atlas connection context.
In the first cell, paste the following:
from pyspark.sql import SparkSession

pipeline="[{'$match': { 'items.name':'printer paper' }}, {'$unwind': { path: '$items' }}, {'$addFields': { totalSale: { \
	'$multiply': [ '$items.price', '$items.quantity' ] } }}, {'$project': { saleDate:1,totalSale:1,_id:0 }}]"

salesDF =
spark.read.format("mongo").option("collection","sales").option("pipeline", pipeline).option("partitioner", "MongoSinglePartitioner").load()
Run the cell to make sure you can connect the Atlas cluster.
Note: If you get an error such as “MongoTimeoutException,” make sure your MongoDB Atlas cluster has the appropriate network access configured.

The notebook gave us a schema view of what the data looks like. Although we could have continued to transform the data in the Mongo pipeline before it reached Spark, let’s use PySpark to transform it. Create a new cell and enter the following:
from pyspark.sql.window import Window

from pyspark.sql import functions as F

salesAgg=salesDF.withColumn('saleDate',
F.col('saleDate').cast('date')).groupBy("saleDate").sum("totalSale").orderBy("saleDate")

w = Window.orderBy('saleDate').rowsBetween(-7, 0)

df = salesAgg.withColumn('rolling_average',
F.avg('sum(totalSale)').over(w))

df.show(truncate=False)
Once the code is executed, the notebook will display our new dataframe with the rolling averages column:
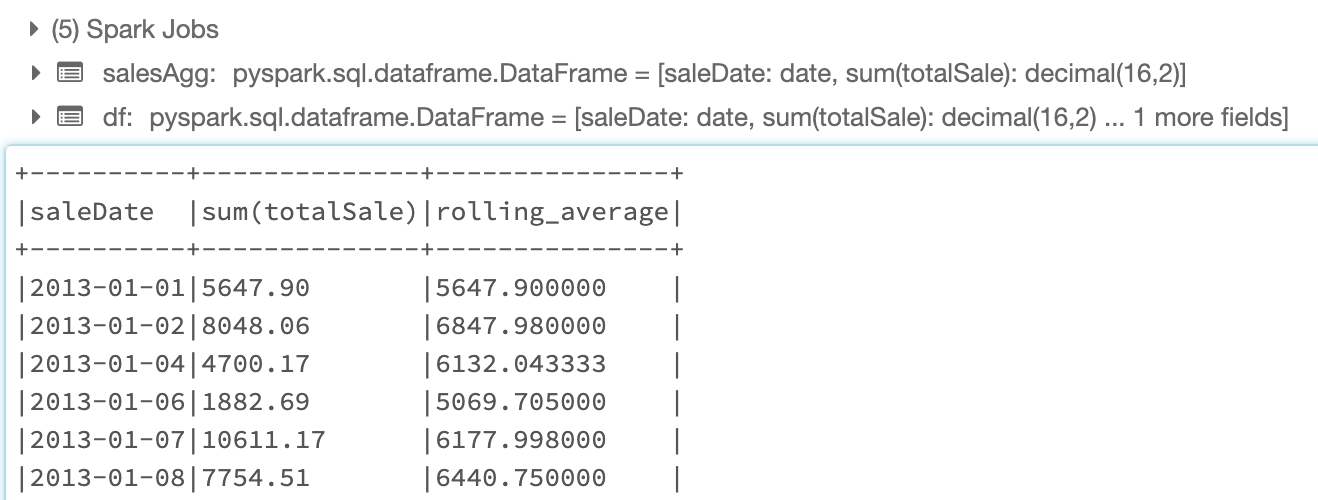
It is this cell where we will provide some additional transformation of the data such as grouping the data by saleDate and provide a summation of the totalSale per day. Once the data is in our desired format, we define a window of time as the past seven entries and then add a column to our data frame that is a rolling average of the total sales data.
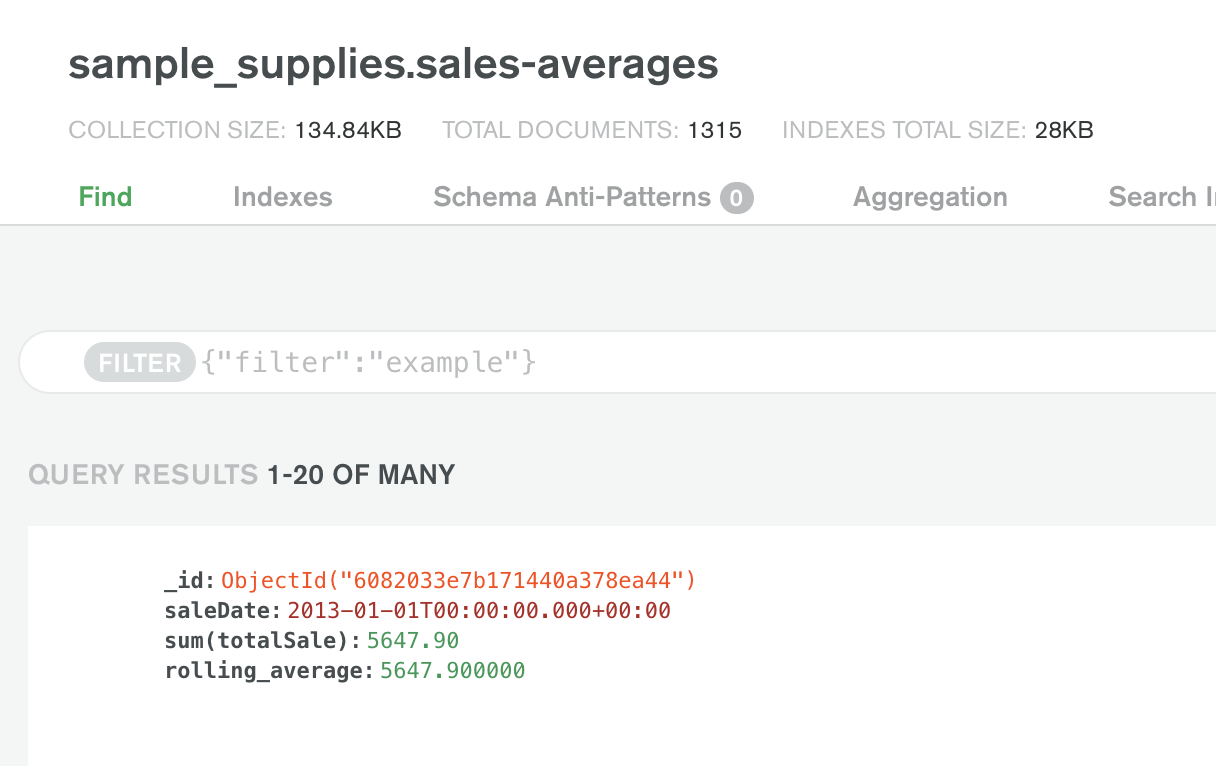
Once we have performed our analytics, we can write the data back to MongoDB for additional reporting, analytics, or archiving. In this scenario, we are writing the data back to a new collection called sales-averages:
df.write.format("mongo").option("collection","sales-averages").save()
You can see the data by using the Collections tab within the MongoDB Atlas cluster UI.
With the data in MongoDB Atlas, you can now leverage many of the services available, including Atlas Online Archive, Atlas Search, and Atlas Data Lake.
Summary
The integration between MongoDB Atlas, Google Cloud, and Databricks enables you to gain deep insights into your data and gives you freedom to move and analyze data as your needs evolve. Check out the resources below for more information: