Docs Menu
Docs Home
/ /
Atlas App Services
/

Configure an App Environment

On this page

  • Overview
  • Before You Begin
  • Procedure

App Environments are a way to organize your development workflow and effectively reuse code. You can use App Environments to define different multiple versions of global configuration values and then switch between them by changing the App's current environment.

App Services supports a set of built-in environment names that each represent a stage of your development workflow:

  • ""

  • "development"

  • "testing"

  • "qa"

  • "production"

For each environment, you can define a set of environment values that are available to your application when that environment is active.

For example, you might use different values for an API's baseUrl configuration depending on whether you're developing a new feature or deploying to production.

The values for an environment are stored as a single JSON object. You can set the field names and corresponding values to whatever you want.

You can access values from the current environment by field name:

Environment tags each represent a specific stage of your development process. You can define a separate App for each environment, where each App uses the same set of configuration files but has a distinct environment tag. To learn how, see Copy an App.

For example, a typical development process may have three development stages: development, testing, and production. You could use a separate App for each stage and use different environment values for each App.

You can also use unique applications to test individual feature branches. For example, you might have a core development App that developers fork for their feature branches. When a feature branch moves into testing, you can use the core testing App instead.

To learn how to incorporate environments into your CI/CD workflow, see Set Up a CI/CD Pipeline. For a full example that manages testing, deployment, and other tasks for a real application, see: How to Build CI/CD Pipelines for App Services Apps using GitHub Actions.
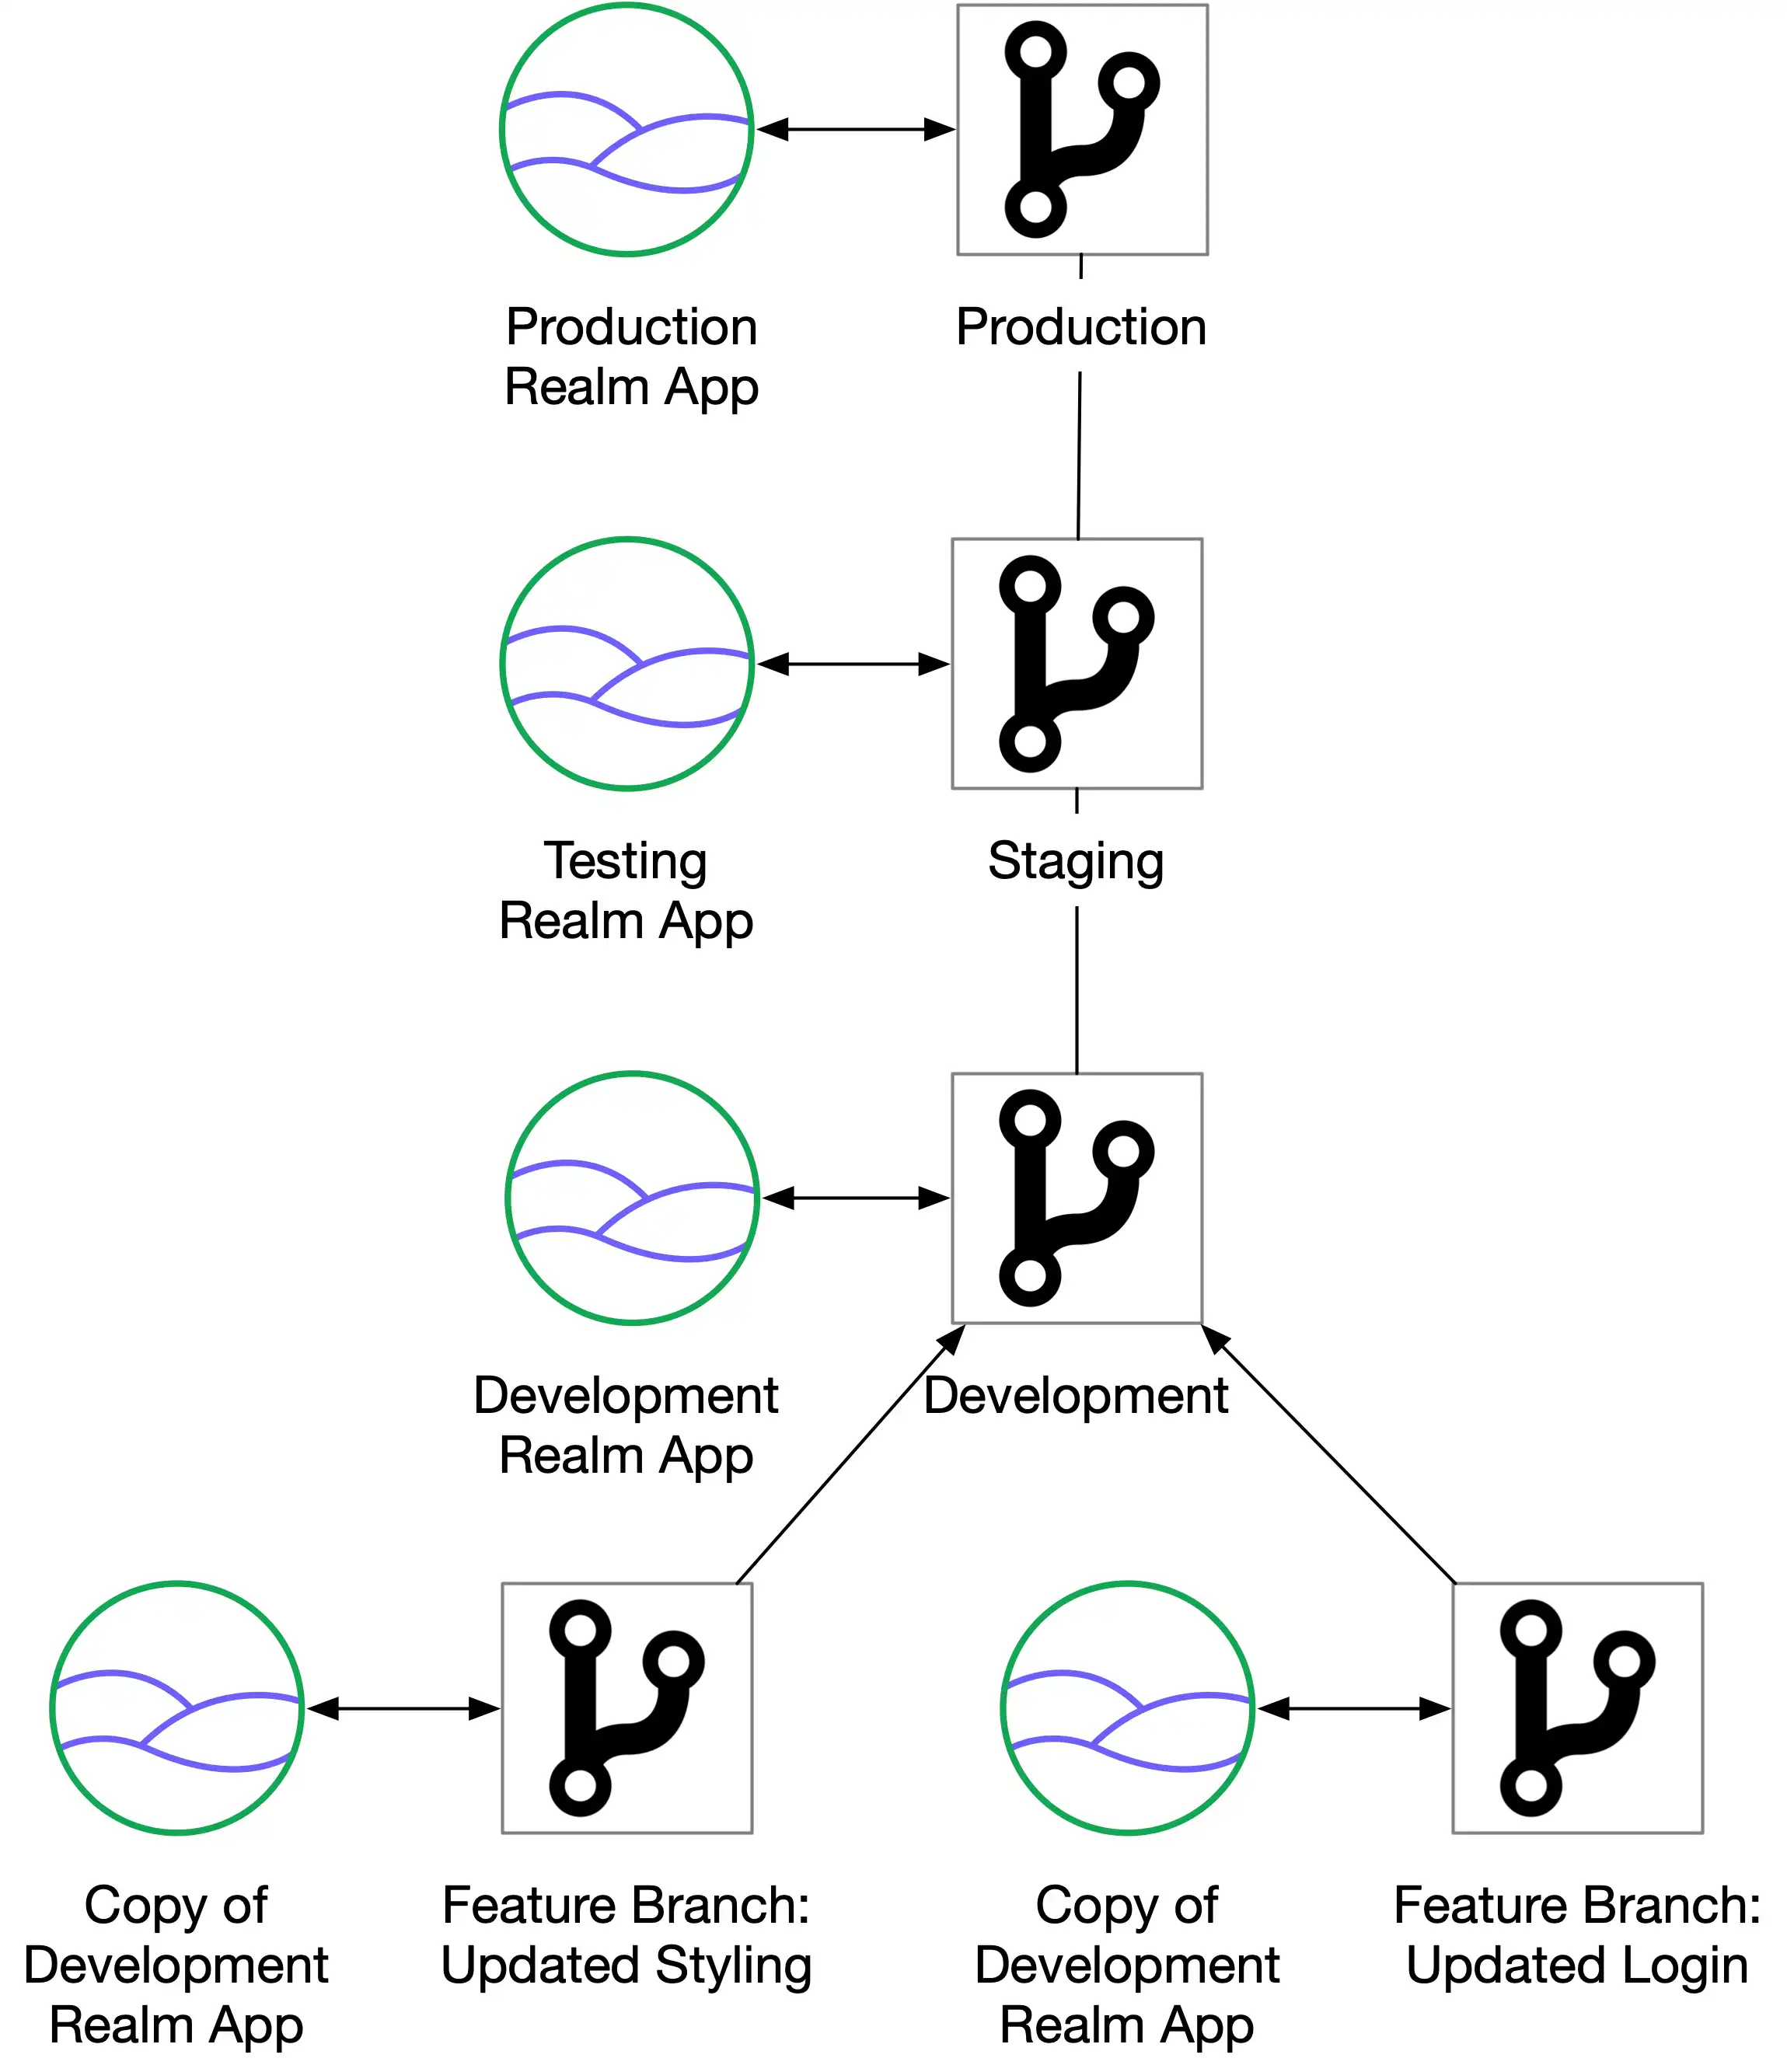
Diagram showing different App Services Apps for each branch
click to enlarge

You will need the following to define an App Environment in the Atlas UI:

  • A MongoDB Atlas account with Project Owner permissions. To learn how to sign up for a free account, see Get Started with Atlas.

You will need the following to define an App Environment in the CLI:

  • A MongoDB Atlas account with Project Owner permissions. To learn how to sign up for a free account, see Get Started with Atlas.

  • A MongoDB Atlas Admin API public/private key pair. The API key must have Project Owner permissions to work with App Services Admin API.

  • A copy of App Services CLI installed and added to your local system PATH. To learn how, see Install App Services CLI.

  • Your App's client App ID. This is the unique string that contains your App name, e.g. "myapp-abcde". To learn how to find your App ID, see Get App Metadata.

You will need the following to define an App Environment with the Admin API:

  • A MongoDB Atlas account with Project Owner permissions. To learn how to sign up for a free account, see Get Started with Atlas.

  • A MongoDB Atlas Admin API public/private key pair. The API key must have Project Owner permissions to work with App Services Admin API.

  • Your App's internal ObjectId hex string and the Project ID of the Atlas Project that contains your App. To learn how to find these, see Get App Metadata.

1

In the App Services UI, click Values in the left navigation menu, then click Create New Value.

Enter a name for the value and select Environment for the value type.

2

Define a value for each environment tag that you want to access the value from. You can define a different value for each environment and may leave a value undefined in any environment.

Environment value inputs in the App Services UI
3

Your App always runs in a specific environment, which affects the value of all environment values. You can specify the current environment for your App on the Deploy > Environment screen.

The environment selector in the App Services UI
4

Once you've defined the environment value, click Save to update the configuration. If your application has deployment drafts enabled, click Review & Deploy to deploy the changes.

1

Use your MongoDB Atlas Admin API Key to log in to the CLI:

appservices login --api-key="<my api key>" --private-api-key="<my private api key>"
2

Get a local copy of your App's configuration files. To get the latest version of your App, run the following command:

appservices pull --remote="<Your App ID>"

You can also export a copy of your application's configuration files from the UI or with the Admin API. To learn how, see Export an App.

3

The /environments directory contains a .json file for each supported environment tag. Each file defines all of the environment values for its corresponding environment.

App Services supports the following environment tags:

  • ""

  • "development"

  • "testing"

  • "qa"

  • "production"

Open the file for each environment you want to use. In each file, add an entry to the values subdocument that maps the value's name to its value in that environment.

Example

The following configurations define the baseUrl environment value in the production and development environments.

/environments/production.json
{
"values": {
"baseUrl": "https://example.com"
}
}
/environments/development.json
{
"values": {
"baseUrl": "https://dev.example.com"
}
}
4

Your app always runs in a specific environment, which affects the value of all environment values. You can specify the current environment for your app in root_config.json:

root_config.json
{
...,
"environment": "development"
}
5

Once you've defined values for each environment, you can push the updated configurations to your remote app. App Services CLI immediately deploys the updated environment values on push.

appservices push --remote="<Your App ID>"
1

Call the admin user authentication endpoint with your MongoDB Atlas API key pair:

curl -X POST \
https://services.cloud.mongodb.com/api/admin/v3.0/auth/providers/mongodb-cloud/login \
-H 'Content-Type: application/json' \
-H 'Accept: application/json' \
-d '{
"username": "<Public API Key>",
"apiKey": "<Private API Key>"
}'

If authentication succeeds, the response body contains a JSON object with an access_token value:

{
"access_token": "<access_token>",
"refresh_token": "<refresh_token>",
"user_id": "<user_id>",
"device_id": "<device_id>"
}

The access_token grants access to the App Services Admin API. You must include it as a Bearer token in the Authorization header for all Admin API requests.

Tip

See also:

2

You can define environment values for your App by calling the Create an Environment Value endpoint. Each environment value has a name and a values object that maps environment tags to the value in the environment.

curl -X GET \
https://services.cloud.mongodb.com/api/admin/v3.0/groups/{groupId}/apps/{appId}/environment_values/{environmentValueId} \
-H 'Authorization: Bearer <access_token>' \
-d '{
"name": "myEnvironmentValue",
"values": {
"none": "alpha",
"development": "beta",
"testing": "gamma",
"qa": "delta",
"production": "epsilon"
}
}'
3

You can set your App's environment tag by calling the Set the App Environment endpoint.

curl -X PUT \
https://services.cloud.mongodb.com/api/admin/v3.0/groups/{groupId}/apps/{appId}/environment \
-H 'Authorization: Bearer <access_token>' \
-d '{ "environment": "production" }'

Back

Export an App

Next

Deploy Automatically with GitHub