An Introduction to the MongoDB Atlas Data API


Rate this article


There are a lot of options for connecting to MongoDB Atlas as an application developer. One of the newest options is the MongoDB Atlas Data API. The Atlas Data API provides a lightweight way to connect to MongoDB Atlas that can be thought of as similar to a REST API. This tutorial will show you how to enable the Data API and perform basic CRUD operations using curl. It’s the first in a series showing different uses for the Data API and how you can use it to build data-centric applications and services faster.
This post assumes you already have an Atlas cluster. You can either use an existing one or you can sign up for a cloud account and create your first database cluster by following the instructions.
Enabling the Data API is very easy once you have a cluster in Atlas.
First, Click "Data API" in the bar on the left of your Atlas deployment.

Then select which data source or sources you want the Data API to have access to. For this example, I am selecting just the default Cluster0.
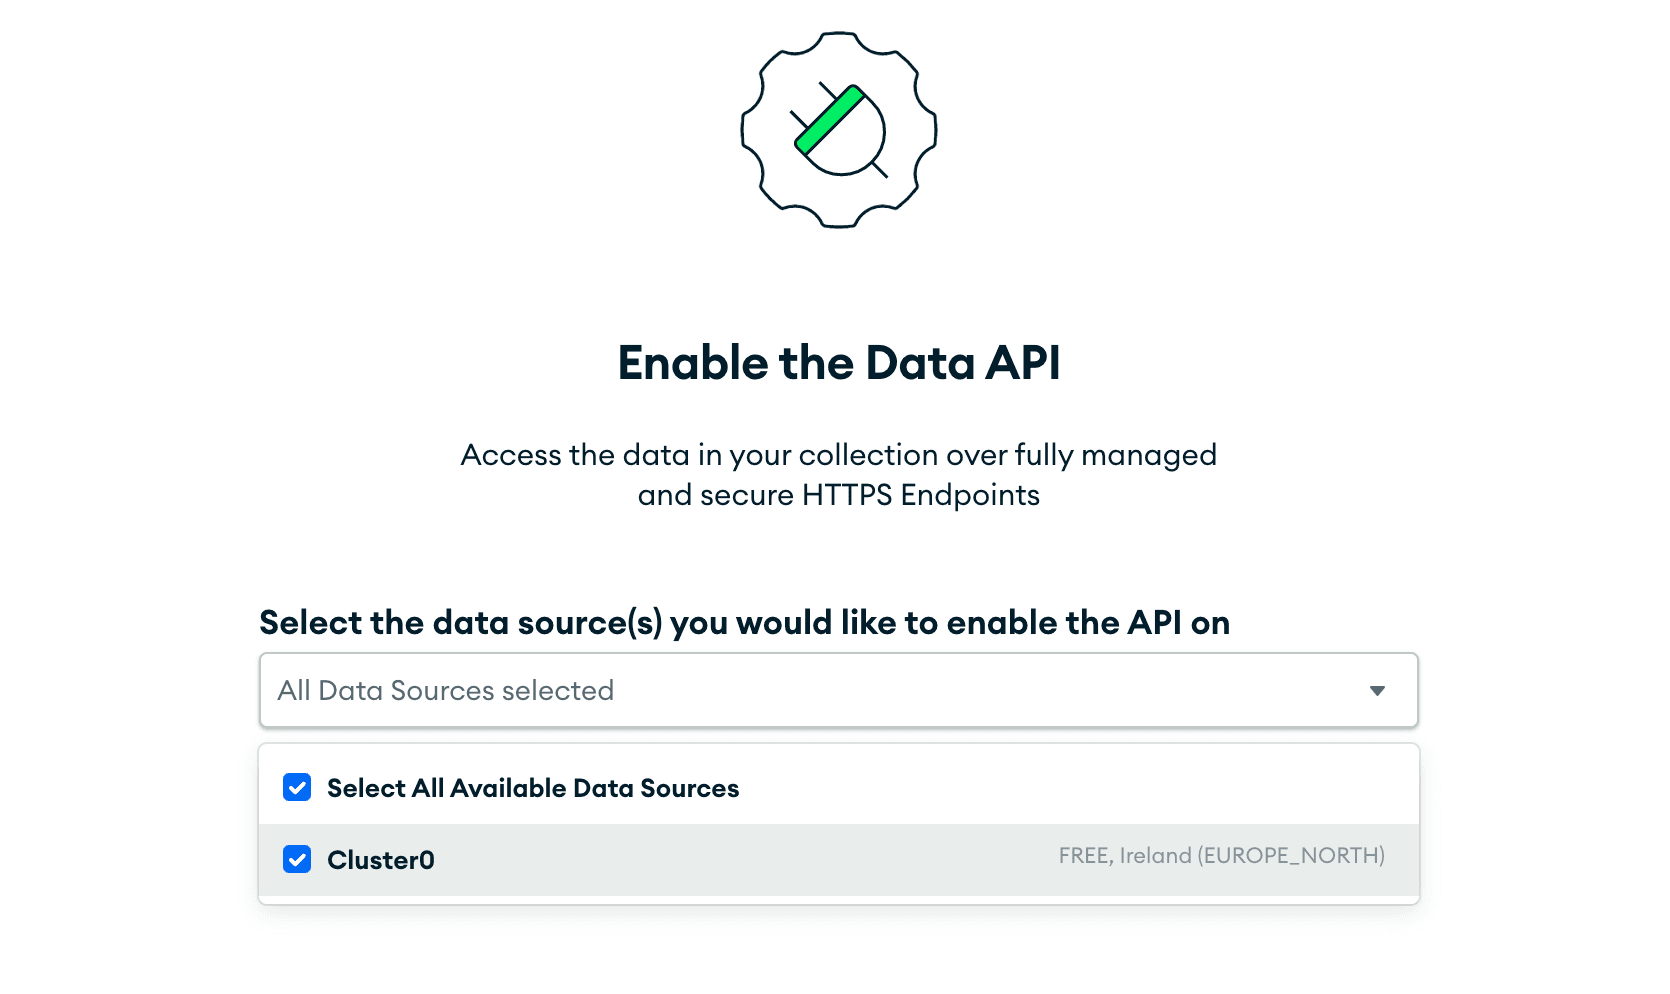
Then, select the large "Enable the Data API" button.

You will then have a screen confirming what clusters you have enabled for the Data API.
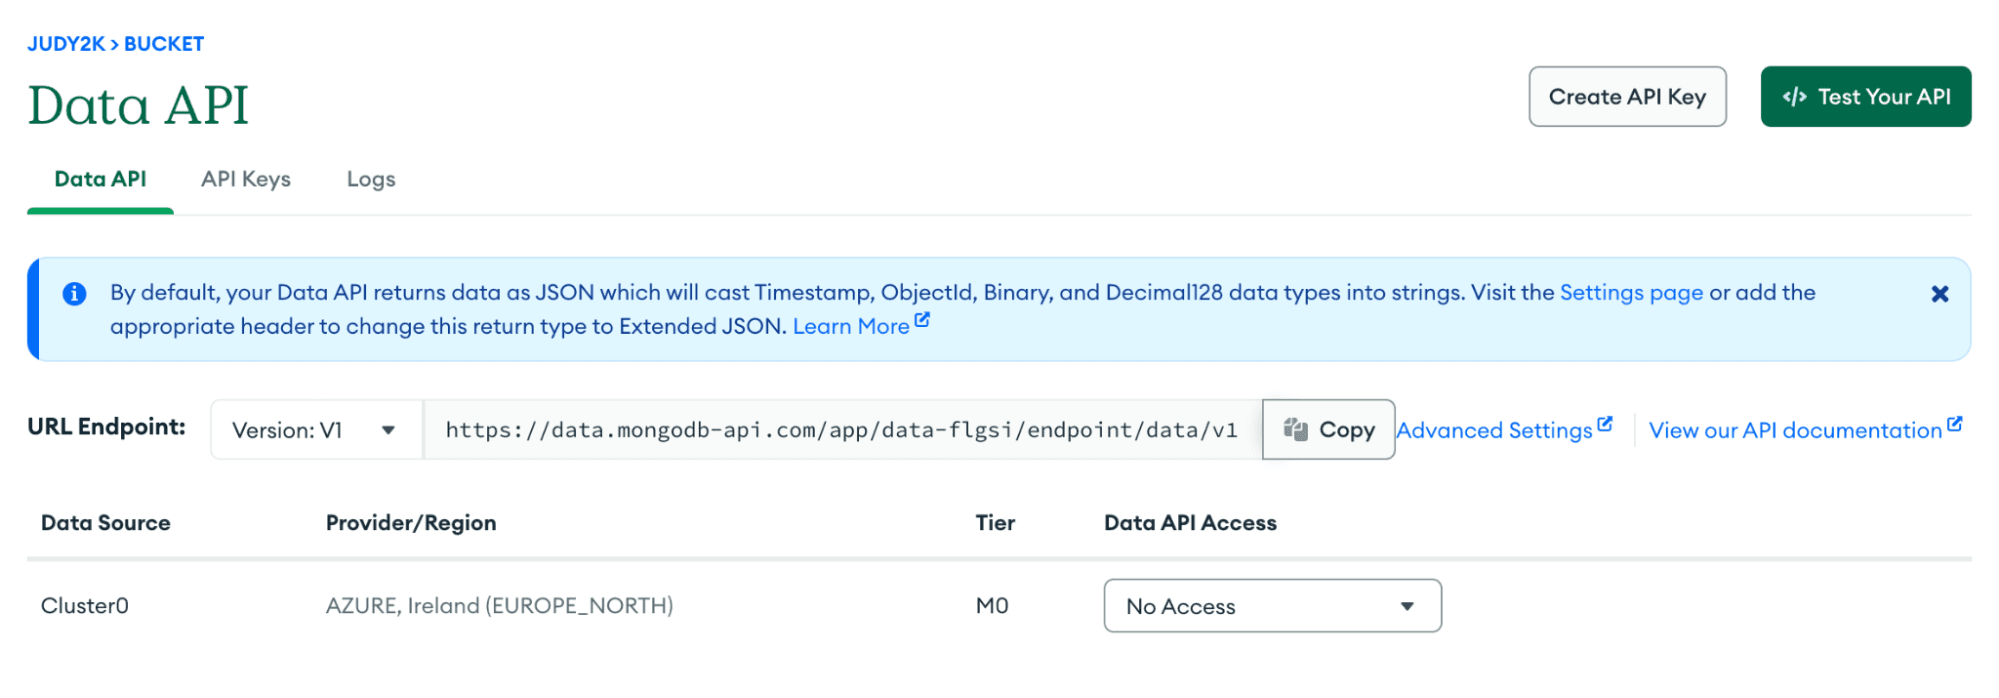
In the "Data API Access" column, select "Read and Write" for now, and then click on the button at the top left that says "Create API Key." Choose a name. It's not important what name you choose, as long as it's useful to you.
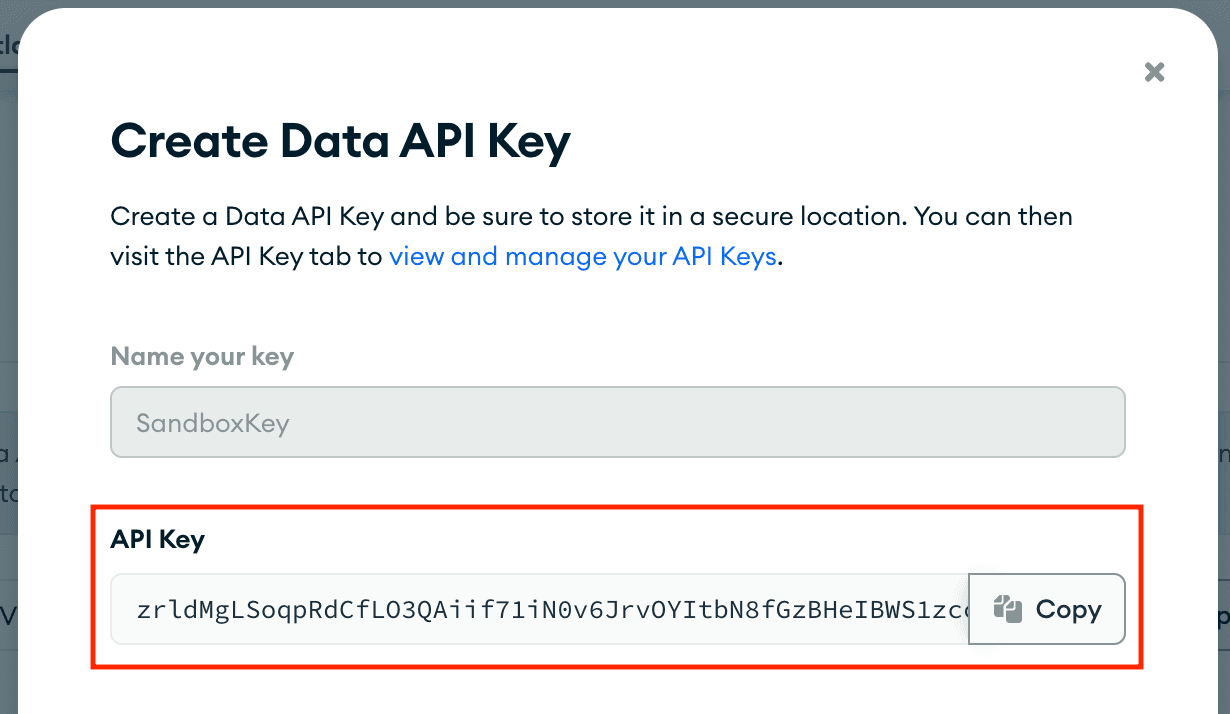
Finally, click "Generate API Key" and take a note of the key displayed in a secure place as you will not be able to see it again in Atlas. You can click the "Copy" button to copy it to your clipboard. I pasted mine into a .envrc file in my project.
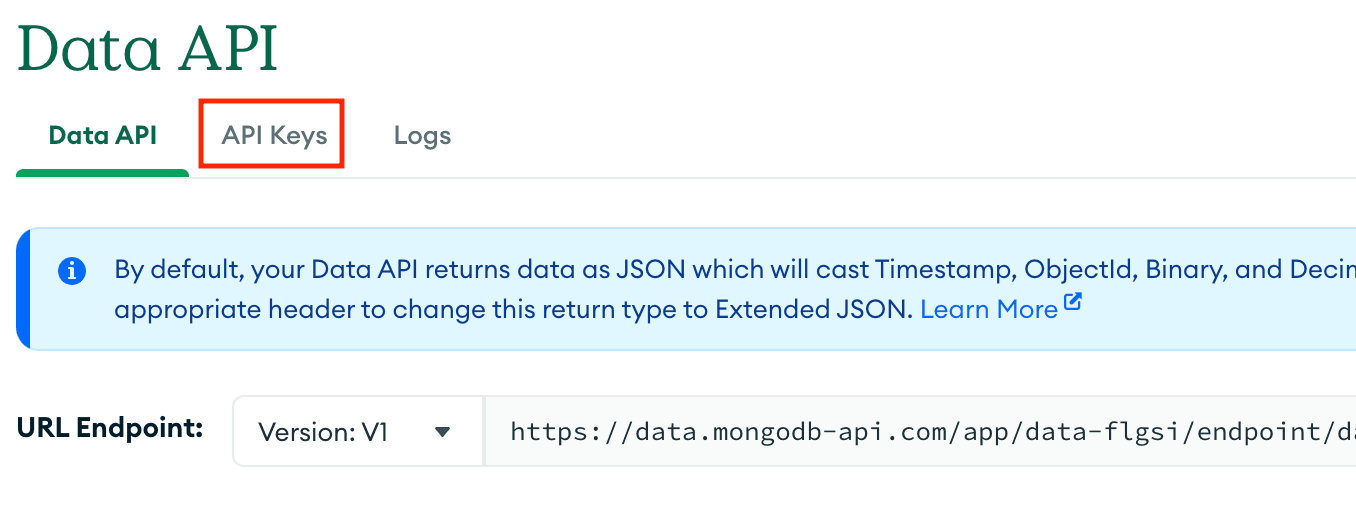
If you want to test out a simple command, you can select one of your database collections in the dropdowns and copy-paste some code into your terminal to see some results. While writing this post, I did it just to check that I got some results back. When you're done, click "Close" to go back to the Data API screen. If you need to manage the keys you've created, you can click the "API Keys" tab on this screen.
You are now ready to call the Data API!
The API key you've just created should never be shared with anyone, or sent to the browser. Anyone who gets hold of the key can use it to make changes to the data in your database! In fact, the Data API blocks browser access, because there's currently no secure way to make Data API requests securely without sharing an API key.
All the Data API endpoints use HTTPS POST. Though it might seem logical to use GET when reading data, GET requests are intended to be cached and many platforms will do so automatically. To ensure you never have stale query results, all of the API endpoints use POST. Time to get started!
To add documents to MongoDB, you will use the InsertOne or InsertMany action endpoints.
When you insert a document with the API, you must provide the "dataSource" (which is your cluster name), "database," "collection," and "document" as part of a JSON payload document.
For authentication, you will need to pass the API key as a header. The API always uses HTTPS, so this is safe and secure from network snooping.
To call with curl, use the following command:

For example, my call looks like this:
Note that the URL I'm using is my Data API URL endpoint, with
/action/insertOne appended. When I ran this command with my values for YOUR_ID and YOUR_API_KEY, curl printed the following:This means you've added a new document to a collection called “pets” in a database called “household.” Due to MongoDB’s flexible dynamic model, neither the database nor collection needed to be defined in advance.
This API call returned a JSON document with the _id of the new document. As I didn't explicitly supply any value for _id ( the primary key in MongoDB), one was created for me and it was of type ObjectId. The API returns standard JSON by default, so this is displayed as a string.
To look up the document I just added by _id, I'll need to provide the _id that was just printed by curl. In the document that was printed, the value looks like a string, but it isn't. It's an ObjectId, which is the type of value that's created by MongoDB when no value is provided for the _id.
When querying for the ObjectId value, you need to wrap this string as an EJSON ObjectId type, like this:
{ "$oid" : <String Value> }. If you don't provide this wrapper, MongoDB will mistakenly believe you are looking for a string value, not the ObjectId that's actually there.The findOne query looks much like the insertOne query, except that the action name in the URL is now findOne, and this call takes a "filter" field instead of a "document" field.
This printed out the following JSON for me:
Note that in the output above, the _id is again being converted to "plain" JSON, and so the "_id" value is being converted to a string. Sometimes, it's useful to keep the type information, so you can specify that you would like Extended JSON (EJSON) output, for any Data API call, by supplying an "Accept" header, with the value of "application/ejson":
When I ran this, the "_id" value was provided with the "$oid" wrapper, to declare that it's an ObjectId value:
If you're inserting several documents into a collection, it’s much more efficient to make a single HTTPS call with the insertMany action. This endpoint works in a very similar way to the insertOne action, but it takes a "documents" field instead of a single "document" field, containing an array of documents:
When I ran this, the output looked like this:
This endpoint returns JSON with an array of the values for _id for the documents that were added.
Querying for more than one document is done with the find endpoint, which returns an array of results. The following query looks up all the labradors that are two years or older, sorted by age:
When I ran this, I received documents for the two oldest dogs, Harvest and Brea:
This object contains a field ”documents,” that is an array of everything that matched. If I wanted to fetch a subset of the results in pages, I could use the skip and limit parameter to set which result to start at and how many to return.
Because this both matched one document and changed its content, my output looked like this:
I only wanted to update a single document (because I only expected to find one document for Harvest). To change all matching documents, I would call updateMany with the same parameters.
You can also run aggregation pipelines. As a simple example of how to call the aggregate endpoint, let's determine the count and average age for each color of labrador.
Aggregation pipelines are the more powerful part of the MongoDB Query API. As well as looking up documents, a pipeline allows you to calculate aggregate values across multiple documents. The following example extracts all labrador documents from the "pets" collection, groups them by their "colour" field, and then calculates the number of dogs ($sum of 1 for each dog document) and the average age of dog (using $avg) for each colour.
When I ran the above query, the result looked like this:
It's worth noting that there are some limitations when running aggregation pipelines through the Data API.
When it comes to authentication and authorization, or just securing access to the Data API in general, you have a few options. These features use a neat feature of the Data API, which is that your Data API is a MongoDB Atlas Application Services app behind the scenes!
You can access the application by clicking on "Advanced Settings" on your Data API console page:

The rest of this section will use the features of this Atlas Application Services app, rather than the high level Data API pages.
Restricting access to your API endpoint from only the servers that should have access is a relatively straightforward but effective way of locking down your API. You can change the list of IP addresses by clicking on "App Settings" in the left-hand navigation bar, and then clicking on the "IP Access List" tab on the settings pane.
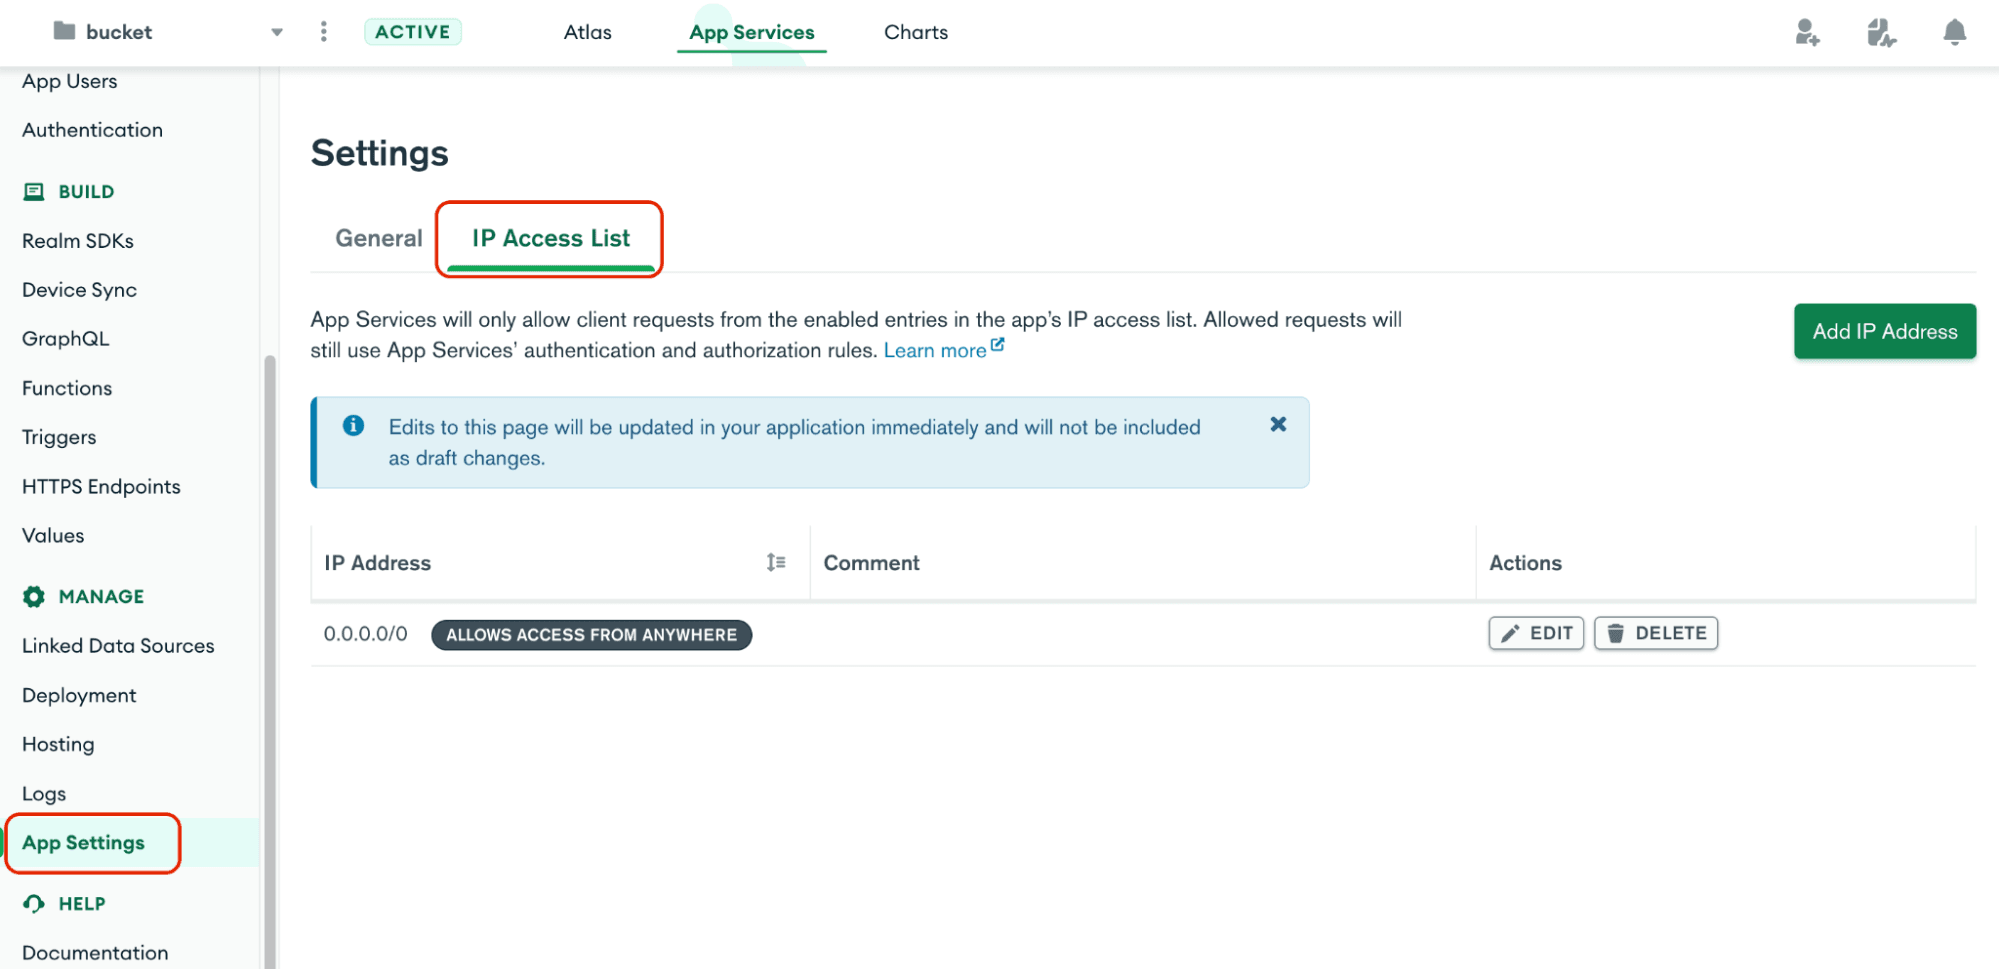
By default, all IP addresses are allowed to access your API endpoint (that's what 0.0.0.0 means). If you want to lock down access to your API, you should delete this entry and add entries for servers that should be able to access your data. There's a convenient button to add your current IP address for when you're writing code against your API endpoint.
In all the examples in this post, I've shown you how to use an API key to access your data. But by using the Atlas Application Services app, you can lock down access to your data using JSON Web Tokens (or JWTs) and email/password credentials. JWT has the benefit that you can use an external authentication service or identity providers, like Auth0 or Okta, to authenticate users of your application. The auth service can provide a JWT that your application can use to make authenticated queries using the Data API, and provides a JWK (JSON Web Keys) URL that can be used by the Data API to ensure any incoming requests have been authenticated by the authentication service.
My colleague Jesse (you may know him as codeSTACKr) has written a great tutorial for getting this up and running with the Data API and Auth0, and the same process applies for accepting JWTs with the Data API. By first clicking on "Advanced Settings" to access the configuration of the app that provides your Data API endpoints behind the scenes and going into “Authentication,” you can enable the provider with the appropriate signing key and algorithm.
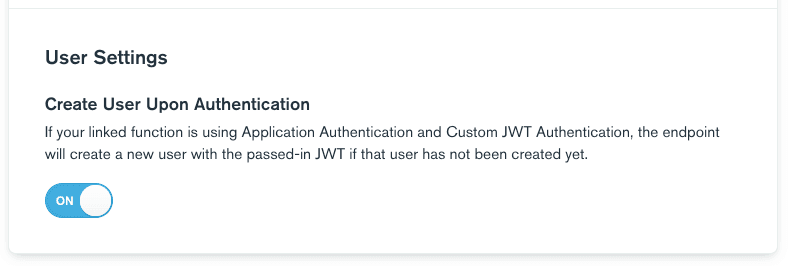
Instead of setting up a trigger to create a new user document when a new JWT is encountered, however, set "Create User Upon Authentication" in the User Settings panel on the Data API configuration to "on."
For each cluster, you can set high-level access permissions like Read-Only Access, Read & Write Access, or No Access. However, you can also take this one step further by setting custom role-based access-control with the App Service Rules.
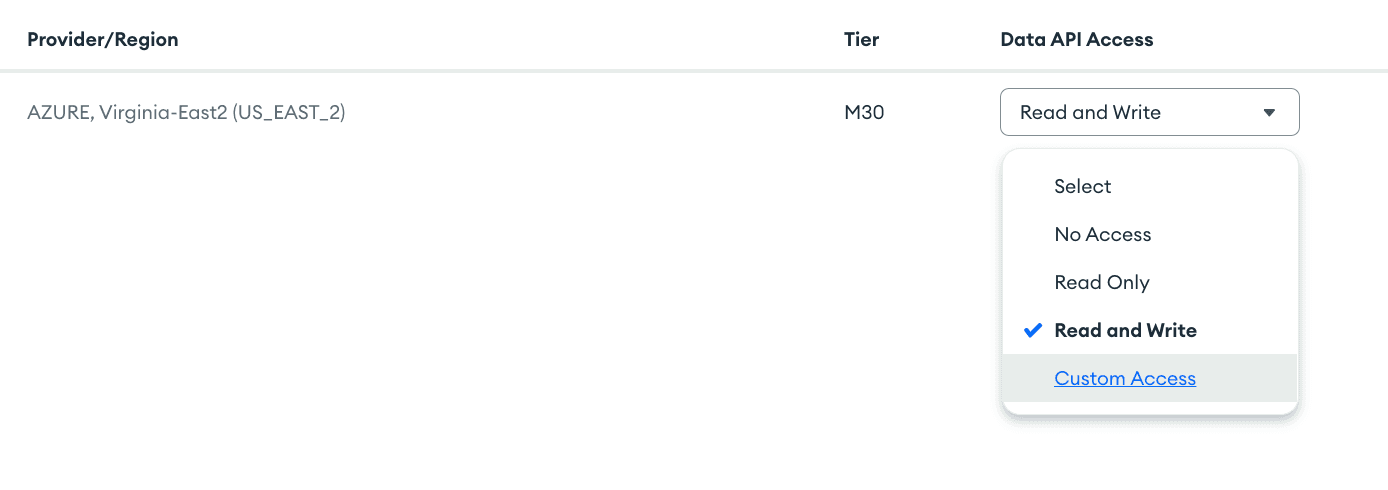
Selecting Custom Access will allow you to set up additional roles on who can access what data, either at the cluster, collection, document, or field level.
For example, you can restrict certain API key holders to only be able to insert documents but not delete them. These user.id fields are associated with each API key created:


The Data API provides the basic CRUD and aggregation endpoints I've described above. For accessing and manipulating the data in your MongoDB database, because the Data API is provided by an Atlas App Services application, you get all the goodness that goes with that, including the ability to add more API endpoints yourself that can use all the power available to MongoDB Atlas Functions.
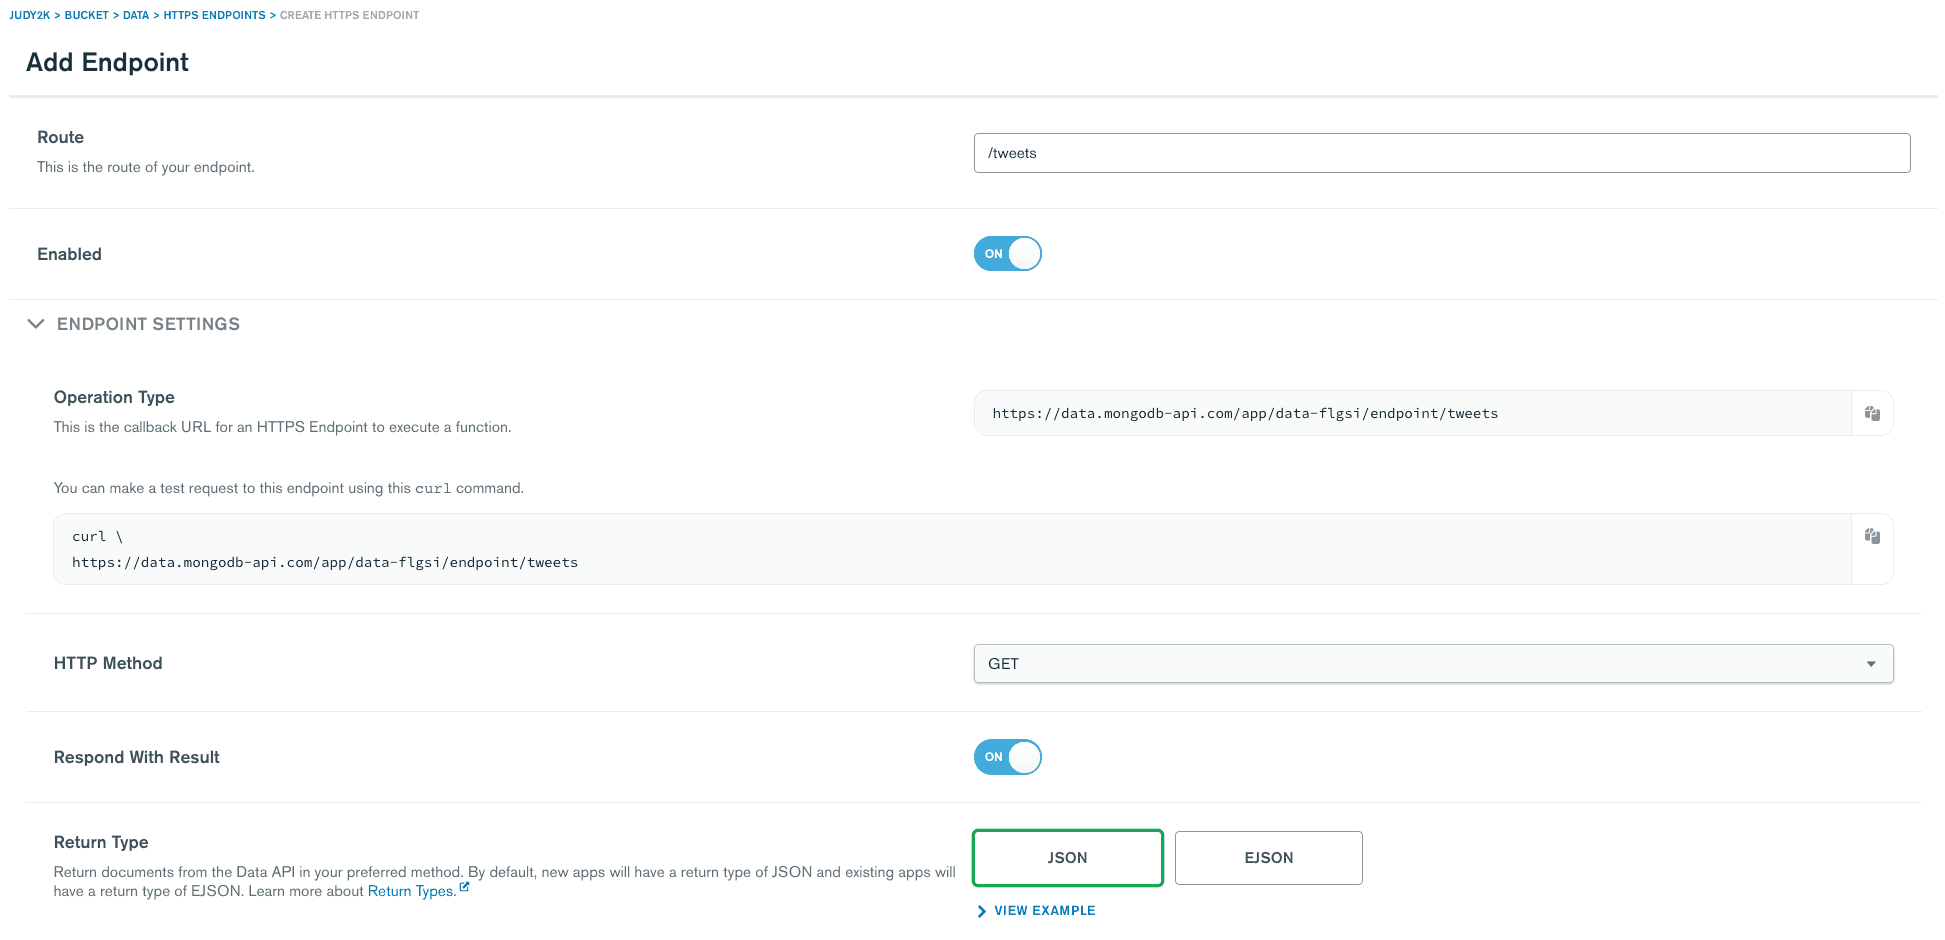
For example, I could write a serverless function that would look up a user's tweets using the Twitter API, combine those with a document looked up in MongoDB, and return the result:
By configuring this as an HTTPS endpoint, I can set things like the
- API route.
- HTTPS method.
- Custom authentication or authorization logic.
In this example, I’ve made this function available via a straightforward HTTPS GET request.
In this way, you can build an API to handle all of your application's data service requirements, all in one place. The endpoint above could be accessed with the following curl command:
And the results would look something like this:
The Data API is a powerful new MongoDB Atlas feature, giving you the ability to query your database from any environment that supports HTTPS. It also supports powerful social authentication possibilities using the standard JWT and JWK technologies. And finally, you can extend your API using all the features like Rules, Authentication, and HTTPS Endpoints.