Authentication for Your iOS Apps with Atlas App Services


Rate this tutorial


Authentication is one of the most important features for any app these days, and there will be a point when your users might want to reset their password for different reasons.
Atlas App Services can help implement this functionality in a clear and simple way. In this tutorial, we’ll develop a simple app that you can follow along with and incorporate into your apps.
If you also want to follow along and check the code that I’ll be explaining in this article, you can find it in the Github repository.
The application consists of a login flow where the user will be able to create their own account by using a username/password. It will also allow them to reset the password by implementing the use of Atlas App Services for it and Universal Links.
There are different options in order to implement this functionality.
- You can configure an email provider to send a password reset email. This option will send an email to the user with the MongoDB logo and a URL that contains the necessary parameters that will be needed in order to reset the password.
- App Services can automatically run a password reset function. You can implement it guided by our password reset documentation. App Services passes this function unique confirmation tokens and data about the user. Use these values to define custom logic to reset a user's password.
- If you decide to use a custom password reset email from a specific domain by using an external service, when the email for the reset password is received, you will get a URL that will be valid for 30 minutes, and you will need to implement Universal Links for it so your app can detect the URL when the user taps on it and extract the tokens from it.
- You can define a function for App Services to run when you callResetPasswordFunction() in the SDK. App Services passes this function with unique confirmation tokens.
For this tutorial, we are going to use the first option. When it gets triggered, it will send the user an email and a valid URL for 30 minutes. But please be aware that we do not recommend using this option in production. Confirmation emails are not currently customizable beyond the base URL and subject line. In particular, they always come from a mongodb.com email address. For production apps, we recommend using a confirmation function. You can check how to run a confirmation function in our MongoDB documentation.
First, you’ll need to create your Atlas App Services App. I recommend following our documentation and this will provide you with the base to start configuring your app.
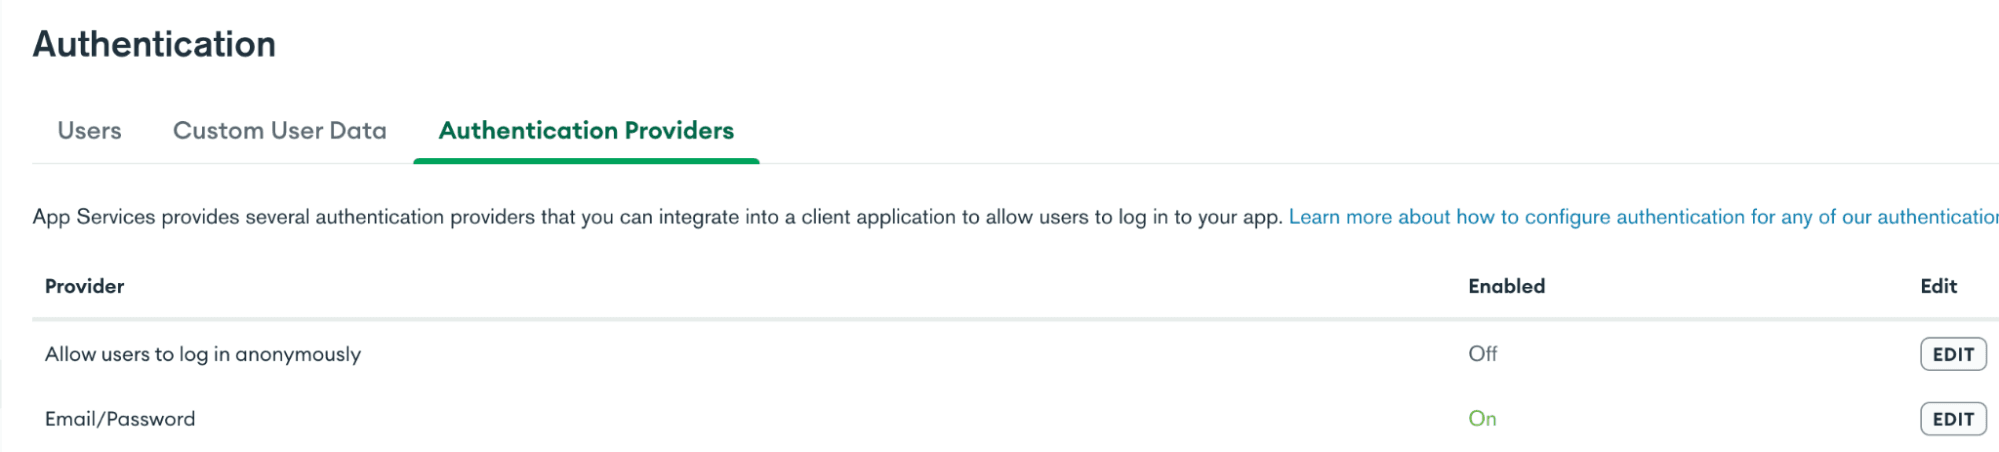
After creating your app, go to the Atlas App Services tab, click on your app, and go to Data Access → Authentication on the sidebar.
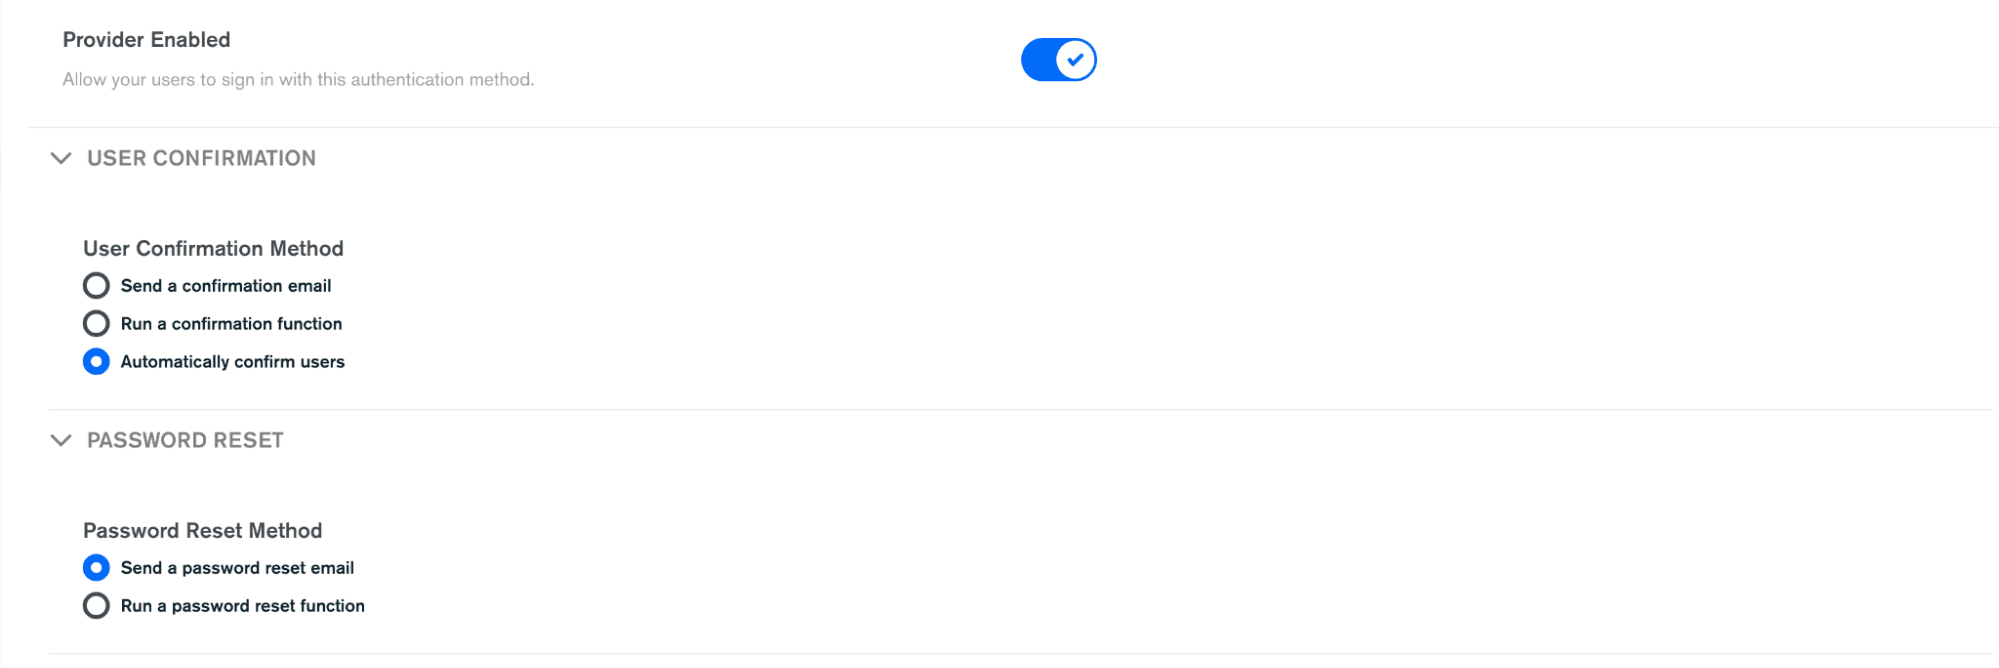
In the Authentication Providers section, enable the provider Email/Password. In the configuration window that will get displayed after, we will focus on the Password Reset Method part.
For this example, the user confirmation will be done automatically. But make sure that the Send a password reset email option is enabled.
One important thing to note is that you won’t be able to save and deploy these changes unless the URL section is completed. Therefore, we’ll use a temporary URL and we’ll change it later to the final one.
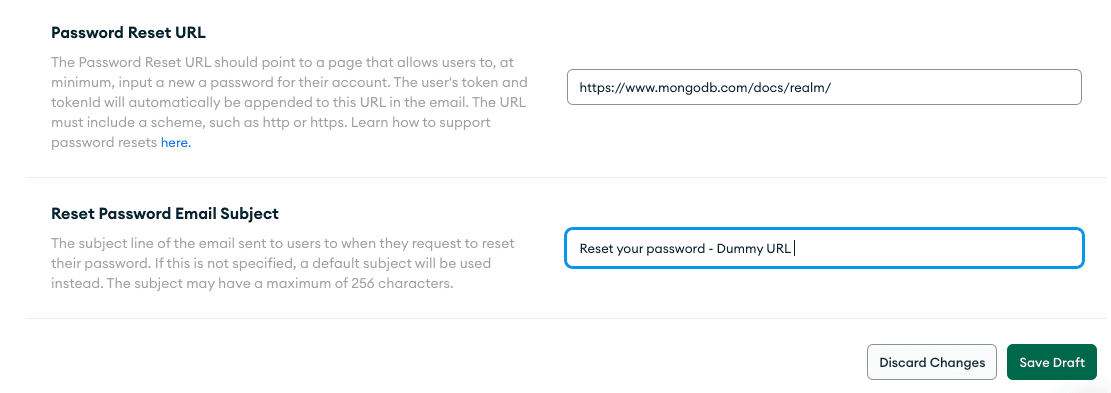
Click on the Save Draft button and your changes will be deployed.
Before starting to write the related code, please make sure that you have followed this quick start guide to make sure that you can use our Swift SDK.
The logic of implementing reset password will be implemented in the
MainViewController.swift file. In it, we have an IBAction called resetPasswordButtonTapped, and inside we are going to write the following code:
By making a call to
client.sendResetPasswordEmail with the user's email, App Services sends an email to the user that contains a unique URL. The user must visit this URL within 30 minutes to confirm the reset.Now we have the first part of the functionality implemented. But if we try to tap on the button, it won’t work as expected. We must go back to our Atlas App Services App, to the Authentication configuration.
The URL that we define here will be the one that will be sent in the email to the user. You can use your own from your own website hosted on a different server but if you don’t, don’t worry! Atlas App Services provides Static Hosting. You can use hosting to store individual pieces of content or to upload and serve your entire client application, but please note that in order to enable static hosting, you must have a paid tier (i.e M2 or higher).
Go to the Hosting section of your Atlas App Services app and click on the Enable Hosting button. App Services will begin provisioning hosting for your application. It may take a few minutes for App Services to finish provisioning hosting for your application once you've enabled it.
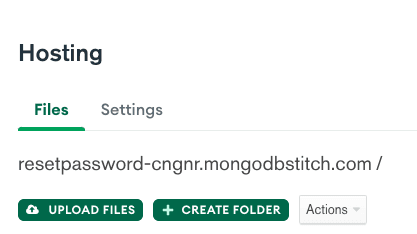
The resource path that you see in the screenshot above is the URL that will be used to redirect the user to our website so they can continue the process of resetting their password.
Now we have to go back to the Authentication section in your Atlas App Services app and tap on the Edit button for Email/Password. We will focus our attention on the lower area of the window.
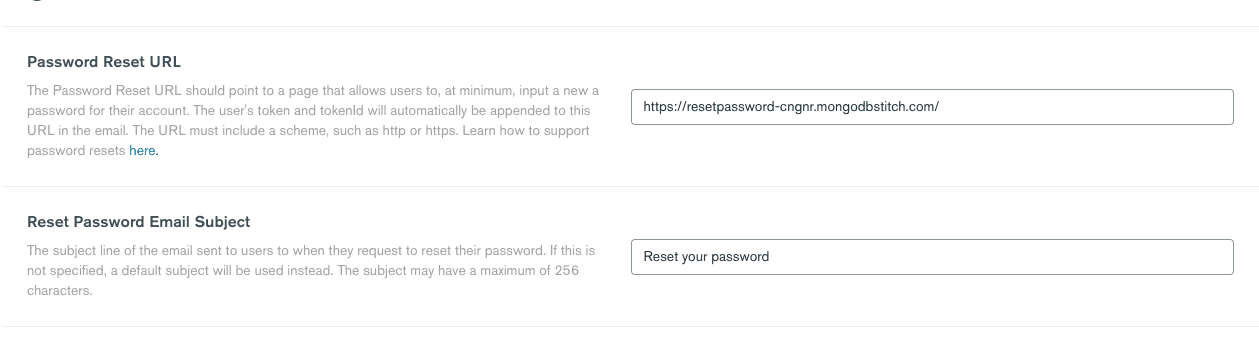
In the Password Reset URL we are going to add our hosted URL. This will create the link between your back end and the email that gets sent to the user.
The base of the URL is included in every password reset email. App Services appends a unique
token and tokenId to this URL. These serve as query parameters to create a unique link for every password reset. To reset the user's password, extract these query parameters from the user's unique URL.In order to extract these query parameters and use them in our client application, we can use Universal Links.
According to Apple, when adding universal links support to your app, your users can tap a link to your website and get seamlessly redirected to your installed app without going through Safari. But if the app isn’t installed, then tapping a link to your website will open it in Safari.
Note: Be aware that in order to add the universal links entitlement to your Xcode project, you need to have an Apple Developer subscription.
#1 Add the Associated Domains entitlement to the Signing & Capabilities section of your project on Xcode and add to the domains the URL from your hosted website following the syntax:
>applinks:<url>
#2 You now need to create an
apple-app-site-association file that contains JSON data about the URL that the app will handle. In my case, this is the structure of my file. The value of the appID key is the team ID or app ID prefix, followed by the bundle ID.#3 Upload the file to your HTTPS web server. In my case, I’ll update it to my Atlas App Services hosted website. Therefore, now I have two files including
index.html.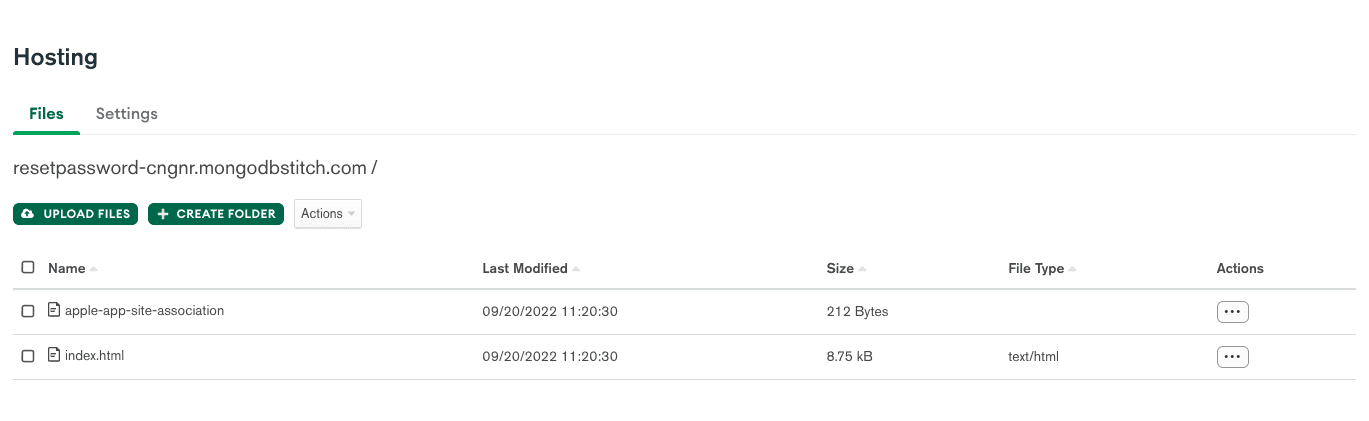
You need to implement the code that will handle the functionality when your user taps on the link from the received email.
Go to the
SceneDelegate.swift file of your Xcode project, and on the continue() delegate method, add the following code:The
handleUniversalLinks() private method will extract the token and tokenId parameters that we need to use in order to reset the password. We will store them as properties on the ResetPassword view controller.Also note that we use the function
url.valueOf(“token”), which is an extension that I have created in order to extract the query parameters that match the string that we pass as an argument and store its value in the token variable.Note: This functionality won’t work if the user decides to terminate the app and it’s not in the foreground. For that, we need to implement similar functionality on the
willConnectTo() delegate method.This view controller contains a text field that will capture the new password that the user wants to set up, and when the Reset Password button is tapped, the
resetPassword function will get triggered and it will make a call to the Client SDK’s resetPassword() function. If there are no errors, a success alert will be displayed on the app. Otherwise, an error message will be displayed.I hope you found this tutorial useful and that it will solve any doubts you may have! I encourage you to explore our Realm Swift SDK documentation so you can check all the features and advantages that Realm can offer you while developing your iOS apps. We also have a lot of resources for you to dive in and learn how to implement them.