Next Gen Web Apps with Remix and MongoDB Atlas Data API


Pavel Duchovny, Stanimira Vlaeva10 min read • Published Jan 26, 2022 • Updated Feb 11, 2024


Rate this tutorial


Javascript-based application stacks have proven themselves to be the dominating architecture for web applications we all use. From MEAN to MERN and MEVN, the idea is to have a JavaScript-based web client and server, communicating through a REST or GraphQL API powered by the document model of MongoDB as its flexible data store.
Remix is a new JS framework that comes to disrupt the perception of static websites and tiering the view and the controller. This framework aims to simplify the web component nesting by turning our web components into small microservices that can load, manipulate, and present data based on the specific use case and application state.
The idea of combining the view logic with the server business logic and data load, leaving the state management and binding to the framework, makes the development fast and agile. Now, adding a data access layer such as MongoDB Atlas and its new Data API makes building data-driven web applications super simple. No driver is needed and everything happens in a loader function via some https calls.
To showcase how easy it is, we have built a demo movie search application based on MongoDB Atlas sample database sample_mflix. In this article, we will cover the main features of this application and learn how to use Atlas Data API and Atlas Search features.
Make sure to check out the live Remix and MongoDB demo application! You can find its source code in this dedicated GitHub repository.
First we need to prepare our data tier that we will work with our Remix application. Follow these steps:

As other Node frameworks, the easiest way to bootstrap an app is by deploying a template application as a base:

The command will prompt for several settings. You can use the default ones with the default self hosting option.
Let’s also add a few node packages that we’ll be using in our application. Navigate to your newly created project and execute the following command:
The application consists of two main files which host the entry point to the demo application with main page html components:
app/root.jsx and app/routes/index.jsx. In the real world, it will probably be the routing to a login or main page.In
app/root.jsx, we have the main building blocks of creating our main page and menu to route us to the different demos.If you choose to use TypeScript while creating the application, add the navigation menu to
app/routes/index.tsx instead. Don't forget to import Link from remix.Main areas are exported in the
app/routes/index.jsx under the “routes” directory which we will introduce in the following section.This file uses the same logic of a UI representation returned as JSX while loading of data is happening in the loader function. In this case, the loader only provides some static data from the “data” variable.
Now, here is where Remix introduces the clever routing in the form of routes directories named after our URL path conventions. For the main demo called “movies,” we created a “movies” route:
The idea is that whenever our application is redirecting to
<BASE_URL>/movies, the index.jsx under routes/movies is called. Each jsx file produces a React component and loads its data via a loader function (operating as the server backend data provider).Before we can create our main movies page and fetch the movies from the Atlas Data API, let’s create a
.env file in the main directory to provide the needed Atlas information for our application:Place the relevant information from your Atlas project locating the API key, the Data API base URL, and the cluster name. Those will be shortly used in our Data API calls.
⚠️Important:
.env file is good for development purposes. However, for production environments, consider the appropriate secret repository to store this information for your deployment.Let’s load this .env file when the application starts by adjusting the “dev” npm scripts in the
package.json file:Let's start to create our movies list by rendering it from our data loader and the
sample_mflix.movies collection structure.Navigate to the ‘app/routes’ directory and execute the following commands to create new routes for our movies list and movie details pages.
Then, open the
movies/index.jsx file in your favorite code editor and add the following:As you can see in the return clause, we have a title named “Movies,” an input inside a “get” form to post a search input if requested. We will shortly explain how forms are convenient when working with Remix. Additionally, there is a link list of the retrieved movies documents. Using the
<Link> component from Remix allows us to create links to each individual movie name. This will allow us to pass the title as a path parameter and trigger the $title.jsx component, which we will build shortly.The data is retrieved using
useLoaderData() which is a helper function provided by the framework to retrieve data from the server-side “loader” function.The interesting part is the
loader() function. Let's create one to first retrieve the first 100 movie documents and leave the search for later.Add the following code to the
movies/index.jsx file.Here we start with an aggregation pipeline to just limit the first 100 documents for our initial view
pipeline = [ {$limit : 100}]; . This pipeline will be passed to our REST API call to the Data API endpoint:We place the API key and the URL from the secrets file we created earlier as environment variables. The results array will be returned to the UI function:
To run the application, we can go into the main folder and execute the following command:
The application should start on
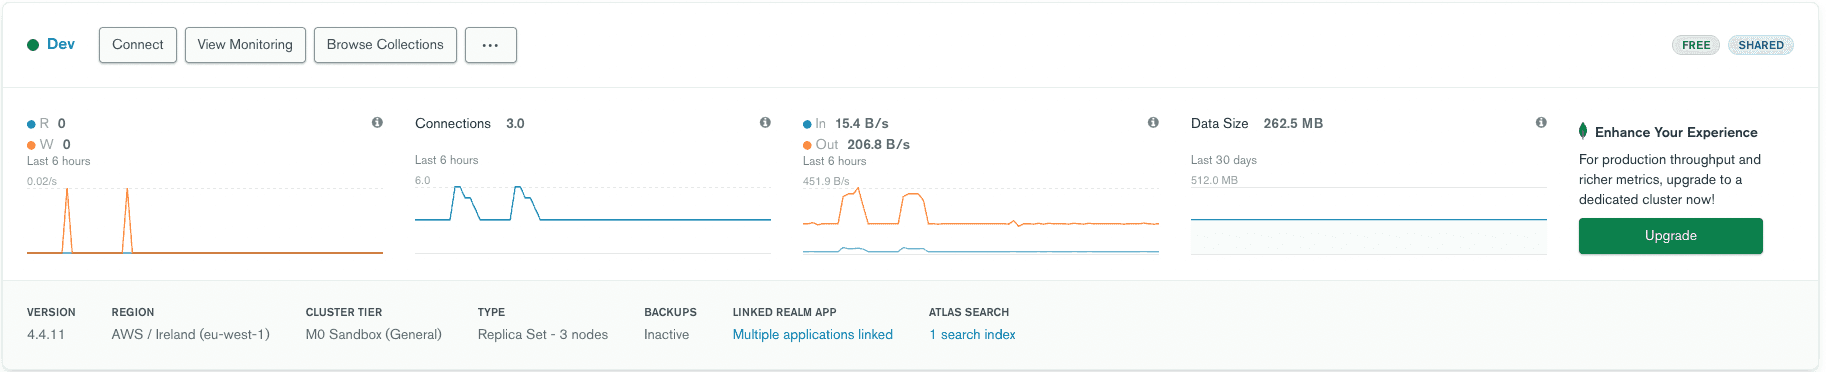
http://localhost:3000 URL.For the full text search capabilities of this demo, you need to create a dynamic Atlas Search index on database 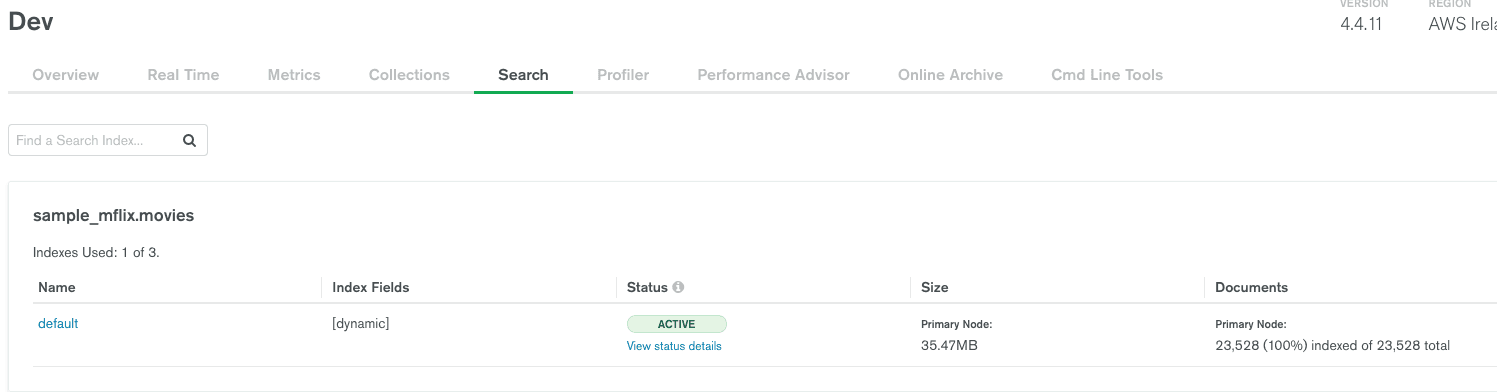
sample_mflix collection movies (use default dynamic mappings). Require version 4.4.11+ (free tier included) or 5.0.4+ of the Atlas cluster for the search metadata and facet searches we will discuss later.
Since we have a
<Form> Remix component submitting the form input, data typed into the input box will trigger a data reload. The <Form> reloads the loader function without refreshing the entire page. This will naturally resubmit the URL as /movies?searchTerm=<TYPED_VALUE> and here is why it's easy to use the same loader function, extract to URL parameter, and add a search logic by just amending the base pipeline:In this case, the submission of a form will call the loader function again. If there was a
searchTermsubmitted in the URL, it will be extracted under the searchTerm variable and create a $search pipeline to interact with the Atlas Search text index.Additionally, there is a very neat feature that allow us to get the metadata for our search—for example, how many matches were for this specific keyword (as we don’t want to show more than 100 results).
When wiring everything together, we get a working searching functionality, including metadata information on our searches.
Now, if you noticed, each movie title is actually a link redirecting to
./movies/<TITLE> url. But why is this good, you ask? Remix allows us to build parameterized routes based on our URL path parameters.The
movies/$title.jsx file will show each movie's details when loaded. The magic is that the loader function will get the name of the movie from the URL. So, in case we clicked on “Home Alone,” the path will be http:/localhost:3000/movies/Home+Alone.This will allow us to fetch the specific information for that title.
Open the
movies/$title.jsx file we created earlier, and add the following:The
findOne query will filter the results by title. The title is extracted from the URL params provided as an argument to the loader function.The data is returned as a document with the needed information to be presented like “full plot,” “poster,” “genres,” etc.
Let’s show the data with a simple html layout:
MongoDB Atlas Search introduced a new feature complementing a very common use case in the text search world: categorising and allowing a faceted search. Facet search is a technique to present users with possible search criteria and allow them to specify multiple search dimensions. In a simpler example, it's the search criteria panels you see in many commercial or booking websites to help you narrow your search based on different available categories.
Additionally, to the different criteria you can have in a facet search, it adds better and much faster counting of different categories. To showcase this ability, we have created a new route called
facets and added an additional page to show counts per genre under routes/facets/index.jsx. Let’s look at its loader function:It uses a new stage called $searchMeta and two facet stages: one to make sure that movies start from a date (1900) and that we aggregate counts based on genres field:
To use the facet search, we need to amend the index and add both fields to types for facet. Editing the index is easy through the Atlas visual editor. Just click 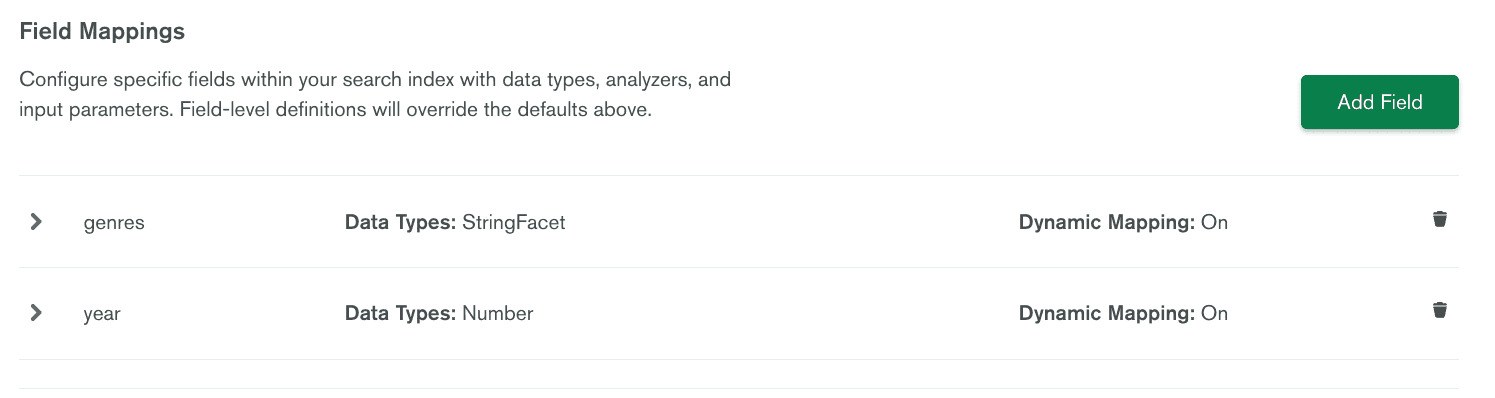
[...] > “Edit with visual editor.”
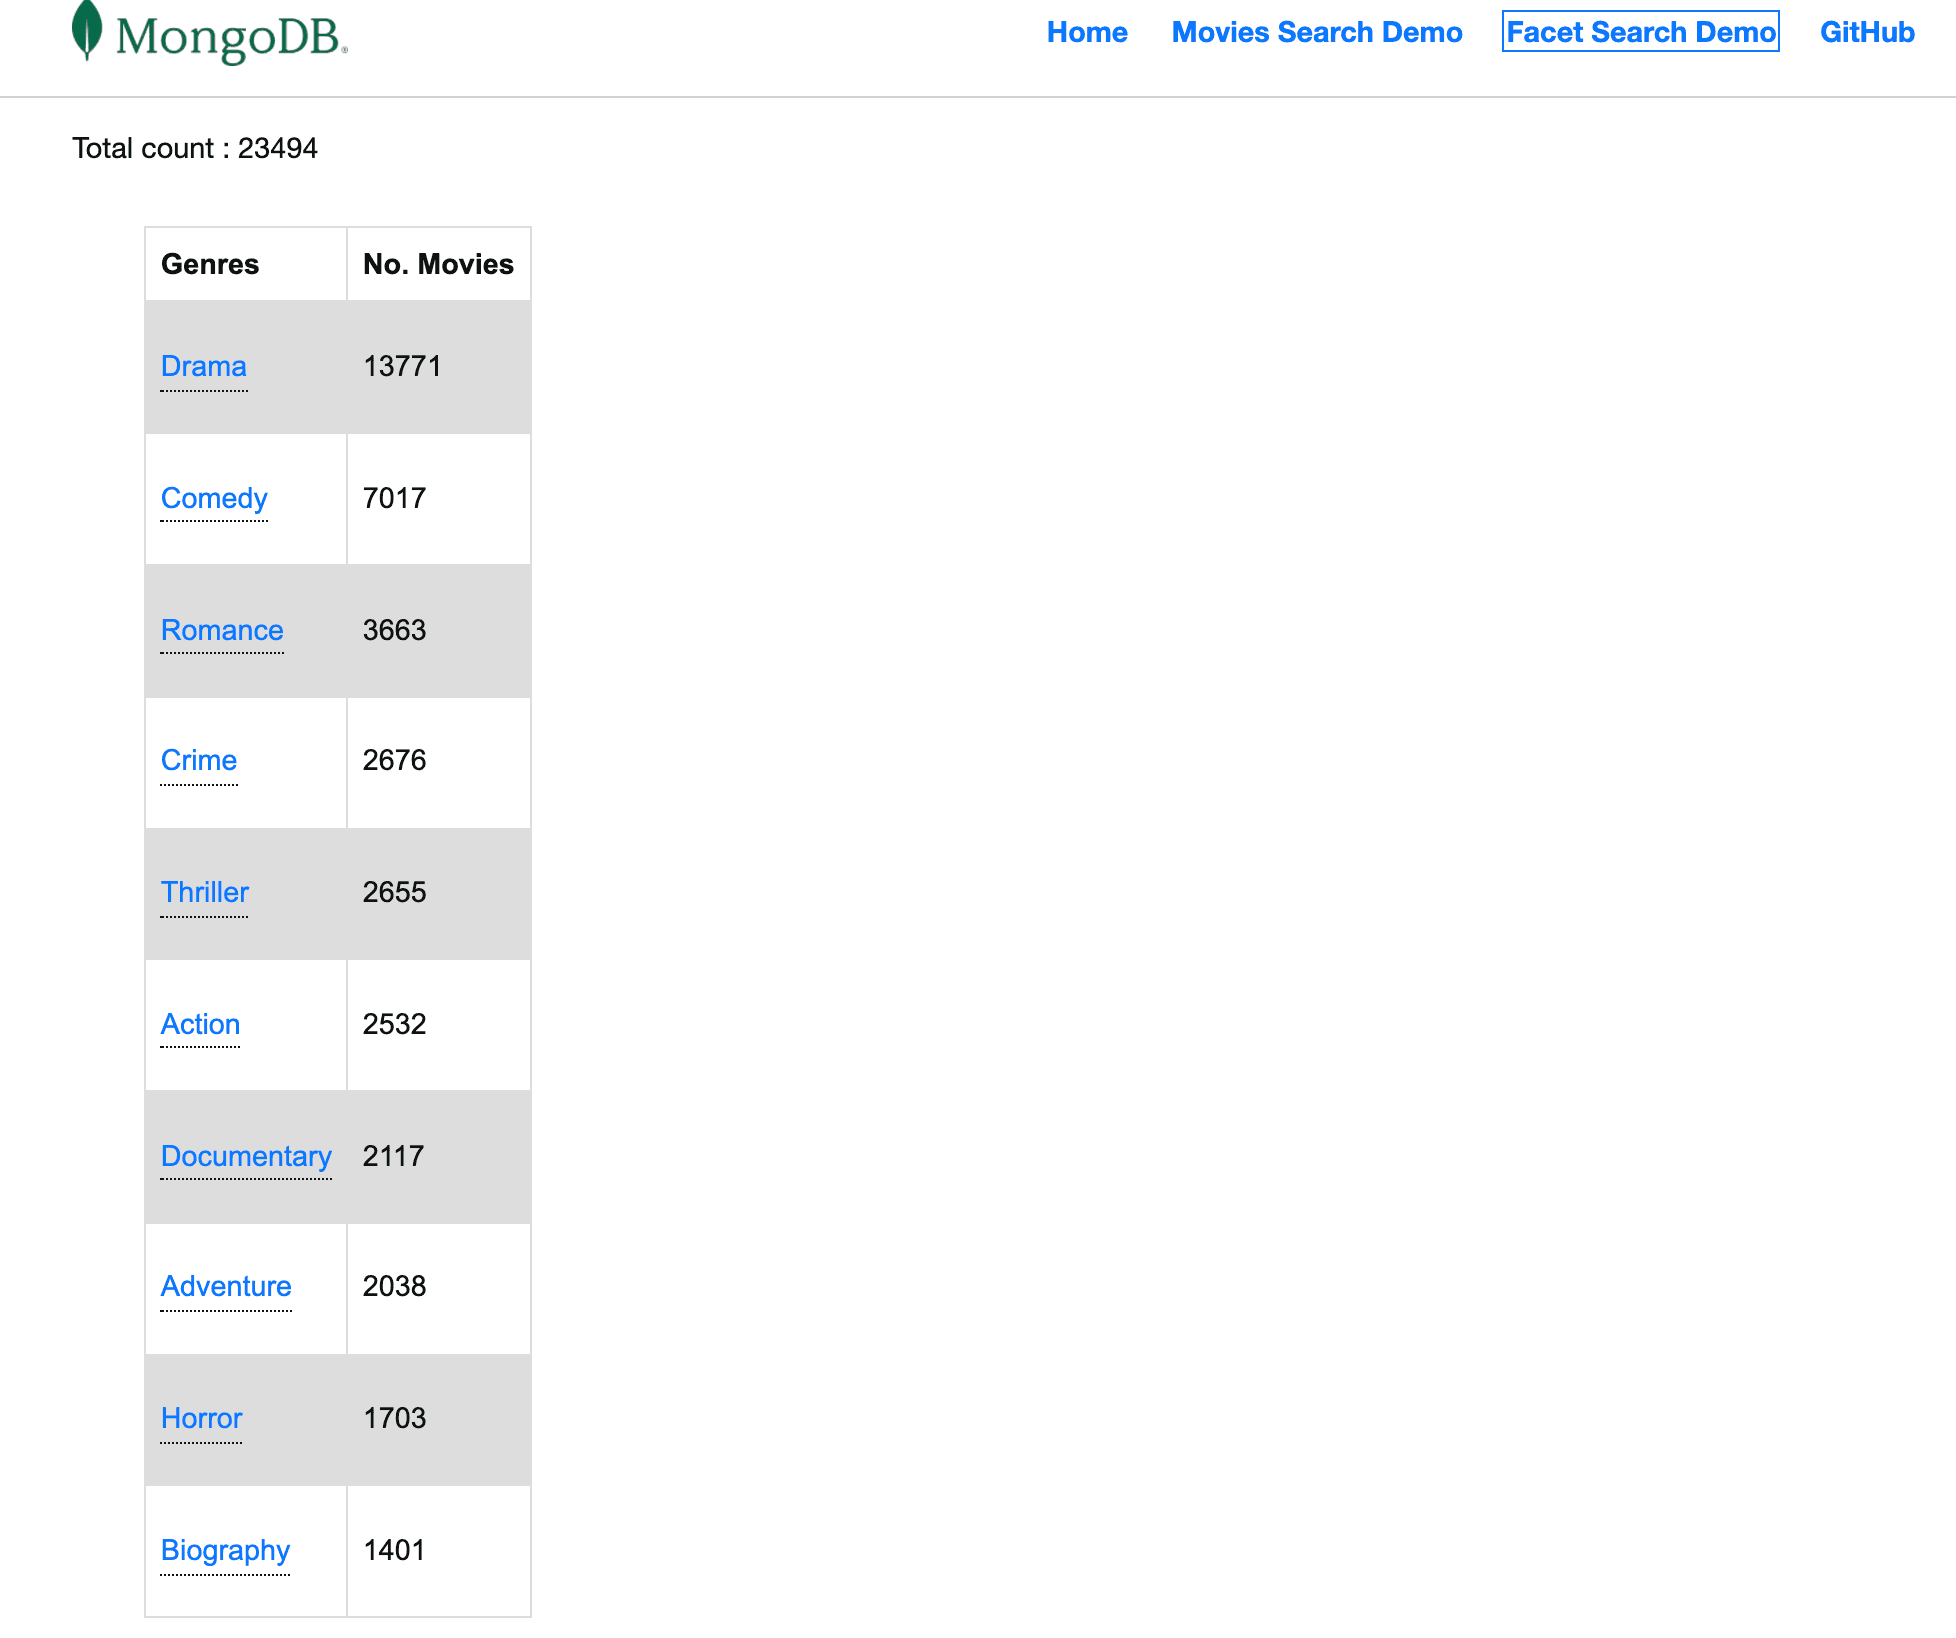
An output document of the search query will look like this:
Once we route the UI page under facets demo, the table of genres in the UI will look as:
To make the application even more interactive, we have decided to allow clicking on any of the genres on the facet page and redirect to the movies search page with
movies?filter={genres : <CLICKED-VALUE>}:Now, every genre clicked on the facet UI will be redirected back to
/movies?filter={generes: <VALUE-BUCKET._id>}—for example, /movies?filter={genres : "Drama"}.This will trigger the
movies/index.jsx loader function, where we will add the following condition:Look how easy it is with the aggregation pipelines to switch between a regular match and a full text search.
With the same approach, we can add any of the presented fields as a search criteria—for example, clicking directors on a specific movie details page passing
/movies?filter={directors: [ <values> ]}.| Click a filtered field (eg. "Directors") | Redirect to filtered movies list |
|---|---|
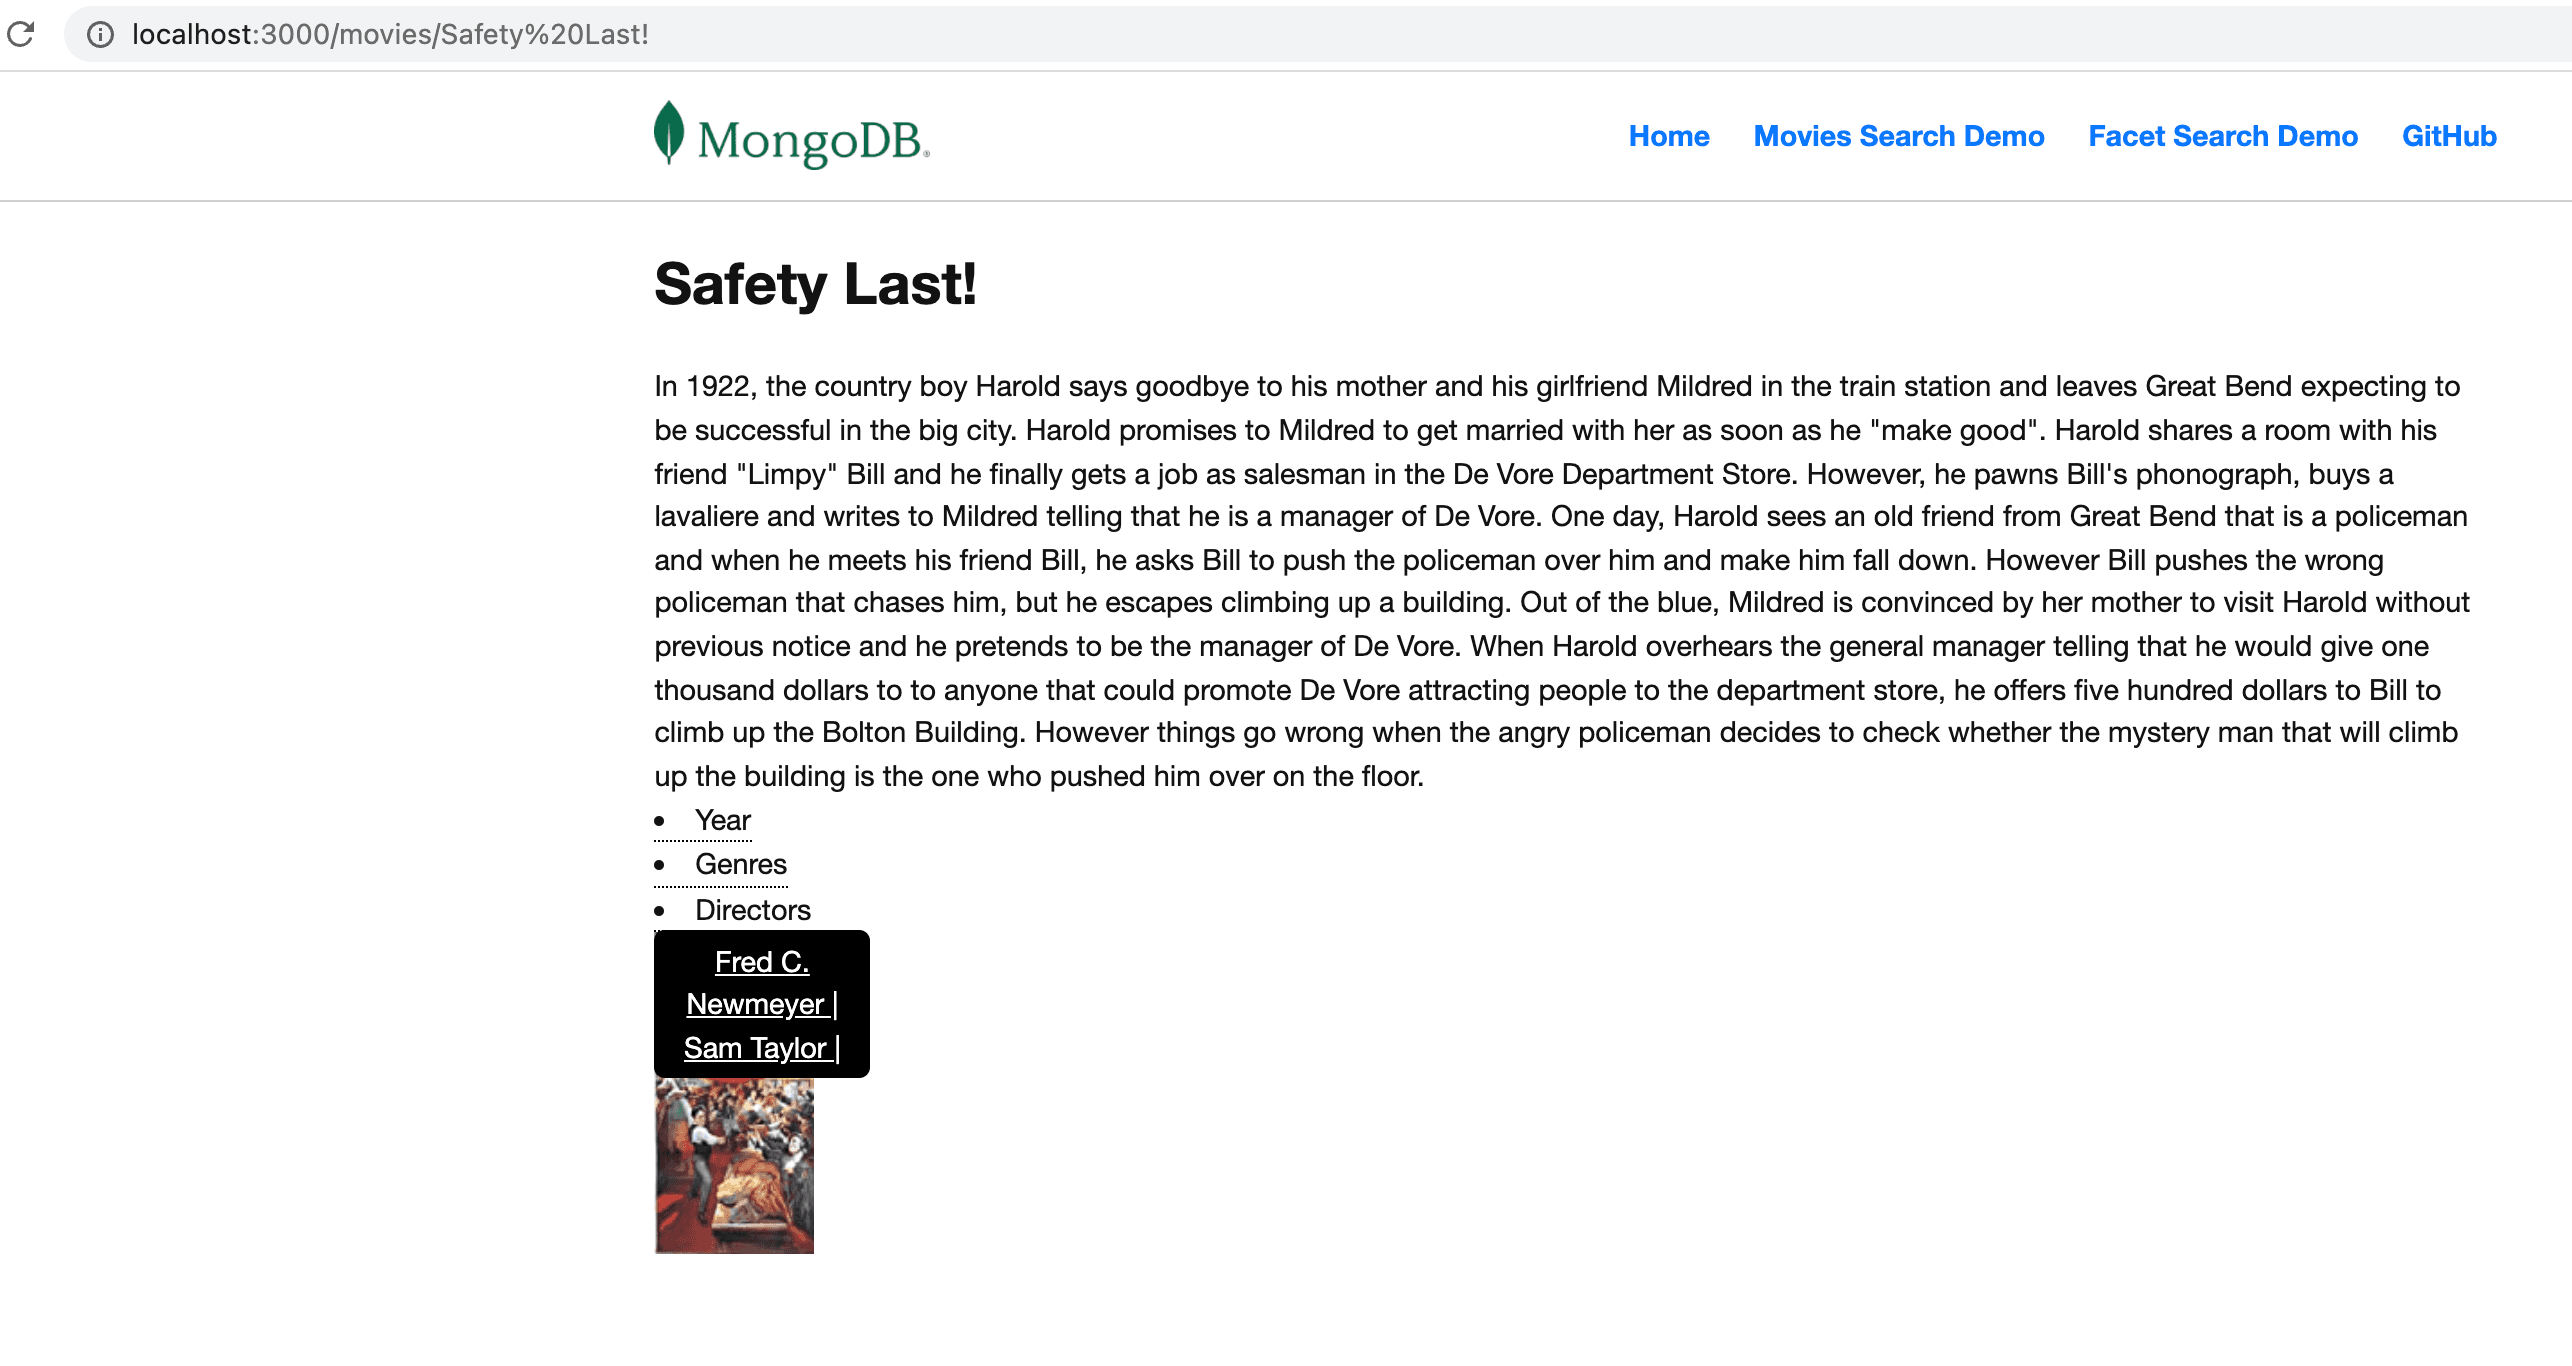 | 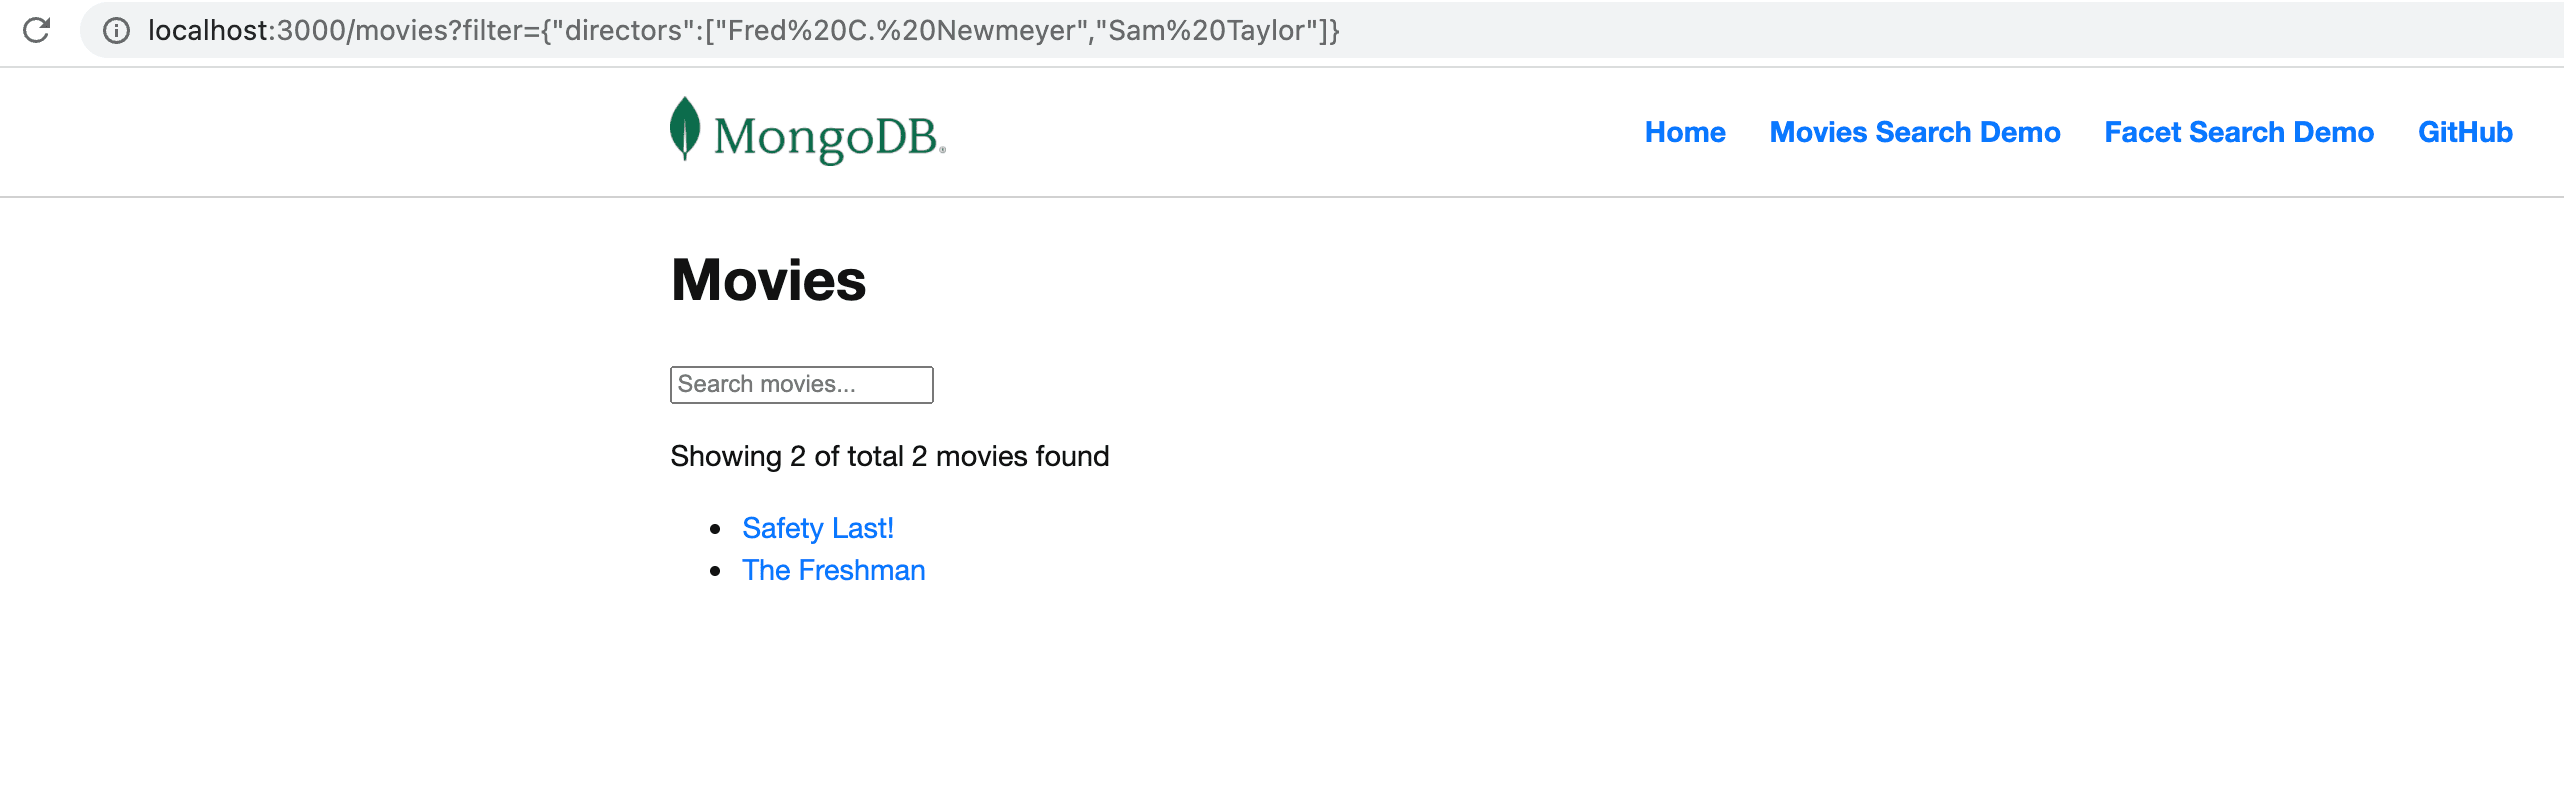 |
Remix has some clever and renewed concepts for building React-based web applications. Having server and client code coupled together inside moduled and parameterized by URL JS files makes developing fun and productive.
The MongoDB Atlas Data API comes as a great fit to easily access, search, and dice your data with simple REST-like API syntax. Overall, the presented stack reduces the amount of code and files to maintain while delivering best of class UI capabilities.
Check out the full code at the following GitHub repo and get started with your new application using MongoDB Atlas today!
If you have questions, please head to our developer community website where the MongoDB engineers and the MongoDB community will help you build your next big idea with MongoDB.