Jupyter notebook is an open source web application that is a game changer for data scientists and engineers. A simple web UI that makes it simple to create and share documents that contain live code, equations, visualizations and narrative text. The Jupyter notebook has now evolved into JupyterLab. This new web-based interactive development environment takes Jupyter notebooks to a whole new level by modularizing the environment making it easy for developers to extend the platform and adds new capabilities like a console, command-line terminal, and a text editor.
Apache Spark is frequently used together with Jupyter notebooks. Spark is an open source general-purpose cluster-computing framework that is one of the most popular analytics engines for large-scale data processing. The key concept with Spark is distributed computing; taking tasks that would normally consume massive amounts of compute resources on a single server and spread the workload out to many worker nodes. This is the technical implementation of the english saying, “many hands make small work”. Spark works efficiently and can consume data from a variety of data sources like HDFS file systems, relational databases and even from MongoDB via the MongoDB Spark Connector.
In this article, we will showcase how to leverage MongoDB data in your JupyterLab notebooks via the MongoDB Spark Connector and PySpark. We will load financial security data from MongoDB, calculate a moving average then update the data in MongoDB with these new data. While you can read through this article and get the basic idea, if you’d like to get hands-on, all the docker scripts and code are available on the GitHub repository, RWaltersMA/mongo-spark-jupyter. A special thanks to Andre Perez for providing a well written article called, “Apache Spark Cluster on Docker”. The docker compose scripts used in this article are based on those that Andre provided in his article.
Getting started
Let’s start by building out an environment that consists of a MongoDB cluster, an Apache Spark deployment with one master and two worker nodes, and JupyterLab.
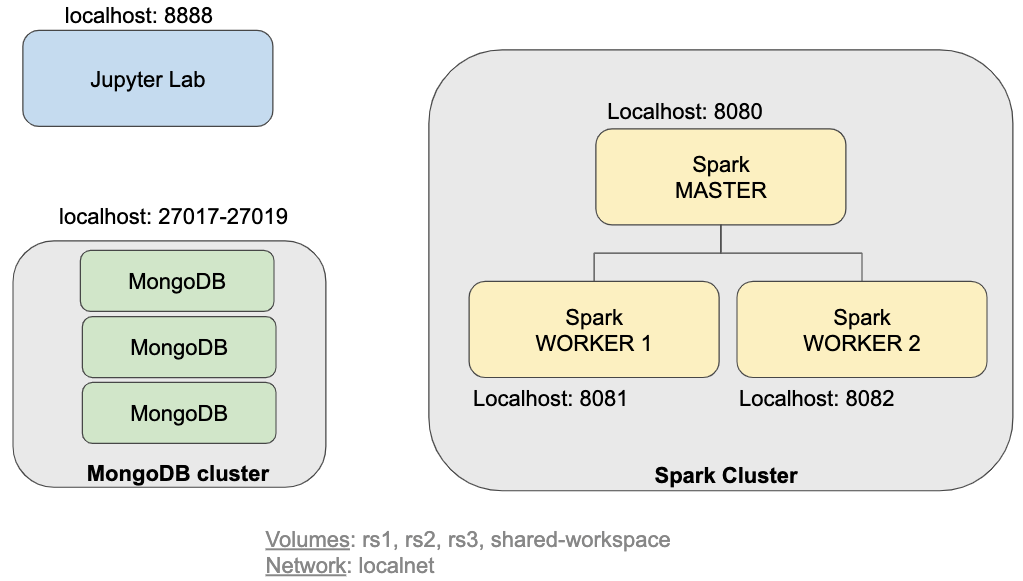
Figure 1: Components
To follow along, git clone the RWaltersMA/mongo-spark-jupyter repository and run “sh build.sh” to build the docker images then run “sh run.sh” to build the environment seen in Figure 1.
The run.sh script file runs the docker compose file which creates a three node MongoDB cluster, configures it as a replica set on port 27017. Spark is also deployed in this environment with a master node located at port 8080 and two worker nodes listening on ports 8081 and 8082 respectively. The MongoDB cluster will be used for both reading data into Spark and writing data from Spark back into MongoDB.
To interact with MongoDB there are a variety of tools options. The mongo shell command line tool has been the de facto standard since the inception of MongoDB itself. At the time of this writing, there is a new version of the MongoDB Shell called mongosh that is currently in Preview. Mongosh addresses some of the limitations of the original shell such as syntax highlighting, auto-complete, command history, and improved logging to name a few. To download this new visit the online mongo shell documentation.
To verify our MongoDB cluster is up and running we can connect to the default port 27017 using the mongo shell.
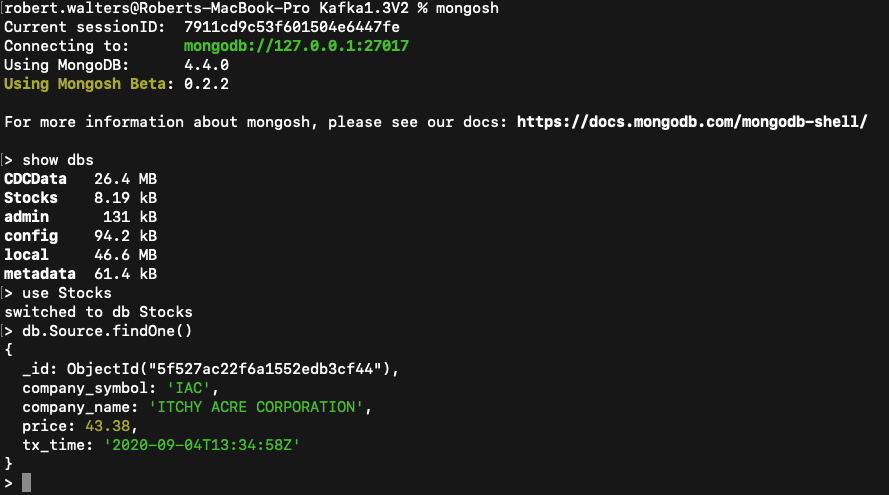
Figure 2: Mongosh shell tool connecting to the MongoDB cluster
Finally, we can verify that the Jupyter Lab is up and running by navigating to the URL: http://localhost:8888.
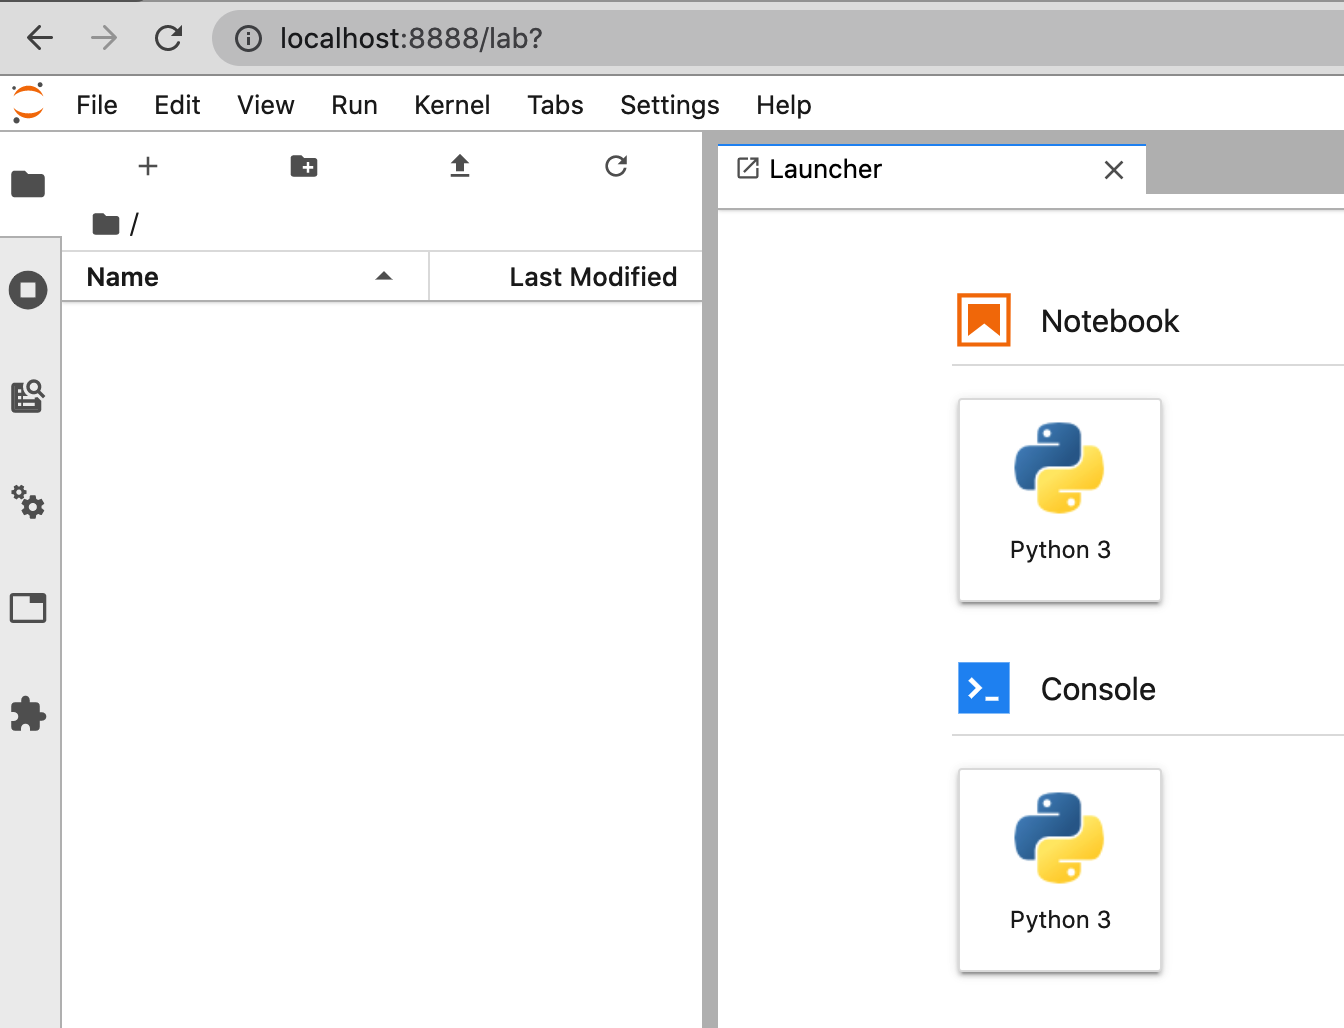
Figure 3: Jupyter Lab web portal
To verify our Spark master and works are online navigate to http://localhost:8080
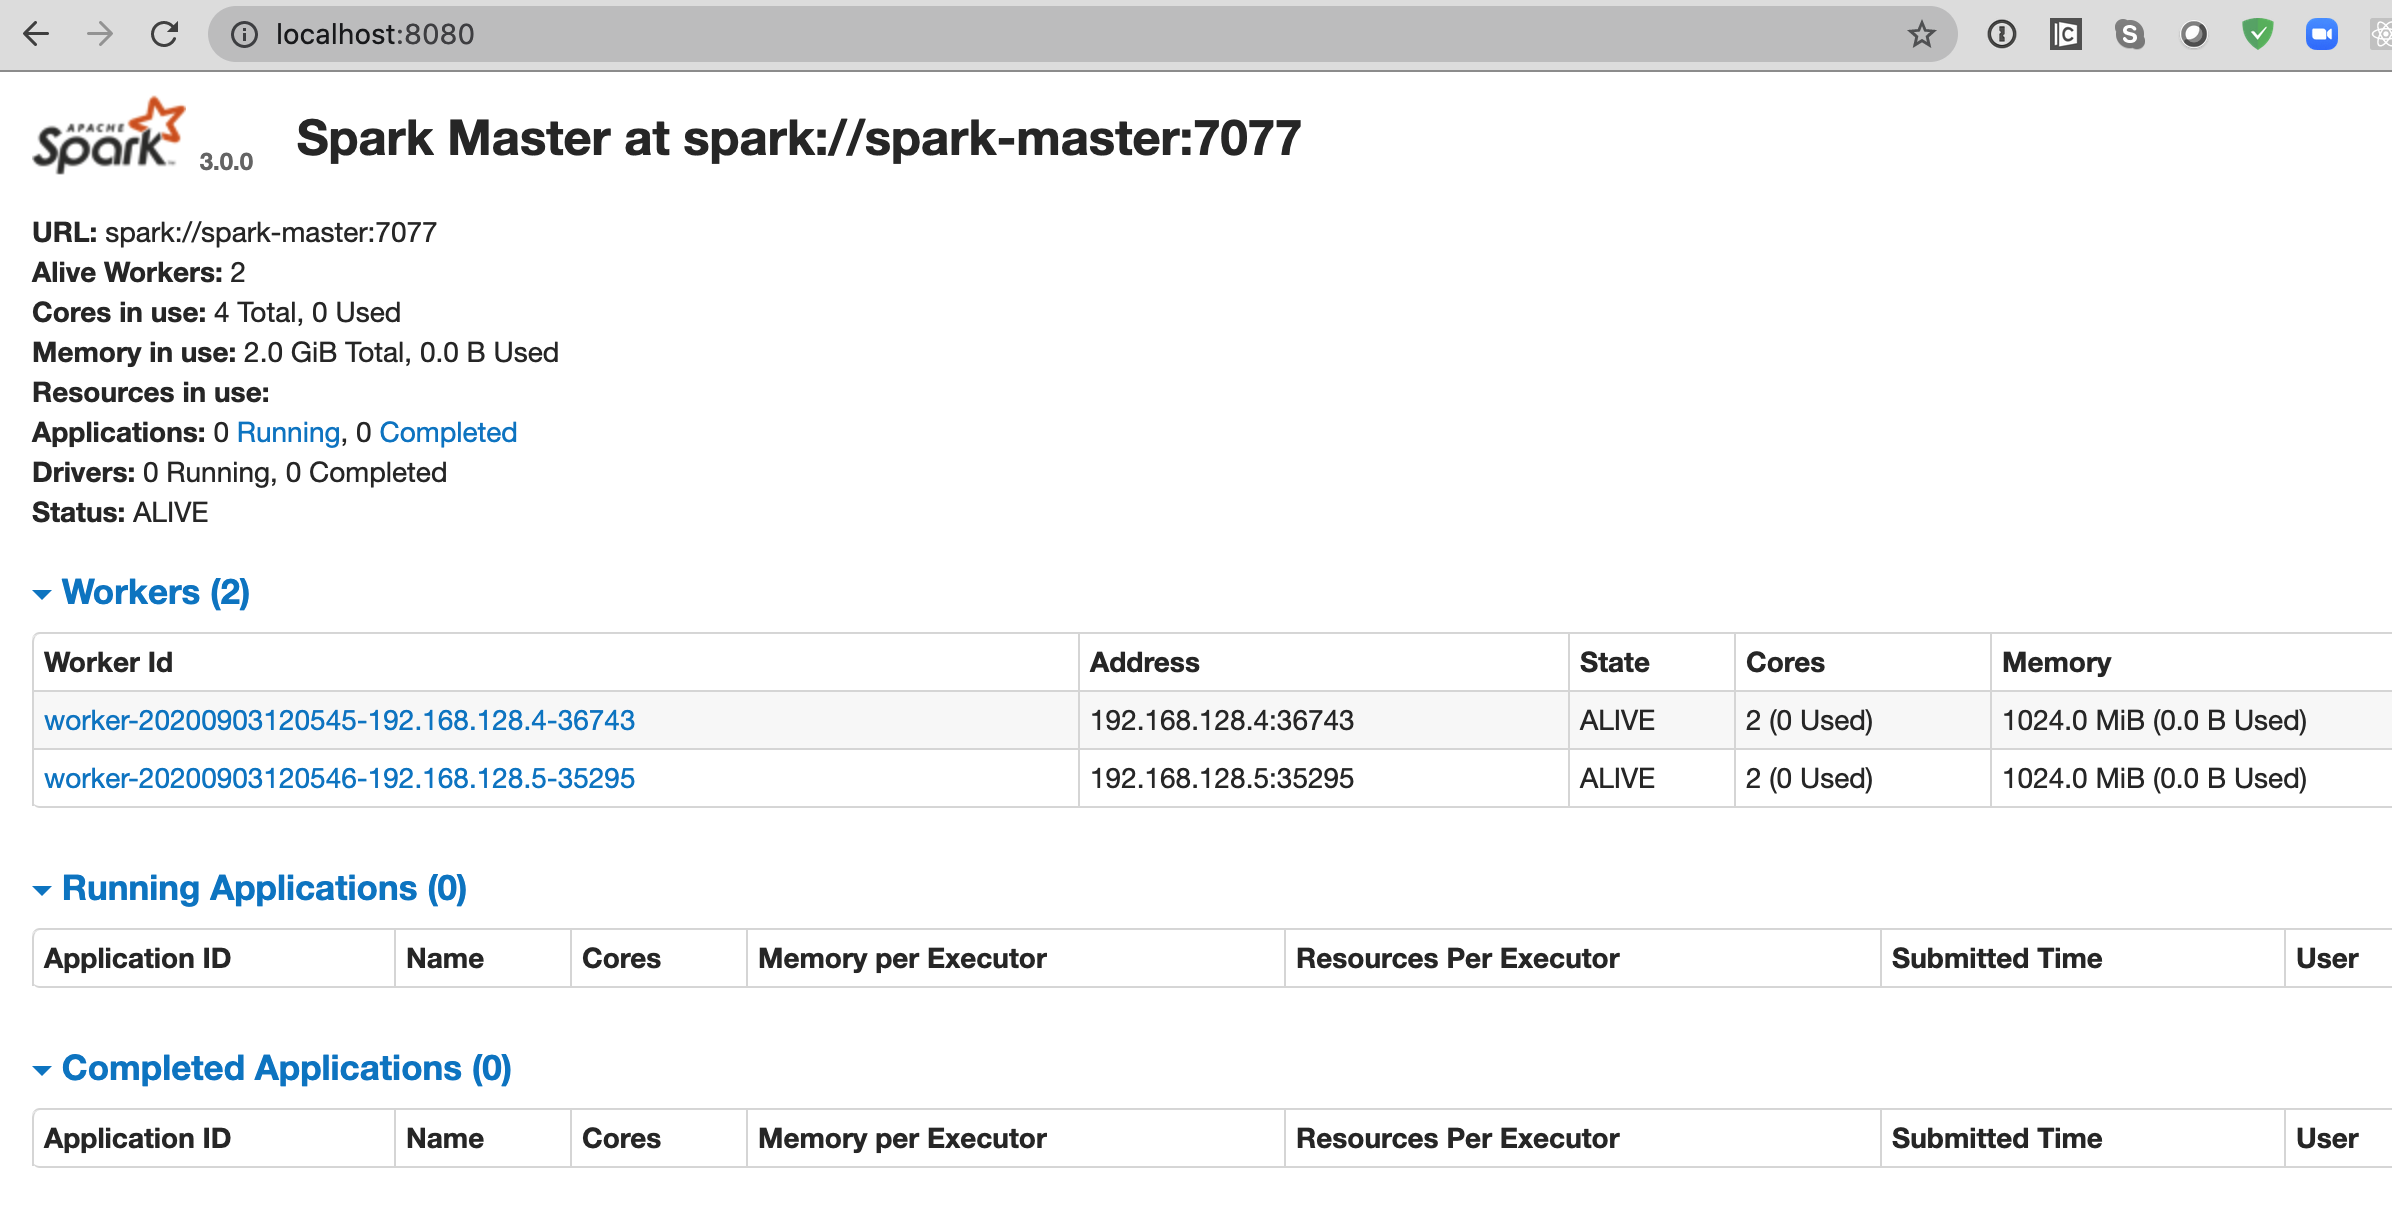
Figure 4: Spark master web portal on port 8080
Creating a moving average using PySpark
Now that our environment is up and running, it is waiting for work to do. In this example we are going to read stock data from MongoDB and calculate a moving average based on the price of the stock security. This new data will be inserted into the database as a new field. The run.sh file grabbed a small database called Stocks from the github and restored it to the local MongoDB cluster. If you want to generate your own data you can run the create-stock-data python app in the DataGenerator directory in the git repository.
Let’s start by creating a new Python notebook in JupyterLab. To create a new notebook, click the Python3 icon in the Notebook section of the Launcher. This will provide you with a blank notebook as shown below:
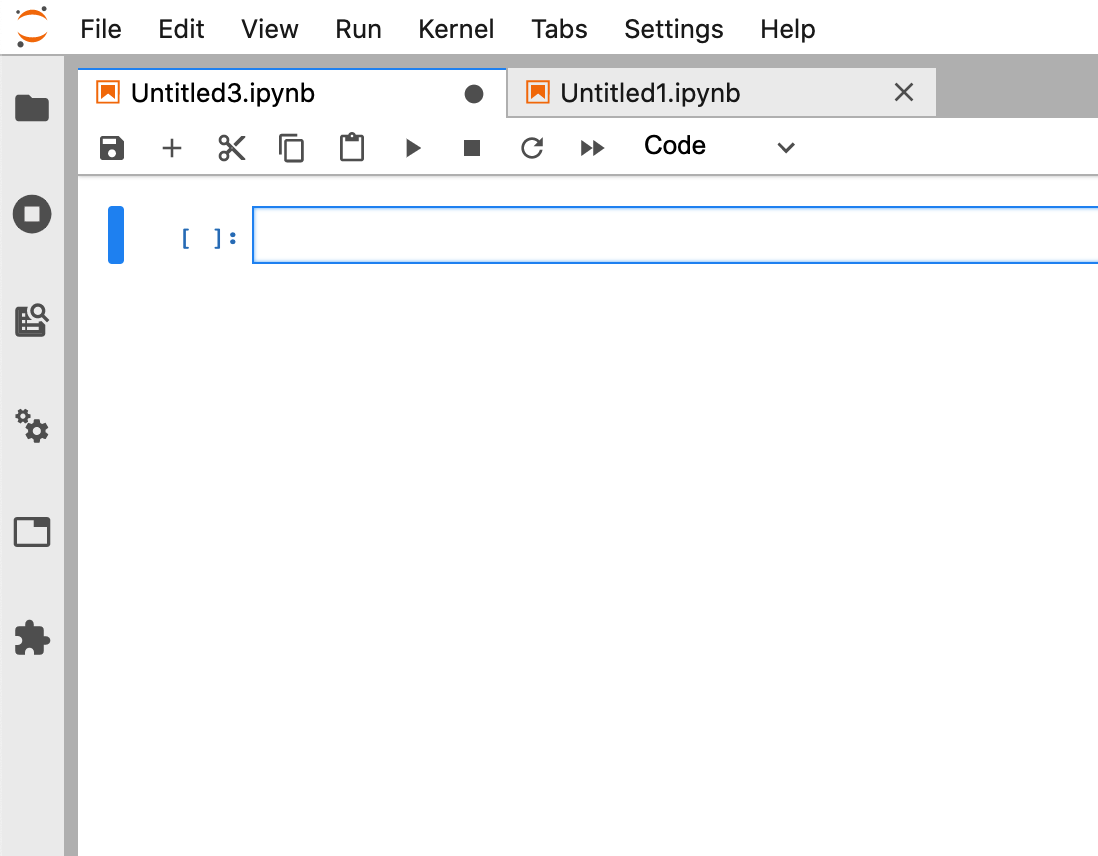
Figure 5: New notebook
The MongoDB Connector for Spark can be used with Scala, Java, Python, and R. In this example we will use Python and the PySpark library. With PySpark, you create specialized data structures called Resilient Distributed Datasets (RDDs). RDDs hide all the complexity of transforming and distributing your data automatically across multiple nodes by a scheduler if you’re running on a cluster. The entry-point of any PySpark program is a SparkSession object. This object allows you to connect to a Spark cluster and create RDDs.
Let’s configure our Spark Connector to use the local MongoDB cluster as both input and output.
Next, let’s load our MongoDB data into a data frame:
Now that the data is loaded, we can verify that the configuration worked by looking at the schema:
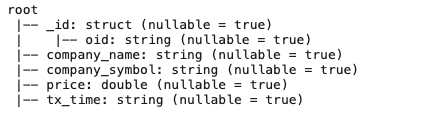
We can see that the tx_time field is loaded as a string. We can easily convert this to a time by issuing a cast statement:
Next, we can add a new ‘movingAverage’ column that will show a moving average based upon the previous value in the dataset. To do this we leverage the PySpark Window function as follows:
To see our data with the new moving average column we can issue a
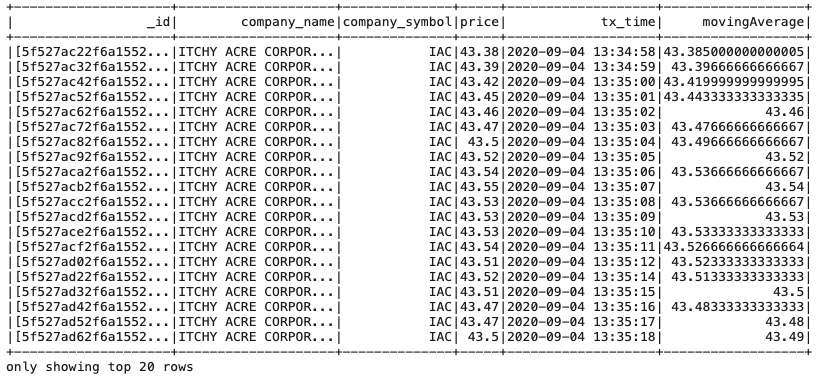
Figure 6: JupyterLab output from movAvg.show() command
To update the data in our MongoDB cluster, we use the save method.
Since we want to update the document we set the replaceDocument option to 'true'.
JupyterLab makes it easy to build out ad-hoc queries and easily integrates with MongoDB data. A screenshot of the above example in JypterLab is seen in figure 7.
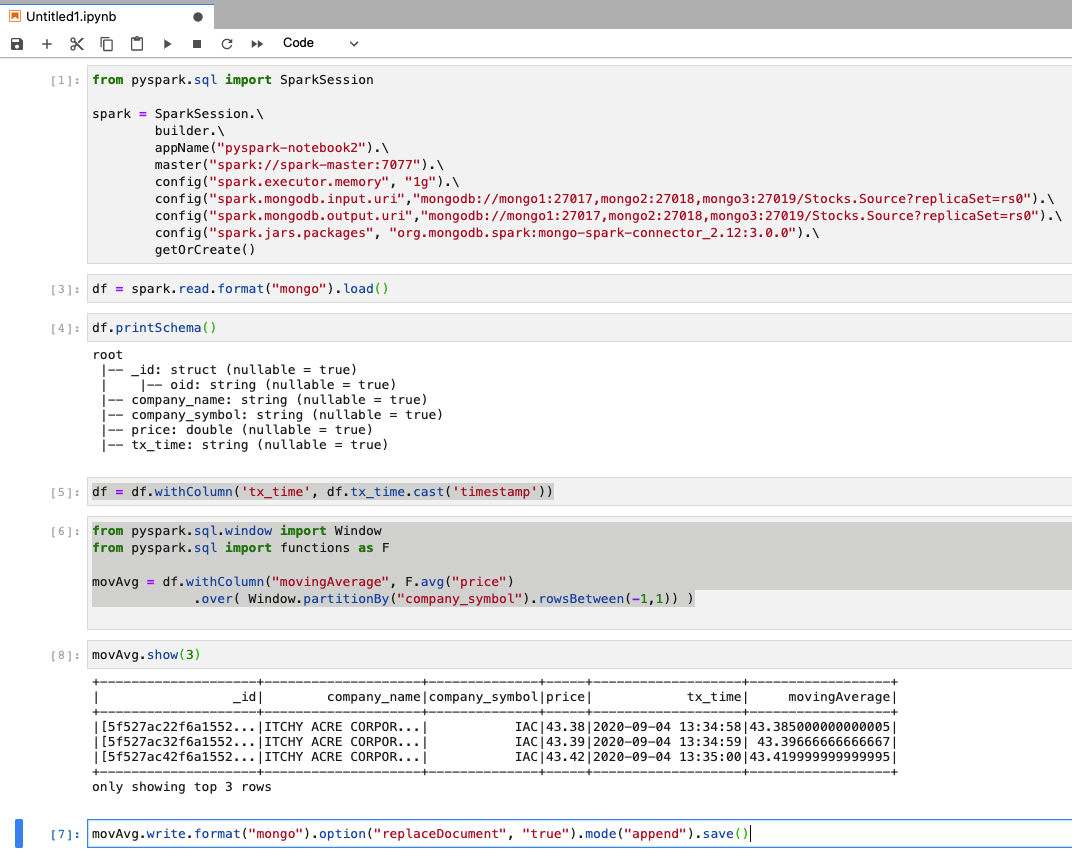
Figure 7: Code sample in the JypterLab UI
Filtering the data set using the aggregation pipeline
In this example we loaded the entire collection, created a moving average of the data and updated the entire dataset with our new calculation. Your particular use case may need to work with just a subset of data and the Spark connector supports providing an aggregation pipeline query to be used as a source query. For example, if we wanted to focus the Spark calculation on the ITCHY ACRE CORPORATION we could define the pipeline in the pipeline option as follows:
Summary
In this article we created a JupyterLab notebook, leaded MongoDB data, computed a moving average and updated the collection with the new data. This simple example shows how easy it is to integrate MongoDB data within your Spark data science application. For more information on the Spark Connector check out the online documentation. For anyone looking for answers to questions feel free to ask them in the MongoDB community pages. The MongoDB Connector for Spark is open source under the Apache license. Comments/pull requests are encouraged and welcomed. Happy data exploration!